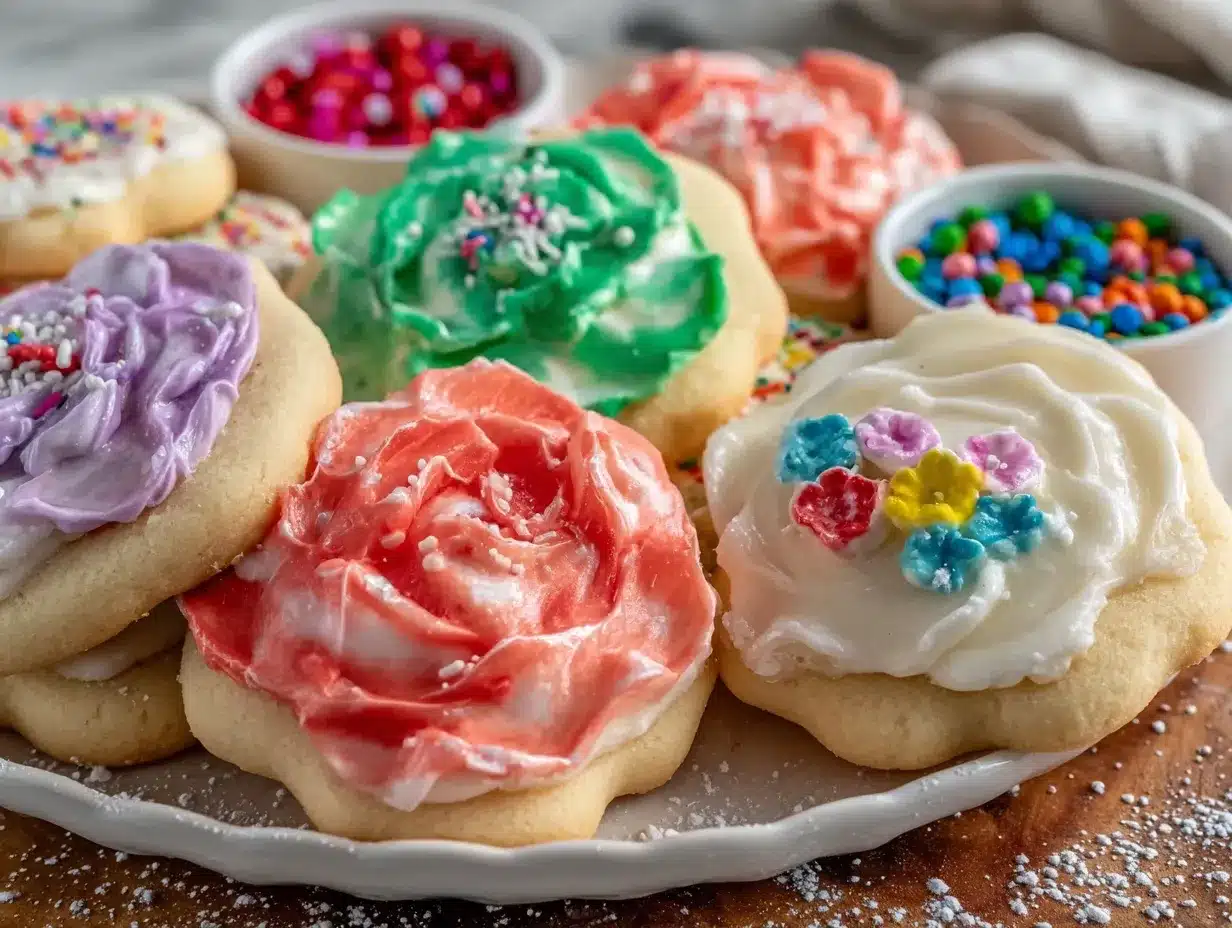
“Hey, do you think these cookies look like little bouquets?” my niece asked, holding up a colorful flower-shaped sugar cookie with a grin that could light up the whole kitchen. Honestly, I was skeptical at first. I’ve baked countless sugar cookies, but decorating them to look like perfect flowers? That always felt like an art reserved for pros or Pinterest influencers with endless patience. But that afternoon, with a few simple tools and a bit of trial and error, we pulled together a flower-shaped sugar cookie decorating platter that was both charming and surprisingly easy to make.
What struck me was how these cookies turned an ordinary snack time into a playful, creative session. The scent of vanilla and sweet dough filled the kitchen, and as the icing set, the colors popped like a spring garden on a plate. It wasn’t just about baking; it was about the moments between bites—the shared laughs, the accidental smudges of royal icing, and the quiet pride in a cookie crafted by little hands.
That day sparked something I didn’t expect. I started making these flower-shaped sugar cookies again and again—sometimes for no reason other than to brighten a dull day or to have a familiar, sweet ritual. Over time, I developed a straightforward method that anyone can follow, even if you’re new to cookie decorating. This platter isn’t just pretty; it’s approachable, fun, and perfect for gathering friends, family, or just treating yourself.
So here’s my easy, step-by-step guide to creating your own perfect flower-shaped sugar cookie decorating platter. Whether you’re planning a party or just looking for a sweet way to unwind, I hope you find this recipe as comforting and joyful as I do.
Why You’ll Love This Recipe
This flower-shaped sugar cookie decorating platter is one of those gems that feels fancy but doesn’t demand hours in the kitchen. I’ve tested this recipe multiple times (more than I care to admit), and it reliably delivers that tender, buttery cookie base with just the right amount of sweetness and a smooth surface perfect for decorating.
- Quick & Easy: The dough comes together in under 20 minutes, and baking takes just 10 minutes per batch—ideal for busy weekends or last-minute gatherings.
- Simple Ingredients: You likely have everything in your pantry: flour, butter, sugar, eggs, and vanilla. No specialty ingredients or hard-to-find extracts here.
- Perfect for Celebrations: Whether it’s a birthday, bridal shower, or just a casual tea party, these flower cookies bring a touch of sweetness and charm that’s sure to impress.
- Crowd-Pleaser: Kids love decorating their own cookies, and adults enjoy the nostalgia and flavor. This platter is always the centerpiece in our family gatherings.
- Unbelievably Delicious: The cookies have a delicate crumb but hold their shape beautifully, making the decorating process smoother and more satisfying.
What sets this recipe apart? The magic lies in the balance—the dough is firm enough to cut clean flower shapes yet tender enough to melt in your mouth. Plus, the royal icing recipe I pair with these cookies dries to a smooth, matte finish that looks professional but is surprisingly forgiving for beginners.
This isn’t just another cookie recipe; it’s the one that makes you pause, smile, and savor each bite, knowing it was made with a little extra love and creativity. It’s perfect for those moments when you want to share a homemade treat that feels special without the stress.
What Ingredients You Will Need
This recipe uses simple, wholesome ingredients to deliver bold flavor and a satisfying texture without any fuss. Most are pantry staples, and I’ve included a few tips on choosing the best versions for your perfect flower-shaped sugar cookie decorating platter.
- All-purpose flour (2 ¾ cups / 345 g) – Provides the structure. I recommend sifting it for a lighter dough.
- Baking powder (1 tsp) – Helps the cookies puff just enough without losing their shape.
- Salt (½ tsp) – Balances sweetness and enhances flavor.
- Unsalted butter (1 cup / 227 g, softened) – For richness and tenderness. Using quality European-style butter really makes a difference here.
- Granulated sugar (1 cup / 200 g) – Sweetens the dough and helps with that classic sugar cookie crunch.
- Large egg (1, room temperature) – Binds the dough and adds moisture.
- Pure vanilla extract (1 ½ tsp) – Adds warm, comforting aroma. I swear by Nielsen-Massey for consistent flavor.
- Milk (2 tbsp) – Keeps the dough pliable; whole milk works best but any dairy or non-dairy milk is fine.
For the royal icing:
- Powdered sugar (4 cups / 480 g) – For smooth, sweet icing.
- Egg whites (2 large) or pasteurized meringue powder (3 tbsp) mixed with water – For that perfect, pipe-able texture.
- Lemon juice (1 tsp) – Adds brightness and helps the icing set.
- Food coloring gels – Pick your favorite shades to bring your flower cookies to life. I prefer gels over liquid for vibrant colors without thinning the icing.
If you want a gluten-free version, swapping in almond flour or a gluten-free all-purpose blend works well, but expect a slightly different texture. For dairy-free adaptations, use coconut oil or vegan butter alternatives and substitute milk with almond or oat milk.
Equipment Needed
To pull off this flower-shaped sugar cookie decorating platter, you don’t need a fancy kitchen. Just a few basic tools and a couple of cake decorating essentials will do the trick.
- Mixing bowls: At least two—one for dry ingredients and one for wet.
- Electric mixer: A stand mixer is great but a hand mixer works fine too.
- Rolling pin: For evenly rolling out the dough to about ¼ inch thickness.
- Flower-shaped cookie cutters: I recommend a set with various sizes for some fun variety.
- Baking sheets: Lined with parchment paper or silicone mats to prevent sticking.
- Cooling racks: To let cookies cool completely before decorating.
- Piping bags and tips: Small round tips (#1 or #2) for outlining and flooding, plus star tips for texture if you want to get fancy.
- Spatula: For mixing and smoothing icing.
If you don’t have piping bags, plastic sandwich bags with a tiny corner snipped off work surprisingly well for beginners. And if you’re on a budget, silicone mats are reusable and better than parchment paper in the long run.
Preparation Method
- Mix dry ingredients: In a medium bowl, sift together 2 ¾ cups (345 g) all-purpose flour, 1 tsp baking powder, and ½ tsp salt. Set aside.
- Cream butter and sugar: In a large bowl, beat 1 cup (227 g) softened unsalted butter with 1 cup (200 g) granulated sugar until light and fluffy, about 3-4 minutes. Use a hand or stand mixer on medium speed.
- Add egg and vanilla: Beat in 1 large egg and 1 ½ tsp pure vanilla extract until fully combined.
- Combine wet and dry: Gradually add the dry ingredients to the wet mixture, alternating with 2 tbsp milk. Mix on low speed until a smooth dough forms. If the dough feels too sticky, add a little more flour, a tablespoon at a time.
- Chill the dough: Divide dough into two discs, wrap in plastic wrap, and chill for at least 1 hour. This helps the dough firm up and prevents spreading during baking.
- Preheat oven and prepare pans: Preheat your oven to 350°F (175°C). Line baking sheets with parchment paper or silicone mats.
- Roll and cut: On a lightly floured surface, roll out one disc of dough to about ¼ inch (6 mm) thickness. Use flower-shaped cookie cutters to cut out shapes. Transfer cookies to baking sheets with a thin spatula.
- Bake: Bake cookies for 8-10 minutes or until edges just start to turn golden. Keep an eye on them—the timing depends on your oven and cookie size.
- Cool: Let cookies cool on the baking sheet for 5 minutes, then transfer to wire racks to cool completely before decorating.
- Prepare royal icing: Beat powdered sugar (4 cups / 480 g) with egg whites or meringue powder and 1 tsp lemon juice until smooth and glossy. Divide icing into bowls and tint with food coloring.
- Decorate: Use piping bags to outline each cookie with a thicker icing consistency, then flood the center with thinned icing. Add details like dots or lines with different colors once the base sets a bit.
- Dry: Allow decorated cookies to dry completely, ideally overnight, before stacking or serving.
If the dough feels brittle after chilling, let it sit at room temperature for 10 minutes before rolling. For icing, if it’s too runny, add more powdered sugar; if too stiff, add a drop of water.
Cooking Tips & Techniques
Making a perfect flower-shaped sugar cookie decorating platter is as much about technique as it is about ingredients. Here are some tips I wish I’d known earlier:
- Don’t overmix the dough: Mix just until combined to keep cookies tender, not tough.
- Roll evenly: Use rolling pin guides or bands to get consistent thickness. Uneven cookies bake unevenly.
- Chill, chill, chill: Cold dough is easier to handle and holds shapes better in the oven.
- Outline before flooding: When decorating, pipe a thicker icing border first. It acts like a dam to keep thinner flood icing from spilling over edges.
- Use gel food colors: They give vibrant colors without thinning your icing.
- Practice piping on parchment: Before decorating cookies, practice your designs on parchment paper. It helps build confidence and control.
- Don’t rush drying: Let icing dry completely to avoid smudges or cracks. This patience pays off in presentation.
I remember once hurrying to decorate and transport cookies before they fully dried—big mistake. The colors blurred, and the icing cracked. Since then, I always set aside time for proper drying, which really makes a difference.
Variations & Adaptations
This flower-shaped sugar cookie decorating platter is wonderfully versatile. Here are a few ways you can switch things up:
- Flavor variations: Add lemon zest or almond extract to the dough for a fresh twist. Lavender or rosewater in the icing pairs beautifully for a floral theme.
- Dietary adaptations: Use gluten-free flour blends or vegan butter and egg replacers to accommodate dietary needs. Just note that texture may vary slightly.
- Seasonal colors: Change your icing palette according to seasons—soft pastels for spring, rich jewel tones for fall, or bright neons for summer fun.
- Decorating styles: Try simple icing outlines for a rustic look or detailed piping for intricate petals and leaves. Adding edible glitter or sprinkles gives festive sparkle.
- Alternative shapes: For a playful twist, mix flower shapes with butterflies or bees to create a garden-themed platter perfect for kids’ parties.
My favorite personal variation? Using a mix of royal icing and softened cream cheese frosting to get that tangy-sweet balance topped with fresh edible flowers for a natural touch. It’s a crowd favorite every time!
Serving & Storage Suggestions
These flower-shaped sugar cookies are best served at room temperature. The icing looks and tastes best once fully set, so give yourself time for the finishing touches to dry completely. Arrange cookies on a pretty platter or tiered stand to showcase the colorful designs.
Pair your platter with simple accompaniments like a pot of hot tea, a pitcher of lemonade, or even a creamy slow cooker potato soup for a cozy afternoon spread. If you want to go savory, the crispy oven-fried buttermilk chicken tenders from this collection are a perfect contrast with their crunchy, salty bite.
For storing, keep cookies in an airtight container at room temperature for up to 5 days. If you want to save them longer, freeze undecorated cookies and decorate after thawing, or freeze fully decorated cookies wrapped tightly in plastic wrap and foil for up to a month.
When reheating, avoid microwaves as they can melt icing. Instead, bring cookies to room temperature naturally after freezing to keep texture and color intact. Over time, the flavors meld and the cookies soften slightly, making them even more enjoyable.
Nutritional Information & Benefits
Each flower-shaped sugar cookie contains approximately 120-150 calories depending on size and icing amount. They provide a quick source of energy primarily from carbohydrates and fats, with minimal protein.
Key ingredients like butter and eggs offer some vitamins and minerals, including vitamin A and choline. Using real vanilla extract adds natural antioxidants compared to artificial flavorings.
If you’re mindful of dietary restrictions, this recipe can be adapted to gluten-free and dairy-free versions without sacrificing much flavor. Just be aware the royal icing contains egg whites, so for egg allergies, consider using a powdered sugar glaze instead.
While definitely an indulgence, these cookies bring comfort and joy, which is part of wellness too. Baking and decorating can be a relaxing, mindful activity that nourishes the soul as much as the body.
Conclusion
Making a perfect flower-shaped sugar cookie decorating platter is a delightful way to bring sweetness and creativity into your kitchen. The recipe’s balance of simplicity and charm means you can enjoy beautiful, tasty cookies without stress or a fancy setup.
Whether you stick to the classic version or customize with seasonal colors and flavors, these cookies are a sweet way to connect with friends, family, or yourself. I love how this recipe turns everyday moments into a celebration of simple pleasures and edible art.
Give it a try, take your time with the decorating, and don’t be afraid to make it your own. I’d love to hear how your platter turns out or what fun variations you come up with—feel free to share your stories and photos!
Remember, sometimes the best recipes are those that bring people together and create memories, one flower cookie at a time.
FAQs
- Can I make the dough ahead of time? Yes! The dough can be wrapped and refrigerated for up to 3 days or frozen for up to 3 months. Just thaw and roll before baking.
- What if I don’t have flower-shaped cookie cutters? You can use any round or scalloped cutters, or even cut shapes freehand with a knife for a rustic look.
- How do I fix royal icing that is too runny? Add more powdered sugar, a tablespoon at a time, until you reach the desired thickness.
- Is it safe to use raw egg whites in royal icing? Use pasteurized egg whites or meringue powder to avoid any risk of salmonella.
- Can I store decorated cookies for a party? Yes, store them in an airtight container at room temperature. Decorated cookies keep well for about 5 days.
Pin This Recipe!
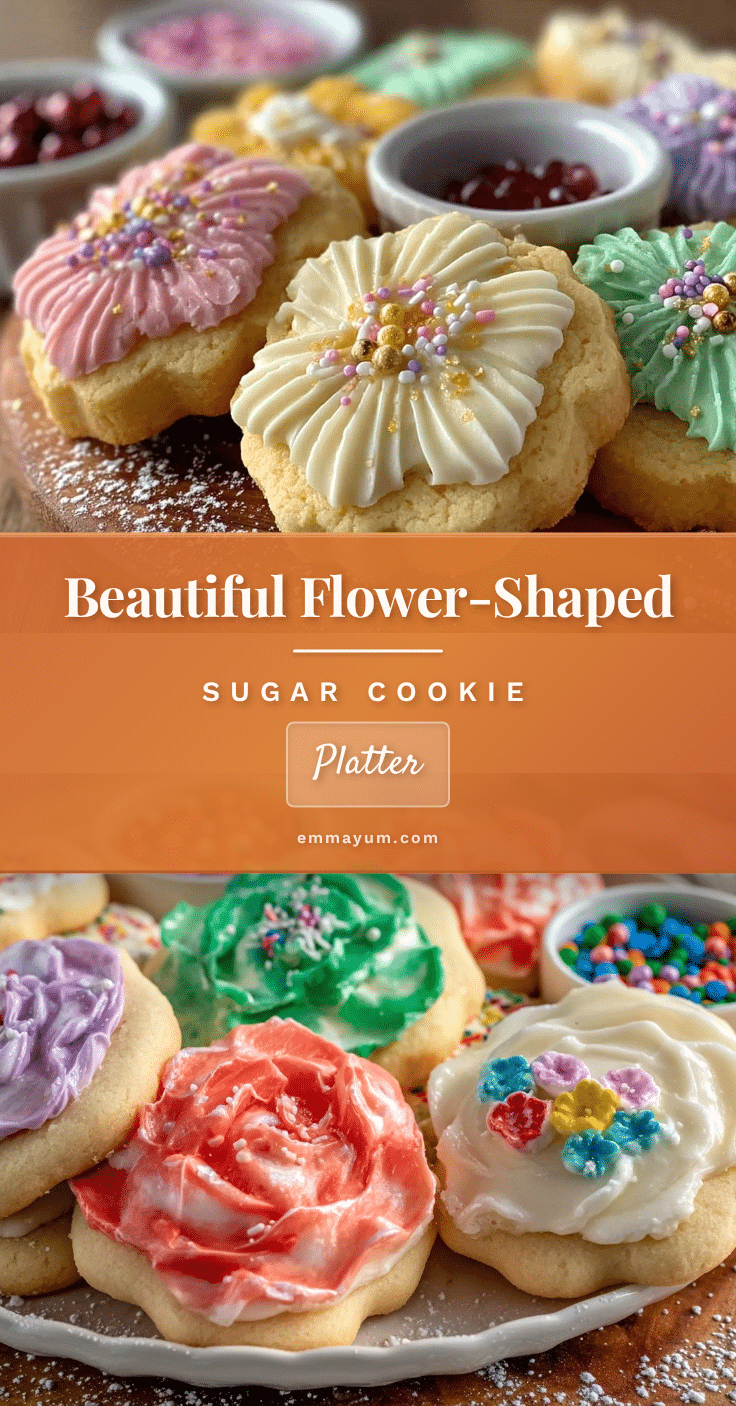
Perfect Flower-Shaped Sugar Cookie Decorating Platter
A charming and easy-to-make flower-shaped sugar cookie decorating platter perfect for beginners and celebrations. These tender, buttery cookies have a smooth surface ideal for decorating with royal icing.
- Prep Time: 20 minutes
- Cook Time: 10 minutes
- Total Time: 1 hour 30 minutes
- Yield: 24 cookies 1x
- Category: Dessert
- Cuisine: American
Ingredients
- 2 ¾ cups (345 g) all-purpose flour
- 1 tsp baking powder
- ½ tsp salt
- 1 cup (227 g) unsalted butter, softened
- 1 cup (200 g) granulated sugar
- 1 large egg, room temperature
- 1 ½ tsp pure vanilla extract
- 2 tbsp milk (whole milk preferred)
- For royal icing:
- 4 cups (480 g) powdered sugar
- 2 large egg whites or 3 tbsp pasteurized meringue powder mixed with water
- 1 tsp lemon juice
- Food coloring gels
Instructions
- Mix dry ingredients: In a medium bowl, sift together 2 ¾ cups (345 g) all-purpose flour, 1 tsp baking powder, and ½ tsp salt. Set aside.
- Cream butter and sugar: In a large bowl, beat 1 cup (227 g) softened unsalted butter with 1 cup (200 g) granulated sugar until light and fluffy, about 3-4 minutes using a hand or stand mixer on medium speed.
- Add egg and vanilla: Beat in 1 large egg and 1 ½ tsp pure vanilla extract until fully combined.
- Combine wet and dry: Gradually add the dry ingredients to the wet mixture, alternating with 2 tbsp milk. Mix on low speed until a smooth dough forms. If dough is too sticky, add more flour a tablespoon at a time.
- Chill the dough: Divide dough into two discs, wrap in plastic wrap, and chill for at least 1 hour.
- Preheat oven and prepare pans: Preheat oven to 350°F (175°C). Line baking sheets with parchment paper or silicone mats.
- Roll and cut: On a lightly floured surface, roll out one disc of dough to about ¼ inch (6 mm) thickness. Use flower-shaped cookie cutters to cut out shapes. Transfer cookies to baking sheets with a thin spatula.
- Bake: Bake cookies for 8-10 minutes or until edges just start to turn golden.
- Cool: Let cookies cool on baking sheet for 5 minutes, then transfer to wire racks to cool completely before decorating.
- Prepare royal icing: Beat powdered sugar (4 cups / 480 g) with egg whites or meringue powder and 1 tsp lemon juice until smooth and glossy. Divide icing into bowls and tint with food coloring.
- Decorate: Use piping bags to outline each cookie with thicker icing consistency, then flood the center with thinned icing. Add details with different colors once base sets a bit.
- Dry: Allow decorated cookies to dry completely, ideally overnight, before stacking or serving.
Notes
If dough feels brittle after chilling, let it sit at room temperature for 10 minutes before rolling. For icing, adjust consistency by adding powdered sugar if too runny or a drop of water if too stiff. Use pasteurized egg whites or meringue powder to avoid salmonella risk. Dough can be refrigerated up to 3 days or frozen up to 3 months. Let decorated cookies dry completely, ideally overnight, to avoid smudging.
Nutrition
- Serving Size: 1 cookie
- Calories: 135
- Sugar: 10
- Sodium: 90
- Fat: 7
- Saturated Fat: 4
- Carbohydrates: 18
- Fiber: 0.5
- Protein: 1.5
Keywords: sugar cookies, flower-shaped cookies, cookie decorating, royal icing, easy sugar cookies, beginner cookie decorating, party cookies