“You want something fresh but without turning on the oven?” That’s how my friend Sarah threw out the challenge last summer, during one of those blazing, sweat-it-out afternoons that just beg for cool treats. Honestly, I was skeptical—key lime pie is one of those desserts I always thought needed careful baking and a lot of patience. But Sarah swore by her no-bake version, and well, I had a box of graham crackers and some limes sitting on the counter, so why not? What happened next was a little magic. The crust came together in minutes, and the filling? Ridiculously creamy with just the right zing of lime. It felt like summer wrapped up in a bite, no oven heat required.
That first try quickly turned into a weekend obsession—I made these bars three times in a week, tweaking the sweetness just a bit each time. The texture is like a dream: silky smooth, tangy, and with a crumbly, buttery base that holds its own without any fuss. Perfect for those moments when you want a dessert that’s as quick as it is satisfying. It’s a recipe that stuck with me not because it’s fancy, but because it’s honest, simple, and downright delicious. Sometimes, the easiest recipes end up being the ones you reach for over and over again.
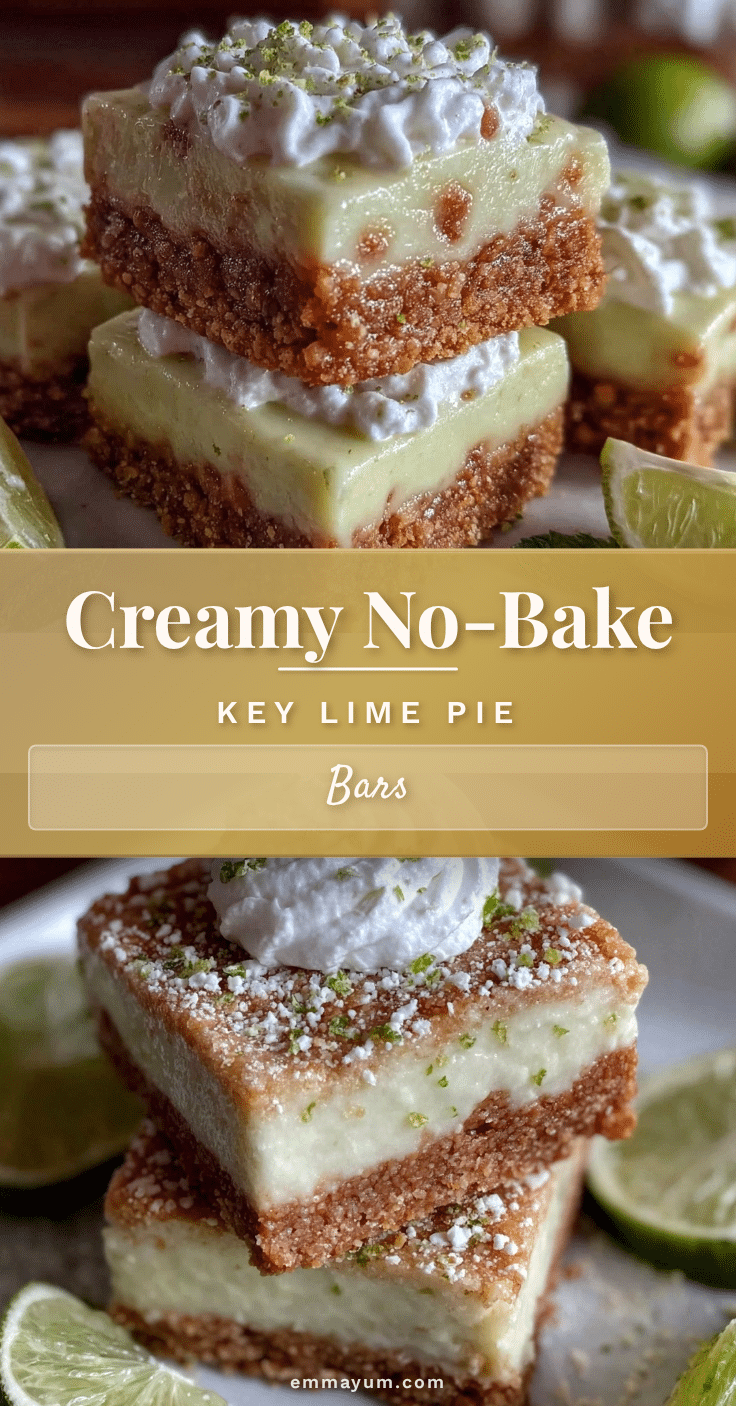
So here’s the story behind these creamy no-bake key lime pie bars with graham cracker crust: a recipe born out of heat, friendship, and a bit of happy accident. I’m sharing it because I think you’ll find the same quiet joy in making it as I do eating it.
Why You’ll Love This Recipe
After testing this recipe multiple times—and sharing it with a few picky eaters around—there’s a lot that makes these key lime pie bars a keeper:
- Quick & Easy: No oven? No problem. It comes together in under 20 minutes, then chills while you relax or prep dinner.
- Simple Ingredients: No need to hunt for anything exotic. Pantry staples like graham crackers, sweetened condensed milk, and fresh key limes do the trick.
- Perfect for Warm Weather: Whether it’s a barbecue, a potluck, or just a casual weekend treat, this pie bar is cool, refreshing, and crowd-friendly.
- Crowd-Pleaser: Kids love the creamy texture and tangy flavor, and adults appreciate the balance of sweet and tart without overwhelming richness.
- Unbelievably Delicious: The melding of the buttery crust with the silky lime filling is exactly what you want for that classic key lime experience.
What really sets this recipe apart is the no-bake, fuss-free approach that doesn’t sacrifice any flavor or texture. Instead of the traditional baked custard, this version relies on the magic of sweetened condensed milk and freshly squeezed lime juice to create that luscious, velvety filling. Plus, the graham cracker crust is buttery and crisp but holds firm without becoming soggy.
This isn’t just another key lime pie bar—I promise it’s the one you’ll want to make when you need a fast, fresh dessert that feels like a mini vacation. It’s especially handy when the oven’s off limits, or when you want to treat friends without the usual baking marathon. Kind of like the easy charm I enjoyed with my no-churn cookies and cream ice cream, it’s about quick satisfaction with minimal fuss.
What Ingredients You Will Need
This recipe uses simple, wholesome ingredients to deliver bold flavor and satisfying texture without the fuss. Most of these are pantry staples or easy to find at any grocery store, making it perfect for a last-minute dessert or a spontaneous craving.
- For the Graham Cracker Crust:
- 1 ½ cups graham cracker crumbs (about 12 full sheets, finely crushed) – I like using Nabisco Honey Maid for that perfect balance of sweetness and crunch
- ⅓ cup granulated sugar (adds a touch of sweetness)
- 6 tablespoons unsalted butter, melted (for a rich, buttery base)
- For the Creamy Key Lime Filling:
- 1 can (14 oz / 396 g) sweetened condensed milk (the magic ingredient for creaminess and sweetness)
- ½ cup freshly squeezed key lime juice (about 4-5 key limes; if you can’t find key limes, regular limes work but key limes have a unique tartness)
- 1 tablespoon lime zest (for that extra punch of citrus aroma)
- 1 cup heavy whipping cream, cold (helps create that dreamy, airy texture)
- 2 tablespoons powdered sugar (to sweeten the whipped cream)
Ingredient Tips: If you want a dairy-free option, substitute the butter with coconut oil and use coconut cream instead of heavy whipping cream. For a gluten-free crust, almond flour or gluten-free graham cracker crumbs work well. During summer, swapping in fresh berries on top adds a lovely seasonal twist.
Equipment Needed
- 8×8 inch (20×20 cm) square baking pan – this size is perfect for thick, satisfying bars.
- Mixing bowls – one large for the crust and another for the filling.
- Electric mixer or stand mixer – whipping the cream smooth is much easier with a mixer, but a sturdy whisk works if you’re patient.
- Measuring cups and spoons – for accuracy, especially with the lime juice and sugar.
- Spatula – a flexible one helps smooth out the crust and filling evenly.
- Citrus juicer or reamer – fresh lime juice is key, and a handheld juicer makes it quick and less messy.
Not everyone has a stand mixer, and honestly, I’ve whipped cream by hand for this recipe when in a pinch. It takes a bit longer, but it’s doable. For the crust, I usually crush graham crackers by putting them in a sealed plastic bag and pounding them with a rolling pin—no fancy food processor needed.
Preparation Method
- Prepare the Crust (10 minutes): In a large bowl, combine 1 ½ cups graham cracker crumbs and ⅓ cup granulated sugar. Pour in 6 tablespoons melted unsalted butter and stir until the mixture resembles wet sand and sticks together when pressed. Press this mixture evenly into the bottom of your 8×8 inch pan—using the back of a spoon or your fingers works well. Place the pan in the fridge to chill while you prepare the filling.
- Make the Filling Base (5 minutes): In a medium bowl, whisk together the 14 oz can of sweetened condensed milk, ½ cup freshly squeezed key lime juice, and 1 tablespoon lime zest until smooth and slightly thickened. The mixture will start to firm up as the acid from the lime juice reacts with the milk.
- Whip the Cream (5-7 minutes): In a separate chilled bowl, beat 1 cup cold heavy whipping cream with 2 tablespoons powdered sugar until soft peaks form. Be careful not to overbeat — you want the cream fluffy but not grainy.
- Combine and Fold (3 minutes): Gently fold the whipped cream into the lime and condensed milk mixture until fully incorporated and creamy. The goal here is to keep it light and airy, so fold carefully without smashing the whipped cream.
- Assemble & Chill (at least 4 hours): Pour the filling over the chilled crust and spread it out evenly with a spatula. Cover the pan with plastic wrap and refrigerate for a minimum of 4 hours, preferably overnight. This chilling step lets the filling set to that perfect creamy bar texture.
- Slice and Serve: Once chilled, run a knife around the edges to loosen, then cut into 9 or 12 bars depending on your preferred size. Serve chilled for the best experience.
Tip: If your crust feels a bit crumbly when pressing, a little extra melted butter will help it hold together better. Also, fresh lime zest is a game-changer here—don’t skip it!
Cooking Tips & Techniques
Making these no-bake key lime pie bars is pretty straightforward, but a few tricks can really make a difference:
- Freshness is Key: Nothing beats freshly squeezed key lime juice and zest. Bottled juice tends to lack that bright, tangy kick.
- Whip Cream Properly: Whether you’re using a mixer or whisk, stop whipping when you see soft peaks. Overwhipping can turn the cream grainy or even into butter—been there, done that!
- Press the Crust Firmly: Don’t be shy about compacting the crust. The firmer, the better it holds when you slice.
- Chill Time Matters: The filling needs enough time to set. I’ve tried cutting bars after just two hours, and the filling was too soft. Four hours or overnight is the sweet spot.
- Use a Sharp Knife: To get clean edges on your bars, dip your knife in hot water and wipe it dry before slicing.
Personally, I learned that skipping the zest or rushing the chilling step makes a noticeable difference. Patience pays off here, and the results are worth waiting for. For a fun twist, once chilled, I sometimes sprinkle a little toasted coconut on top for texture and flavor contrast.
Variations & Adaptations
This recipe is pretty versatile, and you can tweak it to suit different tastes or dietary needs:
- Dairy-Free Version: Swap butter with coconut oil and use full-fat coconut cream instead of heavy whipping cream. The flavor shifts slightly but stays wonderfully creamy.
- Extra Tart: Add an extra tablespoon of lime juice or some finely grated lime peel to the filling for a more pronounced citrus punch.
- Berry Twist: Layer fresh raspberries or blueberries on top of the crust before adding the filling. It adds a burst of color and a sweet-tart contrast.
- Chocolate Crust: Mix 2 tablespoons unsweetened cocoa powder into the graham cracker crumbs for a chocolatey base that pairs nicely with the lime.
- Low Sugar Option: Substitute powdered sugar with a natural sweetener like powdered erythritol in the whipped cream to reduce sugar without sacrificing texture.
One variation I personally adore is adding a thin layer of chocolate-covered strawberry cheesecake bars style drizzle using melted white chocolate after chilling—makes it feel a little fancy for get-togethers.
Serving & Storage Suggestions
Serve these key lime pie bars chilled for the creamiest texture and brightest flavor. They look lovely dusted with a little extra lime zest or topped with whipped cream rosettes for a party-worthy presentation.
These bars pair beautifully with a cup of iced tea or a light, fruity cocktail if you’re entertaining. On the side, fresh berries or a simple mint sprig add a refreshing touch.
For storage, keep them covered in the refrigerator for up to 4 days—though honestly, they rarely last that long in my house. They also freeze well: wrap individual bars tightly in plastic wrap and store in an airtight container for up to 2 months. To thaw, just pop them in the fridge overnight.
Reheating isn’t recommended since the bars are best enjoyed cold, but letting them sit at room temperature for 10-15 minutes before serving softens the texture slightly without losing that creamy zing. The flavors tend to develop more depth after a day in the fridge, so they’re great for making ahead.
Nutritional Information & Benefits
Each bar (assuming 9 servings) roughly contains:
| Calories | 280 |
|---|---|
| Fat | 16g |
| Carbohydrates | 30g |
| Protein | 3g |
| Sugar | 24g |
Thanks to the use of real key lime juice, these bars offer a small boost of vitamin C and antioxidants. The graham cracker crust provides some fiber, and the dairy ingredients supply calcium and protein.
For those who watch carbs, swapping the crust for an almond flour base can reduce carbohydrates, and using a sugar substitute in the whipped cream helps lower sugar content. Just remember that this recipe contains dairy and gluten unless substitutions are made.
From a wellness perspective, this dessert fits nicely into a balanced diet when enjoyed in moderation. It satisfies sweet cravings with real ingredients and skips the complex baking steps, which makes it a practical choice for busy cooks wanting a homemade treat.
Conclusion
These creamy no-bake key lime pie bars with graham cracker crust have become my go-to dessert when I want something fresh, tangy, and fuss-free. The simplicity of the ingredients and the ease of preparation make it a recipe that anyone can feel confident making. Plus, the texture and flavor hit just the right notes—creamy, zesty, with a buttery crunch that keeps you coming back for more.
Feel free to play around with the toppings or try a variation to match your taste or dietary needs. I love how this recipe is flexible but never loses its charm. Honestly, it’s the kind of dessert that feels like a little celebration in every bite.
If you’re curious about other creamy, comforting dishes, you might enjoy my slow cooker potato soup with crispy bacon or the creamy one-pot tomato basil tortellini. Both are easy, satisfying, and perfect for when you want to treat yourself without too much effort.
Give these bars a try, and I’d love to hear how you customize them or what moments you enjoy them in. Baking or no-bake, it’s all about sharing good food and good times.
FAQs About Creamy No-Bake Key Lime Pie Bars
Can I use regular limes instead of key limes?
Yes, regular limes work just fine and are more widely available. The flavor will be slightly different—key limes are a bit more floral and tart—but still delicious.
How long do these bars keep in the fridge?
Stored in an airtight container, they stay fresh for up to 4 days. After that, the texture might start to soften too much.
Can I make these bars ahead of time?
Absolutely! They actually taste better after chilling overnight, which helps the filling set fully and the flavors meld.
Is it possible to freeze these bars?
Yes, wrap individual bars tightly in plastic wrap and place them in an airtight container. Freeze for up to 2 months. Thaw in the fridge overnight before serving.
What if I don’t have heavy cream?
You can substitute with coconut cream for a dairy-free option or use whipped topping, but the texture won’t be quite as rich or fluffy.
Pin This Recipe!
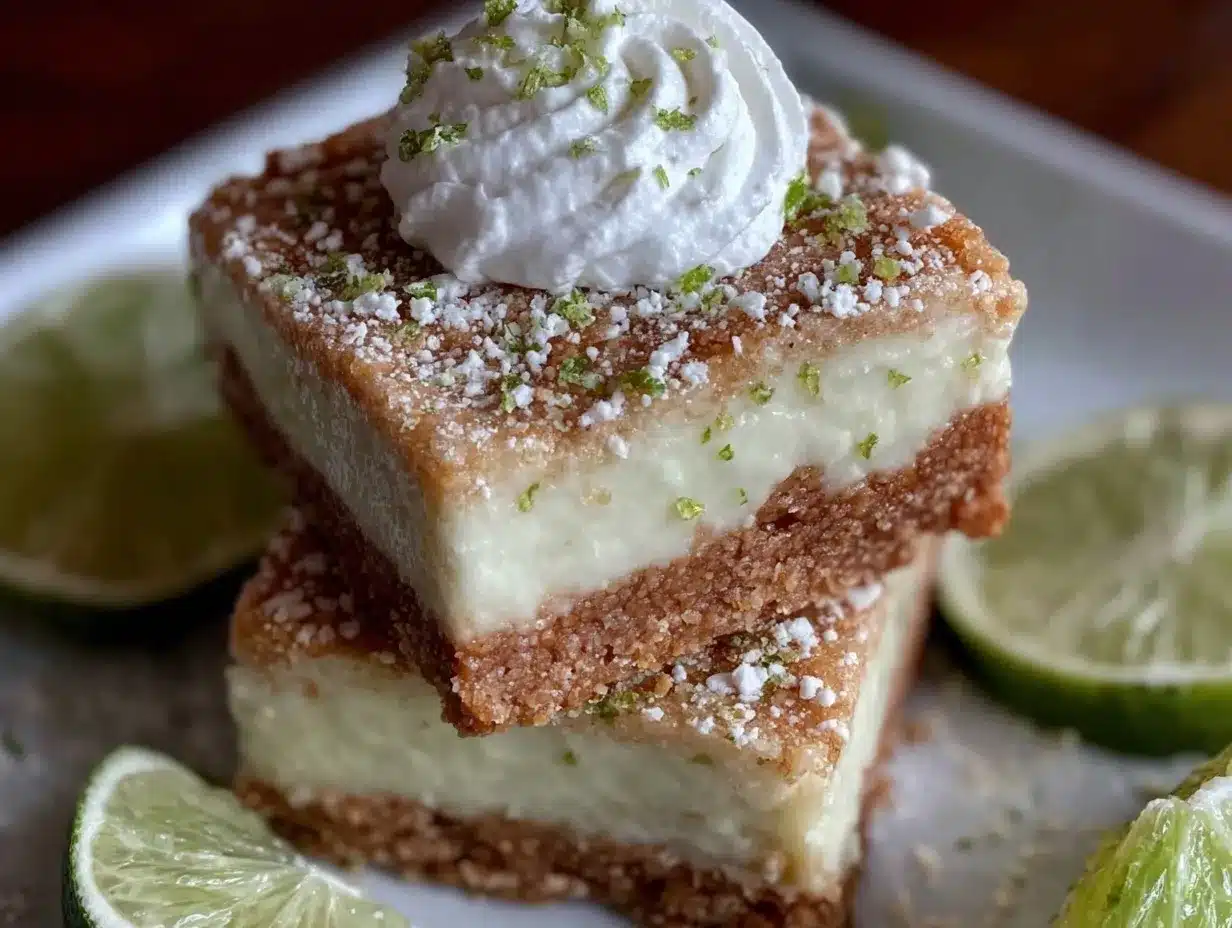
Creamy No-Bake Key Lime Pie Bars Easy Homemade Recipe with Graham Cracker Crust
A quick and easy no-bake dessert featuring a buttery graham cracker crust and a creamy, tangy key lime filling. Perfect for warm weather and crowd-pleasing occasions.
- Prep Time: 15 minutes
- Cook Time: 0 minutes
- Total Time: 4 hours 15 minutes
- Yield: 9 servings 1x
- Category: Dessert
- Cuisine: American
Ingredients
- 1 ½ cups graham cracker crumbs (about 12 full sheets, finely crushed)
- ⅓ cup granulated sugar
- 6 tablespoons unsalted butter, melted
- 1 can (14 oz / 396 g) sweetened condensed milk
- ½ cup freshly squeezed key lime juice (about 4–5 key limes)
- 1 tablespoon lime zest
- 1 cup heavy whipping cream, cold
- 2 tablespoons powdered sugar
Instructions
- Prepare the Crust (10 minutes): In a large bowl, combine graham cracker crumbs and granulated sugar. Pour in melted unsalted butter and stir until the mixture resembles wet sand and sticks together when pressed. Press this mixture evenly into the bottom of an 8×8 inch pan. Place the pan in the fridge to chill while you prepare the filling.
- Make the Filling Base (5 minutes): In a medium bowl, whisk together sweetened condensed milk, freshly squeezed key lime juice, and lime zest until smooth and slightly thickened.
- Whip the Cream (5-7 minutes): In a separate chilled bowl, beat cold heavy whipping cream with powdered sugar until soft peaks form. Avoid overbeating.
- Combine and Fold (3 minutes): Gently fold the whipped cream into the lime and condensed milk mixture until fully incorporated and creamy.
- Assemble & Chill (at least 4 hours): Pour the filling over the chilled crust and spread evenly. Cover with plastic wrap and refrigerate for a minimum of 4 hours, preferably overnight.
- Slice and Serve: Once chilled, run a knife around the edges to loosen, then cut into 9 or 12 bars. Serve chilled.
Notes
If crust is crumbly, add a little extra melted butter to help it hold together. Use fresh lime zest for best flavor. Chill for at least 4 hours or overnight for best texture. Use a sharp knife dipped in hot water for clean slices. For dairy-free, substitute butter with coconut oil and heavy cream with coconut cream. For gluten-free, use almond flour or gluten-free graham cracker crumbs.
Nutrition
- Serving Size: 1 bar (assuming 9 ba
- Calories: 280
- Sugar: 24
- Fat: 16
- Carbohydrates: 30
- Protein: 3
Keywords: key lime pie bars, no-bake dessert, graham cracker crust, creamy lime bars, easy summer dessert, no oven dessert