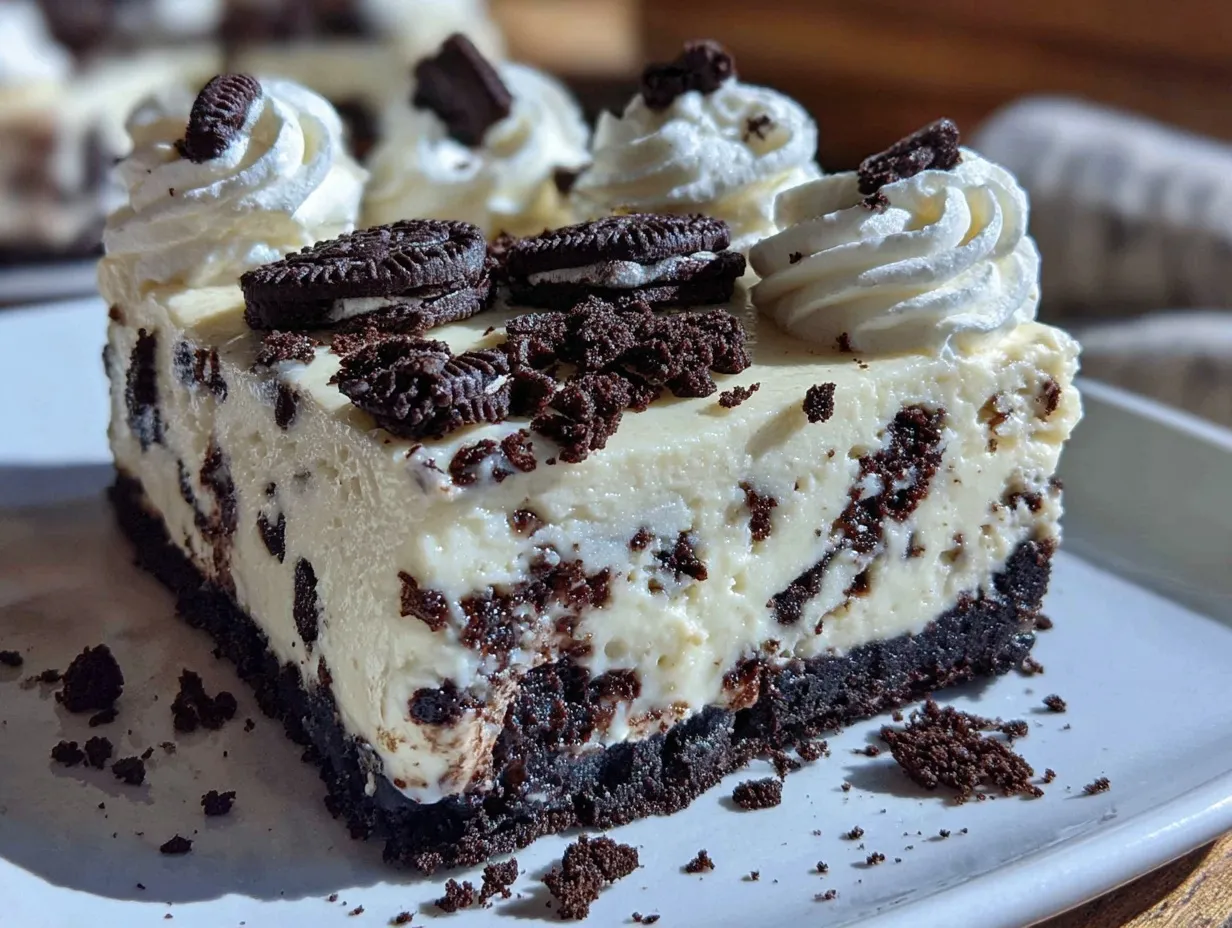
“Are you sure this will work?” my friend asked, eyeing the bowl of crushed Oreos mixed with cream cheese with a skeptical grin. Honestly, I wasn’t too sure myself when I first threw this together on a hectic evening when the oven felt like a distant memory. I was craving something sweet, creamy, and comforting, but the idea of firing up the oven after a long day? No thanks. So, I grabbed a pack of Oreos, some cream cheese, and a few basic ingredients and decided to wing it. The result? A luscious, creamy no-bake Oreo cheesecake with a cloud-like whipped cream topping that wowed everyone at the table.
That night, this cheesecake wasn’t just dessert — it became a kind of sweet victory over the chaos of the day. The crunchy Oreo crust, the silky smooth filling, and the airy whipped cream on top combined into a moment of pure joy. Since then, I’ve made it more times than I can count; it’s turned into my go-to treat when I want impressive flavors without fuss. Sometimes you just need a recipe that feels like a cozy hug, and this one fits the bill perfectly.
What’s funny is how little effort it takes to get that rich, indulgent cheesecake feeling without even turning on the oven. The creamy no-bake Oreo cheesecake with whipped cream topping stayed in my rotation because it’s not only delicious but also forgiving — you can tweak it with whatever you have on hand. And maybe that’s why it’s become a little tradition, a secret weapon for last-minute guests or when you need a quick pick-me-up that tastes like you spent hours in the kitchen.
So, if you’ve ever doubted no-bake desserts or thought Oreo cheesecakes are complicated, this recipe might just change your mind. It’s simple, creamy, and perfectly balanced — and somehow, it feels like a little celebration in every bite.
Why You’ll Love This Creamy No-Bake Oreo Cheesecake Recipe
From my many experiments in the kitchen and the countless times this cheesecake has saved the day, I can confidently say this recipe is a keeper. Here’s why it stands out and why you’ll find yourself making it again and again:
- Quick & Easy: Ready in under 20 minutes, it’s ideal for busy weeknights or surprise guests when you want dessert without the wait.
- Simple Ingredients: No need for fancy or hard-to-find items—just a handful of pantry staples and your favorite Oreos.
- Perfect for Any Occasion: Whether it’s a birthday, potluck, or just a cozy night at home, this cheesecake fits the bill.
- Crowd-Pleaser: Kids and adults alike can’t get enough of the creamy texture and that classic Oreo crunch.
- Unbelievably Delicious: The smooth, velvety filling paired with whipped cream topping feels like comfort food with a twist.
What sets this recipe apart isn’t just the no-bake convenience. The key is the balance of textures and flavors — the crushed Oreos folded gently into the cream cheese mixture create little pockets of chocolatey crunch, while the whipped cream topping adds a lightness that keeps things from feeling too heavy. Plus, you don’t have to worry about the crust falling apart or the filling being too dense. It’s just right, every single time.
This cheesecake recipe is also forgiving and versatile. For instance, I’ve swapped the cream cheese for a lighter version to cut calories without losing creaminess. Sometimes I even add a pinch of espresso powder to amp up the chocolate flavor subtly. Honestly, it’s the kind of recipe that feels like a little indulgence but without the stress.
What Ingredients You Will Need
This creamy no-bake Oreo cheesecake recipe uses straightforward, wholesome ingredients to deliver that rich flavor and smooth texture you crave. Most are pantry staples, so you probably have them ready to go.
- Oreo Cookies (24 pieces): Crushed finely for the crust and some reserved for folding into the filling (I recommend the classic original Oreos for that iconic taste).
- Unsalted Butter (6 tablespoons / 85 grams), melted: Binds the Oreo crust perfectly — room temperature butter works best for even mixing.
- Cream Cheese (16 ounces / 450 grams), softened: The star ingredient for creamy texture; I prefer full-fat for richness but light cream cheese works too.
- Powdered Sugar (¾ cup / 90 grams): Adds sweetness without graininess; sift it for a smooth blend.
- Vanilla Extract (1 teaspoon): Enhances the overall flavor; pure vanilla is worth the extra buck here.
- Heavy Whipping Cream (1 cup / 240 ml): Whipped to stiff peaks for that light, fluffy topping.
- Optional: A pinch of salt: Balances the sweetness and deepens the flavor.
When picking your Oreos, if you’re feeling adventurous, swapping for the mint or golden Oreo varieties can add a fun twist. And if you want to keep it gluten-free, there are gluten-free sandwich cookies you can use instead. For dairy-free options, cream cheese alternatives made from cashews or coconut work nicely, though the texture will be a bit different but still delicious.
Equipment Needed
Making this no-bake cheesecake requires just a handful of basic kitchen tools. Here’s what you’ll need:
- Mixing bowls: One large for the filling and one small for the crust ingredients.
- Electric mixer or stand mixer: Essential for whipping the cream to stiff peaks and beating the cream cheese smooth without lumps.
- Food processor or rolling pin: To crush the Oreos finely. If you don’t have a food processor, placing cookies in a ziplock bag and crushing them with a rolling pin works just as well.
- Springform pan or pie dish (9-inch / 23 cm): A springform pan is ideal for easy removal and neat slices, but a pie dish works too.
- Rubber spatula: For folding ingredients gently and scraping down the bowl.
If you don’t own a stand mixer, an electric handheld mixer is great and saves time and effort whipping the cream. For those on a budget, crushing Oreos in a bag is a perfectly acceptable method — I’ve done it plenty of times when the food processor was buried in a cabinet! Just be gentle with folding and mixing to keep the texture light and fluffy.
Preparation Method
- Prepare the crust: Place 20 Oreo cookies in a food processor and pulse until finely crushed (about 1 cup of crumbs). If you’re using a rolling pin, crush the cookies inside a sealed plastic bag until you get fine crumbs. Mix the crumbs with 6 tablespoons (85 grams) of melted unsalted butter until the mixture resembles wet sand.
- Press the crust: Transfer the crumb mixture into a 9-inch (23 cm) springform pan or pie dish. Press firmly and evenly into the bottom using the back of a spoon or your fingers. Pop it in the fridge to chill while you prepare the filling (about 10 minutes).
- Beat the cream cheese: In a large mixing bowl, beat 16 ounces (450 grams) of softened cream cheese with ¾ cup (90 grams) powdered sugar and 1 teaspoon vanilla extract until smooth and creamy (about 3-4 minutes). Make sure there are no lumps — scraping the bowl occasionally helps.
- Whip the cream: In a separate chilled bowl, whip 1 cup (240 ml) heavy whipping cream with a pinch of salt until stiff peaks form. This means when you lift the whisk, the peaks stand straight without drooping.
- Combine and fold: Gently fold about ½ cup of crushed Oreos (reserve 4 cookies for topping) into the cream cheese mixture. Then carefully fold in the whipped cream until everything is just combined — don’t overmix or you’ll lose that light texture.
- Assemble and chill: Pour the filling onto the chilled crust and smooth the top with a spatula. Sprinkle the reserved crushed Oreos or broken cookie pieces on top. Refrigerate for at least 4 hours, preferably overnight, to let it set and develop flavor.
If you find the filling too soft, a quick tip is to add a teaspoon of gelatin dissolved in warm water before folding in the whipped cream. This adds extra firmness without affecting the creamy mouthfeel. And when pressing the crust, remember that firmer pressure means a sturdier base that holds up well against the creamy filling.
Cooking Tips & Techniques
Making the perfect no-bake Oreo cheesecake is about technique as much as ingredients. Here are some tips I’ve picked up along the way:
- Softened Cream Cheese is Key: If your cream cheese is too cold, it won’t beat smooth, and lumps will ruin the texture. Let it sit at room temperature for at least 30 minutes before mixing.
- Whip Cream Just Right: Under-whipped cream won’t hold the filling together; over-whipped cream turns buttery and grainy. Watch closely and stop as soon as stiff peaks form.
- Fold Gently: Folding keeps the filling airy. Use a rubber spatula and fold in a slow, circular motion. Resist the urge to stir vigorously.
- Chill Time Matters: The cheesecake needs at least 4 hours in the fridge to set properly. If you’re impatient like me, sometimes 3 hours works, but overnight is best for clean slices and flavor depth.
- Crust Firmness: Don’t skip the chilling step after pressing the crust. A chilled crust prevents crumbling when you add the filling.
- Use Fresh Whipping Cream: It whips better and tastes fresher than pre-whipped varieties, which can deflate quickly.
One time, I accidentally added the whipped cream too soon before the cream cheese was fully smooth, and the filling ended up a bit lumpy. Lesson learned — patience with each step really pays off. Also, when trying to serve this with a clean cut, warm your knife under hot water and wipe it dry for each slice for neat edges.
Variations & Adaptations
This creamy no-bake Oreo cheesecake is a versatile base for all sorts of fun twists. Here are a few ways to make it your own:
- Dietary-Friendly: Use dairy-free cream cheese and coconut whipping cream for a vegan-friendly version. Gluten-free sandwich cookies work well for the crust.
- Flavor Boost: Add a teaspoon of instant espresso powder to the cream cheese mixture to deepen the chocolate flavor without making it taste like coffee.
- Fruit Twist: Swirl in some fresh raspberries or top with strawberry slices for a pop of color and tartness that contrasts beautifully with the sweet cream.
- Chocolate Lover’s Dream: Mix in mini chocolate chips or drizzle melted chocolate over the whipped cream topping before chilling.
- Crunch Factor: Toss in chopped nuts like pecans or walnuts with the Oreo crumbs for added texture in the crust.
Personally, I once tried stirring in some peanut butter into the cream cheese mixture for a nutty surprise. It was a bit decadent but surprisingly good! If you’re making this for a crowd, you can even prepare mini cheesecake cups instead of a large pie, which makes for a fun presentation and easy serving.
Serving & Storage Suggestions
This cheesecake is best served chilled, straight from the fridge. The creamy texture and whipped cream topping are most delightful when cold but not frozen. To serve, slice with a warm, clean knife and plate each piece with a dollop of extra whipped cream or a few fresh berries on the side for a touch of freshness.
For a casual gathering, this pairs wonderfully with a cup of coffee or a glass of cold milk. If you’re hosting a brunch, it works beautifully alongside a light fruit salad for balance.
Store leftover cheesecake covered tightly in the refrigerator for up to 3 days. The flavor actually improves a bit after sitting overnight as the Oreo flavors meld with the creamy filling. If you want to keep it longer, wrap it well and freeze for up to 2 months. Thaw it overnight in the fridge before serving.
Reheating isn’t recommended — this cheesecake is best enjoyed cold. However, if the whipped cream topping softens too much from fridge humidity, a quick fresh whisk of cream can revive the texture.
Nutritional Information & Benefits
Here’s an estimate per serving (assuming 8 slices): approximately 350 calories, 28 grams fat, 25 grams carbohydrates, and 5 grams protein. This dessert is rich and satisfying, so a small slice goes a long way.
The cream cheese provides a good source of calcium and protein, while the Oreos add that irresistible chocolate flavor. Using high-quality cream cheese and fresh whipping cream means you’re getting more natural ingredients without unnecessary additives.
For those watching carbs, swapping the Oreos for a low-carb cookie alternative can reduce sugar content significantly. And if you opt for light cream cheese or reduced-fat butter, you’ll cut calories further without sacrificing too much creaminess.
This recipe isn’t daily fare, but it’s a wonderful occasional treat that brings comfort and joy. For a balanced lifestyle, pairing it with fresh fruit or a simple green salad (like a fresh Cowboy Caviar Texas Style Salad) can round out the meal.
Conclusion
This creamy no-bake Oreo cheesecake with whipped cream topping has become a little kitchen favorite for good reason. It’s quick, fuss-free, and delivers that perfect balance of crunchy, creamy, and sweet with minimal effort. Whether you’re new to cheesecakes or just need a reliable recipe for a sweet fix, this one won’t disappoint.
Feel free to tweak and customize it based on your mood or pantry staples — that’s the beauty of no-bake recipes. I love how it comes together quickly yet tastes like you spent hours perfecting it. It’s proof that sometimes the simplest recipes bring the most happiness.
If you give this recipe a try, I’d love to hear about your twists and how it turned out! Sharing these little kitchen wins keeps the love for good food alive and well.
Frequently Asked Questions About Creamy No-Bake Oreo Cheesecake
Can I use a different type of cookie for the crust?
Absolutely! While Oreos are classic, graham crackers, chocolate wafers, or gluten-free sandwich cookies also work well. Just crush them finely and mix with butter as usual.
How long does the cheesecake need to chill before serving?
At least 4 hours in the fridge is recommended, but overnight chilling yields the best texture and flavor.
Can I make this cheesecake ahead of time?
Yes, it stores well in the fridge for up to 3 days and can be frozen for up to 2 months if wrapped tightly.
Is it possible to make this recipe dairy-free?
Yes, by substituting dairy-free cream cheese and coconut-based whipping cream, you can make a vegan-friendly version, plus use gluten-free cookies if needed.
How do I prevent the whipped cream topping from deflating?
Use fresh, cold heavy cream and whip it just until stiff peaks form. Folding it gently into the filling helps preserve the airy texture. Store the cheesecake chilled to keep it stable.
For similar creamy, no-oven treats, you might enjoy checking out the easy no-churn cookies and cream ice cream or to balance your sweet with savory, the crispy oven-fried buttermilk chicken tenders are a fantastic pairing for a full meal.
Pin This Recipe!
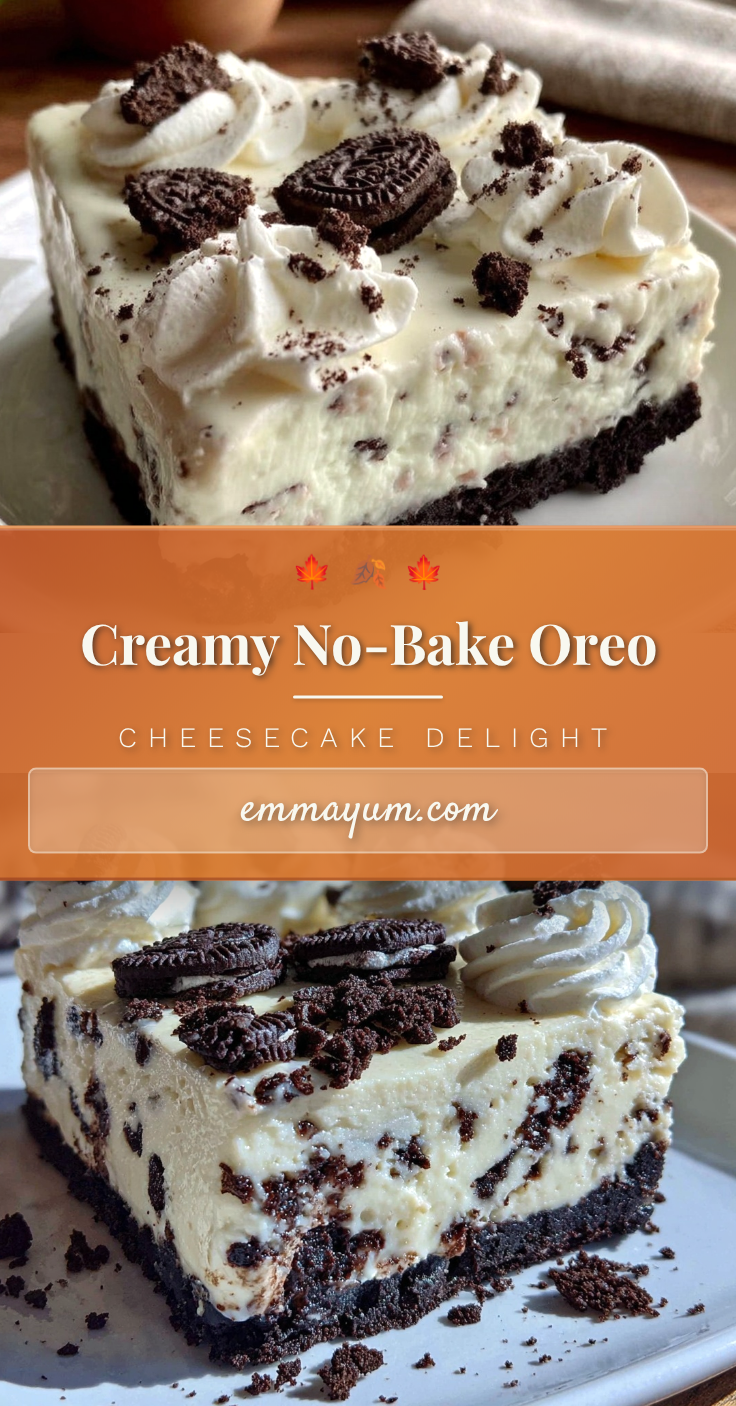
Creamy No-Bake Oreo Cheesecake
A luscious, creamy no-bake Oreo cheesecake with a crunchy Oreo crust and cloud-like whipped cream topping, perfect for quick and impressive desserts without using an oven.
- Prep Time: 15 minutes
- Cook Time: 0 minutes
- Total Time: 4 hours 15 minutes
- Yield: 8 servings 1x
- Category: Dessert
- Cuisine: American
Ingredients
- 24 Oreo Cookies (crushed finely, reserve some for folding and topping)
- 6 tablespoons (85 grams) unsalted butter, melted
- 16 ounces (450 grams) cream cheese, softened
- 3/4 cup (90 grams) powdered sugar
- 1 teaspoon vanilla extract
- 1 cup (240 ml) heavy whipping cream
- Pinch of salt (optional)
Instructions
- Prepare the crust: Crush 20 Oreo cookies finely using a food processor or rolling pin inside a sealed plastic bag until you get about 1 cup of crumbs. Mix crumbs with melted butter until mixture resembles wet sand.
- Press the crust: Transfer crumb mixture into a 9-inch springform pan or pie dish. Press firmly and evenly into the bottom. Chill in fridge for about 10 minutes.
- Beat the cream cheese: In a large bowl, beat softened cream cheese with powdered sugar and vanilla extract until smooth and creamy, about 3-4 minutes.
- Whip the cream: In a separate chilled bowl, whip heavy cream with a pinch of salt until stiff peaks form.
- Combine and fold: Gently fold about 1/2 cup crushed Oreos into the cream cheese mixture. Then fold in whipped cream carefully until just combined.
- Assemble and chill: Pour filling onto chilled crust and smooth the top. Sprinkle reserved crushed Oreos on top. Refrigerate at least 4 hours or overnight to set.
Notes
Use softened cream cheese for smooth texture. Whip cream to stiff peaks but do not overwhip. Fold ingredients gently to keep filling light and airy. Chill cheesecake at least 4 hours or overnight for best results. For firmer filling, add dissolved gelatin before folding in whipped cream. Use fresh whipping cream for best texture. Warm knife under hot water and dry before slicing for clean cuts.
Nutrition
- Serving Size: 1 slice (1/8 of chee
- Calories: 350
- Fat: 28
- Carbohydrates: 25
- Protein: 5
Keywords: no-bake cheesecake, Oreo cheesecake, easy dessert, no oven dessert, creamy cheesecake, quick dessert, Oreo crust