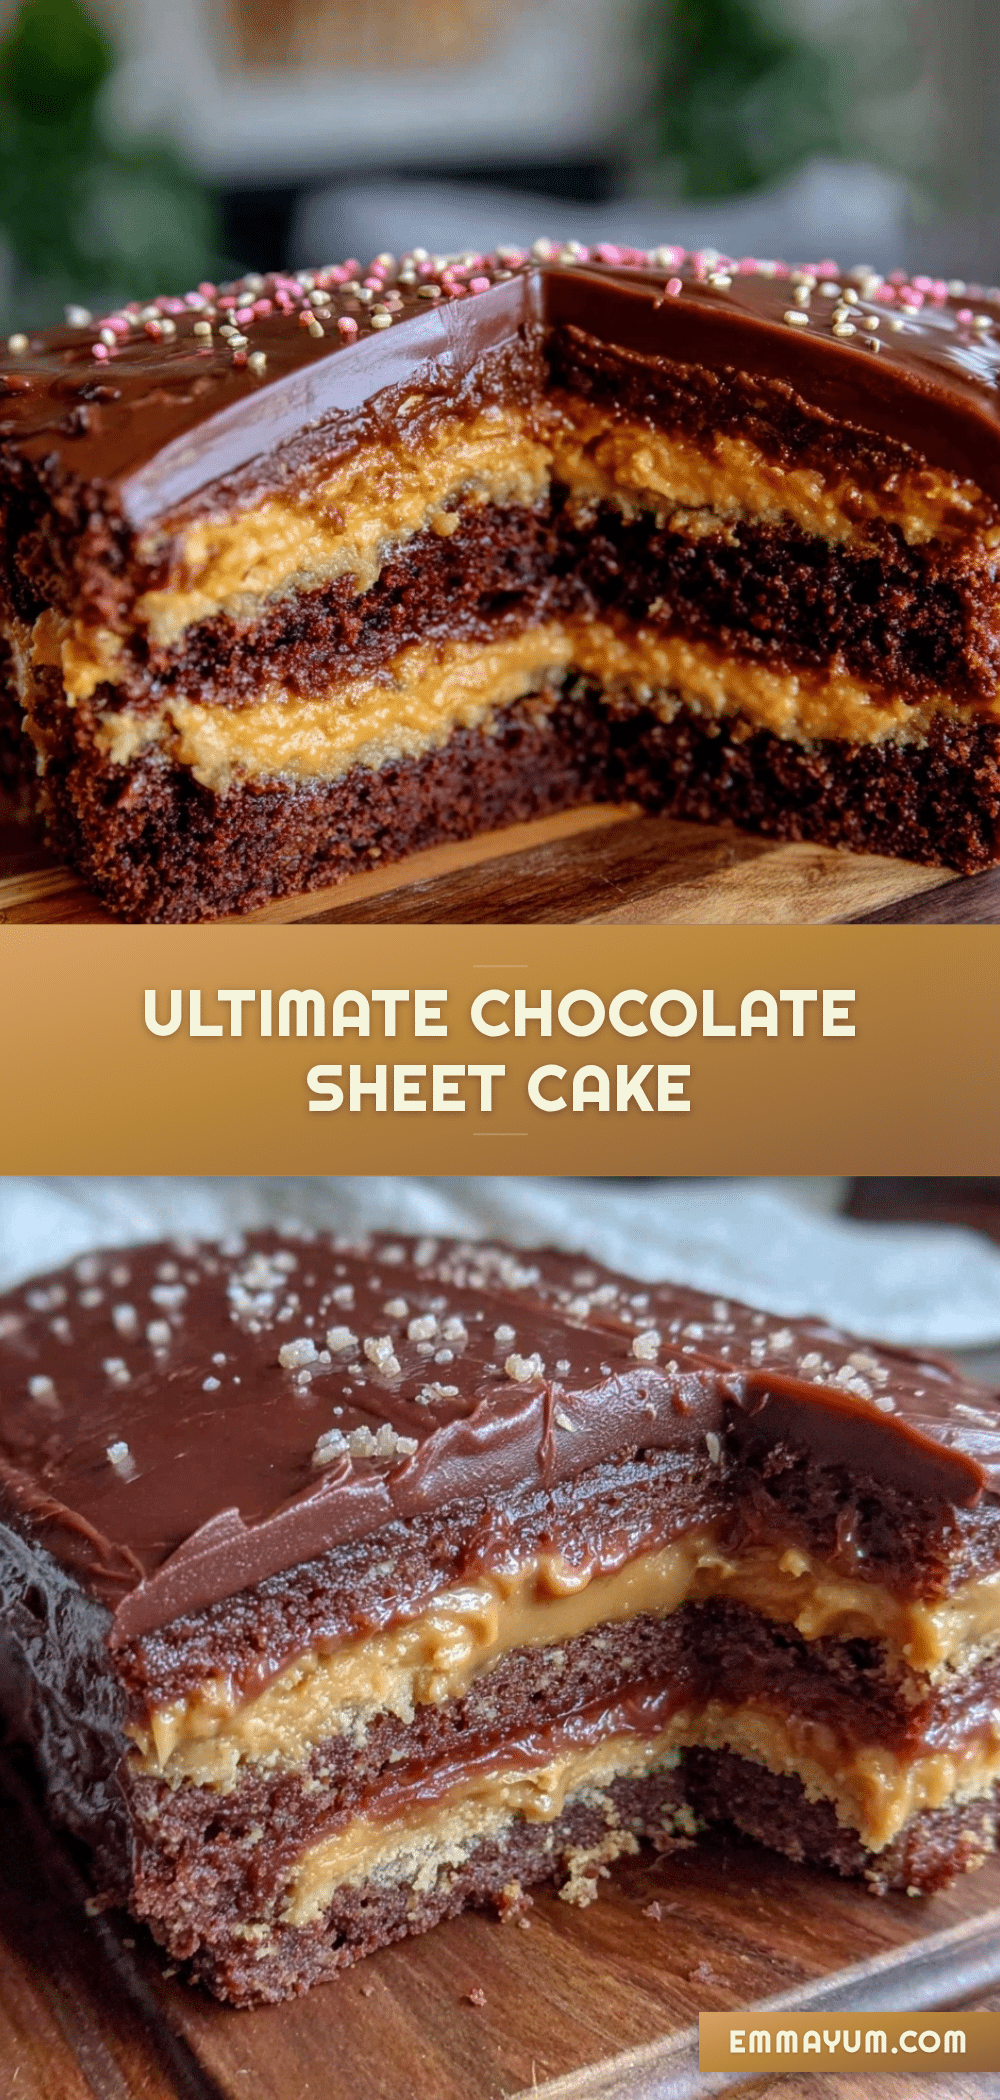
“You really think peanut butter belongs in a graduation cake?” I remember my sister’s skeptical voice as she eyed the mixing bowl. Honestly, I wasn’t sure either at first. But that spring afternoon, juggling last-minute party prep and a mountain of to-dos, I grabbed whatever I had on hand for a simple sheet cake. That little detour—throwing together a chocolate sheet cake with a quick peanut butter filling—ended up being the hit of the entire gathering.
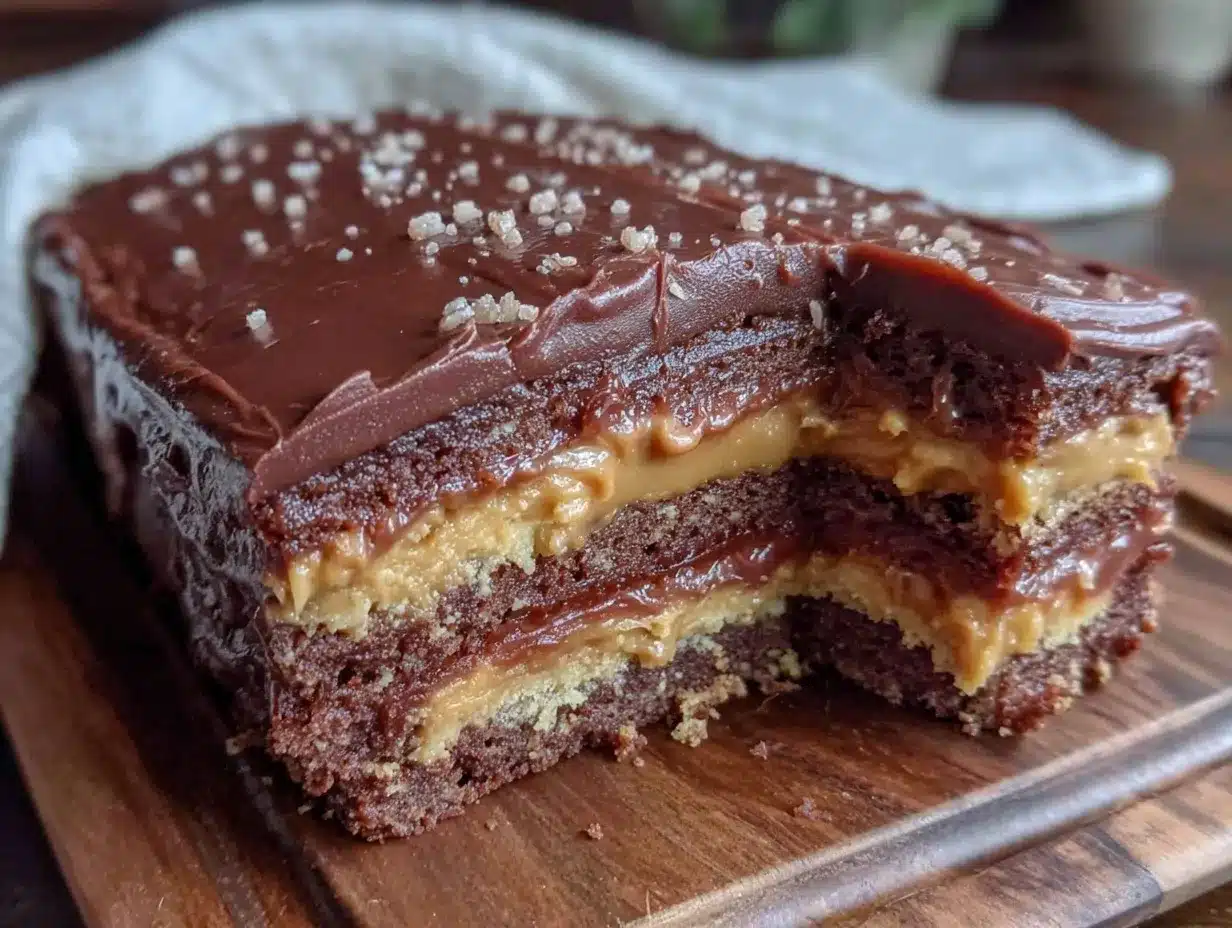
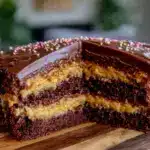
There’s something about the rich, fudgy chocolate layers hugging that creamy peanut butter center which makes this cake stand out from the usual party fare. It’s not just dessert; it’s a moment. A bit messy, a bit unexpected, and perfectly suited for celebrating milestones. I found myself making it over and over that graduation season—neighbors, coworkers, and even my own family kept asking for “that peanut butter cake.”
Maybe it’s the way the peanut butter cuts through the chocolate’s sweetness, or how the thick, tender crumbs soak up every bit of the luscious filling. Whatever it is, this Ultimate Chocolate Graduation Sheet Cake with Peanut Butter Filling became my go-to when I wanted something both comforting and special without a fuss. And you know, it sticks—not just on your fingers but in your memory.
So if you’re wondering whether a chocolate cake layered with peanut butter can truly impress a crowd, I get it. I was there too. But after tasting this one, that quiet little “maybe” turns into a solid “yes.” It’s a recipe that’s stayed with me, ready to make any celebration a little sweeter and a little more unforgettable.
Why You’ll Love This Recipe
After multiple trials and a fair share of cake crumbs, this recipe has proven itself a winner in my kitchen. It’s one of those rare desserts that’s both indulgent and approachable, perfect for anyone wanting to impress without stress. Here’s why this Ultimate Chocolate Graduation Sheet Cake with Peanut Butter Filling is worth every minute:
- Quick & Easy: Ready in under 1 hour from start to finish, it’s perfect for last-minute celebrations or when you just need something homemade, stat.
- Simple Ingredients: No fancy or hard-to-find items here—just pantry staples like cocoa powder, peanut butter, and a handful of basic baking essentials.
- Perfect for Graduations & Parties: This sheet cake serves a crowd beautifully, making it ideal for events where you want to feed many without fussing over individual servings.
- Crowd-Pleaser: Kids, adults, picky eaters—all agree that the combo of chocolate and peanut butter hits the spot every time.
- Unbelievably Delicious: The moist texture of the chocolate cake alongside the creamy peanut butter filling creates a flavor and mouthfeel that’s downright addictive.
What makes it different? Well, instead of a typical frosting, the peanut butter filling lends a luscious, slightly salty contrast that brings out the chocolate’s depth. Plus, the sheet cake format means no fancy piping or decorating skills required—just slice and enjoy. It’s that balance of simplicity and flavor that’s kept me coming back, especially when I’m juggling busy days or casual gatherings.
This recipe isn’t just another chocolate cake—it’s the one I reach for when I want something that feels special but isn’t a production. It’s comfort food that’s a little dressed up, a little nostalgic, and totally satisfying.
What Ingredients You Will Need
This Ultimate Chocolate Graduation Sheet Cake with Peanut Butter Filling uses straightforward ingredients that work together to create bold flavors and a satisfyingly tender texture. Most of these are pantry staples, so no last-minute store runs needed. Here’s what you’ll gather:
- For the Chocolate Cake:
- All-purpose flour (2 cups / 240g) – for structure and crumb
- Granulated sugar (1 ¾ cups / 350g) – to sweeten and tenderize
- Unsweetened cocoa powder (¾ cup / 75g) – I recommend Dutch-processed for a richer chocolate flavor
- Baking soda (1 ½ tsp) – helps the cake rise and gives a lighter texture
- Salt (1 tsp) – balances sweetness
- Large eggs (2, room temperature) – bind ingredients and add moisture
- Buttermilk (1 cup / 240ml) – adds tang and tenderness; can substitute with milk + 1 tbsp vinegar
- Vegetable oil (½ cup / 120ml) – keeps the cake moist
- Vanilla extract (2 tsp) – enhances flavor
- Hot water (1 cup / 240ml) – blooms cocoa and creates a smooth batter
- For the Peanut Butter Filling:
- Creamy peanut butter (1 cup / 240g) – natural or classic works; choose unsweetened if you like less sugar
- Powdered sugar (1 ½ cups / 180g) – for sweetness and smooth texture
- Unsalted butter (4 tbsp / 60g, softened) – adds richness and creaminess
- Heavy cream or milk (2-3 tbsp / 30-45ml) – to adjust filling consistency
- Vanilla extract (1 tsp) – adds depth
- For the Chocolate Frosting:
- Unsalted butter (½ cup / 115g, softened)
- Powdered sugar (2 ½ cups / 300g)
- Unsweetened cocoa powder (⅓ cup / 30g)
- Milk (3-4 tbsp / 45-60ml)
- Vanilla extract (1 tsp)
- Pinch of salt
For best results, use fresh baking soda and good-quality cocoa powder. I like brands like Hershey’s Special Dark or Ghirardelli for that deep chocolate punch. If you’re after a gluten-free option, swapping the all-purpose flour with a 1:1 gluten-free baking flour blend works well, though texture will vary slightly.
And just a heads up—if you prefer crunchy peanut butter or want to add some texture, feel free to stir in a handful of chopped peanuts into the filling. It’s a personal favorite twist I’ve tried when making this for a more casual crowd.
Equipment Needed
Since this is a sheet cake, you don’t need fancy gadgets—just the basics you probably have already. Here’s what you’ll want on hand:
- 9×13 inch (23×33 cm) baking pan – standard size for a sheet cake; greased and lined with parchment paper for easy removal
- Mixing bowls – one large for the batter, one medium for the peanut butter filling, and one for the frosting
- Electric mixer or stand mixer – helpful for smooth batter and fluffy frosting, but a sturdy whisk and some arm power can work too
- Measuring cups and spoons – accuracy helps with consistent results
- Rubber spatula – great for scraping down bowl sides and folding ingredients
- Cooling rack – to let the cake cool evenly before assembling
If you don’t have an electric mixer, whisking the frosting and filling by hand is doable but expect to spend a few extra minutes for smoothness. Also, I’ve found that parchment lining the pan prevents sticking much better than greasing alone, and it makes clean-up easier, especially when you’re in a rush.
Preparation Method
- Preheat and Prep: Set your oven to 350°F (175°C). Grease and line your 9×13 inch baking pan with parchment paper, leaving a little overhang on the sides to lift the cake out easily later. This step saves a lot of heartache dealing with stuck cake later on.
- Mix Dry Ingredients: In a large bowl, sift together 2 cups (240g) all-purpose flour, 1 ¾ cups (350g) granulated sugar, ¾ cup (75g) cocoa powder, 1 ½ tsp baking soda, and 1 tsp salt. Whisk these well so everything is evenly combined and the cocoa powder is free of lumps.
- Combine Wet Ingredients: In a separate bowl or large measuring cup, whisk 2 large eggs, 1 cup (240ml) buttermilk, ½ cup (120ml) vegetable oil, and 2 tsp vanilla extract until smooth and slightly frothy.
- Make the Batter: Pour the wet mixture into the dry ingredients, stirring gently with a spatula or spoon until just combined. Avoid overmixing to keep the cake tender. Now, add 1 cup (240ml) hot water slowly while stirring to create a smooth, thin batter. It’ll look runny—that’s right, and it bakes into a moist crumb.
- Bake: Pour the batter into your prepared pan and tap gently on the counter to release air bubbles. Bake for 30-35 minutes, or until a toothpick inserted in the center comes out with a few moist crumbs but no wet batter. Baking times vary by oven, so start checking around 30 minutes.
- Cool Completely: Remove the cake from the oven and let it cool in the pan on a wire rack for 20 minutes. Then, use the parchment overhang to lift the cake out and cool it completely on the rack. This is critical—peanut butter filling and frosting slide off if the cake is warm.
- Prepare the Peanut Butter Filling: In a mixing bowl, beat 1 cup (240g) creamy peanut butter with 4 tbsp (60g) softened unsalted butter until smooth. Gradually add 1 ½ cups (180g) powdered sugar, beating between additions. Add 2-3 tbsp (30-45ml) heavy cream or milk and 1 tsp vanilla extract to reach a spreadable, creamy consistency.
- Slice the Cake: Once cooled, carefully slice the cake horizontally into two even layers using a serrated knife. If your cake is delicate, chilling it for 15 minutes first can make slicing easier.
- Assemble: Spread the peanut butter filling evenly over the bottom layer, then gently place the second layer on top.
- Make the Chocolate Frosting: Beat ½ cup (115g) softened butter until creamy. Sift and add 2 ½ cups (300g) powdered sugar and ⅓ cup (30g) cocoa powder alternately with 3-4 tbsp (45-60ml) milk, beating well after each addition. Stir in 1 tsp vanilla extract and a pinch of salt, then beat until fluffy and smooth.
- Frost the Cake: Spread the chocolate frosting evenly over the top and sides of the cake. For a simple decoration, sprinkle a few chopped peanuts or chocolate shavings on top.
- Chill and Serve: Refrigerate the cake for at least 30 minutes to set the filling and frosting before slicing into squares. This helps everything hold together better when serving.
If you want to speed things up, you can make the peanut butter filling and frosting while the cake bakes. Just keep an eye on the cake so it doesn’t overbake, which can dry it out.
Cooking Tips & Techniques
Getting this cake just right is all about timing and texture balance. Here are some tips I’ve picked up from making this cake more times than I can count:
- Don’t Overmix the Batter: Stir until ingredients are combined but still a bit lumpy. Overmixing develops gluten and can make the cake dense.
- Use Hot Water: It might feel odd, but adding hot water blooms the cocoa, intensifying the chocolate flavor and thinning the batter for a moist crumb.
- Room Temperature Ingredients: Eggs, butter, and buttermilk at room temp mix more evenly, resulting in a smoother batter and filling.
- Cooling is Crucial: Let the cake cool fully before cutting and filling. Otherwise, the peanut butter layer will melt and slide off.
- Slicing Tips: Use a long serrated knife and a gentle sawing motion. Chilling the cake slightly before slicing helps prevent crumbs.
- Frosting Consistency: If frosting is too thick, add a splash more milk; if too thin, add a bit more powdered sugar. It should spread easily without dripping.
- Make Ahead: This cake actually tastes better the next day as flavors meld. Wrap tightly and refrigerate overnight for a delicious, moist treat.
One mistake I’ve made? Rushing the cooling step and trying to frost warm cake. That was a crumbly, sticky mess! Patience here is your friend.
Variations & Adaptations
This chocolate and peanut butter combo is versatile, so you can tweak it to suit your taste or dietary needs:
- Nut-Free Version: Substitute the peanut butter filling with a sunflower seed butter filling to keep it allergy-friendly without losing creaminess.
- Vegan Adaptation: Use flax eggs (1 tbsp ground flaxseed + 3 tbsp water per egg), plant-based milk, and dairy-free butter substitutes. Choose a vegan peanut butter and powdered sugar blend.
- Peanut Butter Crunch: Stir chopped roasted peanuts or peanut butter chips into the filling or sprinkle on top for added texture and flavor.
- Seasonal Twist: Swap the peanut butter filling with a salted caramel filling in fall, or mix in chopped fresh strawberries for a spring twist.
- Alternate Frosting: Try a cream cheese frosting for a tangy contrast, or a simple chocolate ganache for a glossy finish.
One time, I added a thin layer of raspberry jam beneath the peanut butter filling, and it was surprisingly delicious—a little fruitiness against the rich chocolate and peanut butter. Experimenting a bit is part of the fun!
Serving & Storage Suggestions
This sheet cake is best served chilled or at room temperature. The peanut butter filling firms up nicely in the fridge, making slices clean and less messy. For celebrations, slice into generous squares and serve with a scoop of ice cream or fresh berries for an extra touch.
Leftovers keep well—wrap tightly in plastic wrap or store in an airtight container in the refrigerator for up to 4 days. You can also freeze individual slices wrapped in foil and placed in freezer bags for up to 3 months.
To reheat, let frozen slices thaw in the fridge overnight, then bring to room temperature before serving. Avoid microwaving as it can cause the peanut butter filling to separate or melt unevenly.
Flavors tend to deepen after a day or two, so if you can wait, this cake rewards patience. It pairs wonderfully with a cold glass of milk or a simple cup of coffee. For a casual summer gathering, I sometimes serve it alongside an easy homemade vanilla ice cream like the no-churn cookies and cream ice cream for a cool contrast.
Nutritional Information & Benefits
This Ultimate Chocolate Graduation Sheet Cake with Peanut Butter Filling is a treat, but it also offers some nutritional perks thanks to its ingredients. Here’s a rough estimate per serving (assuming 12 servings):
| Calories | 420 |
|---|---|
| Fat | 22g |
| Saturated Fat | 7g |
| Carbohydrates | 50g |
| Sugar | 35g |
| Protein | 6g |
| Fiber | 3g |
Peanut butter provides healthy fats and protein, which help balance out the sweetness and add some staying power. Cocoa powder is rich in antioxidants, and using buttermilk adds a nice dose of calcium and probiotics. Of course, this is a dessert, so enjoy in moderation! If you’re watching sugar or carbs, consider swapping some sugar with coconut sugar or a sugar substitute and use natural peanut butter without added sugar.
Conclusion
This Ultimate Chocolate Graduation Sheet Cake with Peanut Butter Filling is one of those recipes that sticks around not just for the taste but for the memories it creates. It’s simple, satisfying, and just different enough to make celebrations feel a little more special. I love how it balances indulgence with ease—no fancy decorating, just layers of flavor that speak for themselves.
Whether you’re planning a graduation party, a family gathering, or just a treat-yourself moment, this cake invites you to play around with the flavors and make it your own. The peanut butter filling adds that unexpected twist that makes people ask for seconds, and the moist chocolate cake is a classic everyone loves.
If you try this recipe, I’d love to hear how you make it yours! Drop a comment below sharing your twists or how it went with your crowd. And if you want a savory meal to pair afterward, you might enjoy the crispy oven-fried buttermilk chicken tenders—comfort food in a different kind of way.
Here’s to sweet celebrations and delicious moments—one slice at a time.
FAQs
Can I make this cake ahead of time?
Yes! This cake actually tastes better the next day as the flavors meld. Store it covered in the fridge for up to 4 days or freeze slices for longer storage.
What if I don’t have buttermilk?
Simply mix 1 cup (240ml) milk with 1 tablespoon vinegar or lemon juice. Let it sit for 5 minutes before using as a buttermilk substitute.
Can I use crunchy peanut butter instead of creamy?
Absolutely! Crunchy peanut butter adds texture to the filling, which some people really enjoy. Just be sure to beat it well with the butter for a smooth consistency.
Is it possible to make this cake gluten-free?
Yes, you can substitute the all-purpose flour with a 1:1 gluten-free baking flour blend. The texture might be slightly different, but it will still be delicious.
How do I slice the cake evenly?
Using a long serrated knife with a gentle sawing motion works best. You can chill the cake for 15-20 minutes first to make slicing cleaner and easier.
Pin This Recipe!
Ultimate Chocolate Graduation Sheet Cake Recipe with Easy Peanut Butter Filling
A rich, fudgy chocolate sheet cake layered with a creamy peanut butter filling and topped with chocolate frosting, perfect for celebrations and gatherings.
- Prep Time: 20 minutes
- Cook Time: 30-35 minutes
- Total Time: 55-60 minutes
- Yield: 12 servings 1x
- Category: Dessert
- Cuisine: American
Ingredients
- 2 cups (240g) all-purpose flour
- 1 ¾ cups (350g) granulated sugar
- ¾ cup (75g) unsweetened cocoa powder (Dutch-processed recommended)
- 1 ½ tsp baking soda
- 1 tsp salt
- 2 large eggs (room temperature)
- 1 cup (240ml) buttermilk (or milk + 1 tbsp vinegar)
- ½ cup (120ml) vegetable oil
- 2 tsp vanilla extract
- 1 cup (240ml) hot water
- 1 cup (240g) creamy peanut butter (natural or classic)
- 1 ½ cups (180g) powdered sugar
- 4 tbsp (60g) unsalted butter (softened)
- 2–3 tbsp (30-45ml) heavy cream or milk
- 1 tsp vanilla extract (for filling)
- ½ cup (115g) unsalted butter (softened, for frosting)
- 2 ½ cups (300g) powdered sugar (for frosting)
- ⅓ cup (30g) unsweetened cocoa powder (for frosting)
- 3–4 tbsp (45-60ml) milk (for frosting)
- 1 tsp vanilla extract (for frosting)
- Pinch of salt (for frosting)
Instructions
- Preheat oven to 350°F (175°C). Grease and line a 9×13 inch baking pan with parchment paper, leaving an overhang for easy removal.
- In a large bowl, sift together flour, sugar, cocoa powder, baking soda, and salt. Whisk to combine.
- In a separate bowl, whisk eggs, buttermilk, vegetable oil, and vanilla extract until smooth and slightly frothy.
- Pour wet ingredients into dry ingredients and stir gently until just combined. Slowly add hot water while stirring to create a smooth, thin batter.
- Pour batter into prepared pan and tap gently to release air bubbles. Bake for 30-35 minutes or until a toothpick inserted comes out with a few moist crumbs.
- Cool cake in pan on a wire rack for 20 minutes. Use parchment overhang to lift cake out and cool completely on rack.
- Prepare peanut butter filling by beating peanut butter and softened butter until smooth. Gradually add powdered sugar, beating between additions. Add heavy cream or milk and vanilla extract to reach spreadable consistency.
- Slice cooled cake horizontally into two even layers using a serrated knife. Chill for 15 minutes if needed for easier slicing.
- Spread peanut butter filling evenly over bottom layer, then place second layer on top.
- Make chocolate frosting by beating softened butter until creamy. Alternately add powdered sugar and cocoa powder with milk, beating well after each addition. Stir in vanilla extract and salt, then beat until fluffy.
- Spread frosting evenly over top and sides of cake. Optionally, sprinkle chopped peanuts or chocolate shavings on top.
- Refrigerate cake for at least 30 minutes to set filling and frosting before slicing and serving.
Notes
Do not overmix the batter to keep the cake tender. Use hot water to bloom cocoa powder for richer chocolate flavor. Cool cake completely before slicing and filling to prevent filling from sliding off. Frosting consistency can be adjusted with milk or powdered sugar. Cake tastes better the next day as flavors meld. For gluten-free option, substitute flour with 1:1 gluten-free baking flour blend. Crunchy peanut butter or chopped peanuts can be added for texture.
Nutrition
- Serving Size: 1 slice (1/12th of c
- Calories: 420
- Sugar: 35
- Fat: 22
- Saturated Fat: 7
- Carbohydrates: 50
- Fiber: 3
- Protein: 6
Keywords: chocolate cake, peanut butter filling, sheet cake, graduation cake, easy dessert, party cake, chocolate frosting