“Pass the sliders!” That’s what my friends kept saying at last weekend’s casual get-together, and honestly, I wasn’t expecting this little pull-apart slider bar to steal the show. I threw it together mostly out of a pinch—half the time, I was scrambling with what to serve for a crowd, and the other half, I was just craving something fun that didn’t require a million dishes. The idea came from a forgotten bag of slider rolls buried in the back of the fridge and a few pantry staples waiting to be transformed.
As I assembled those soft, buttery rolls with layers of savory fillings and paired them with three homemade sauces, the kitchen filled with this cozy, irresistible aroma. At first, I was skeptical—would a slider bar really hit the mark? But as everyone started pulling apart their own little sandwiches, laughter and chatter filled the room, and I realized this was more than just a quick snack. It was a moment of connection, hands reaching in, creating bites just the way you like.
What stuck with me, beyond the flavor, was how this pull-apart slider bar became the centerpiece of easy joy—no stress, just deliciousness shared. I love how the trio of sauces adds a playful twist, letting everyone customize their sliders. It’s simple yet feels special, the kind of dish you come back to again and again, whether it’s a busy weeknight or an unplanned hosting moment.
So, if you’re after a flavorful pull-apart slider bar with three irresistible sauces that bring everyone together, this recipe might just become your new go-to. It’s the kind of dish that makes you pause, smile, and quietly appreciate the good things around the table.
Why You’ll Love This Recipe
After countless trials and tasty experiments, this pull-apart slider bar recipe has genuinely earned its spot in my regular rotation. Here’s why it shines:
- Quick & Easy: You can have this slider bar ready in under 45 minutes — ideal for those busy evenings when time’s tight but flavors matter.
- Simple Ingredients: No need to hunt down anything exotic. Most items are pantry staples or easy finds at your local grocery store.
- Perfect for Entertaining: Whether it’s a casual game night, potluck, or family brunch, these sliders adapt effortlessly to any occasion.
- Crowd-Pleaser: From kids to adults, everyone loves the playful pull-apart format and the bold flavors in every bite.
- Unbelievably Delicious: The combination of soft rolls, savory fillings, and three diverse sauces creates a flavor explosion you won’t forget.
What makes this recipe stand out is the thoughtful layering of the sauces—each crafted to complement and contrast with the others. One is smoky and tangy, another creamy with a hint of spice, and the last brings a fresh, herby brightness. This trio isn’t just an afterthought; it’s the heart of the dish, turning simple sliders into an interactive, flavor-packed experience.
In a way, this recipe feels like comfort food reimagined. It’s friendly to your schedule, forgiving in the kitchen, and joyful to share. Honestly, it’s the kind of dish that makes you close your eyes after the first bite and think, “Yep, this is good.” And if you’re curious about other crowd-pleasing recipes, you might appreciate the crispy oven-fried buttermilk chicken tenders or the cozy vibe of a creamy slow cooker potato soup to round out your meal.
What Ingredients You Will Need
This flavorful pull-apart slider bar recipe uses simple, wholesome ingredients to deliver bold flavor and satisfying texture without the fuss. You likely have most of these on hand already, making it perfect for last-minute gatherings or comforting dinners.
- Slider Rolls – 12 soft, pull-apart slider buns (I prefer King’s Hawaiian for that slightly sweet, tender crumb)
- Protein Filling – 1 lb (450 g) ground beef or shredded rotisserie chicken (use what you have; both work beautifully)
- Cheese – 8 oz (225 g) sharp cheddar, shredded (adds that melty, tangy goodness)
- Onion – 1 small yellow onion, finely diced (for savory depth)
- Garlic – 2 cloves, minced (fresh always wins here)
- Butter – 1/2 cup (113 g), melted (for brushing the tops and adding richness)
- Fresh Herbs – 2 tbsp chopped parsley or chives (optional, for freshness)
- Salt & Pepper – to taste (simple but essential)
For the Three Irresistible Sauces:
- Smoky BBQ Sauce – 1/2 cup (120 ml) store-bought or homemade (adds tang and a little kick)
- Garlic Herb Aioli – 1/2 cup (120 ml) mayo, 1 garlic clove minced, 1 tbsp lemon juice, 1 tsp Dijon mustard (creamy and zesty)
- Spicy Honey Mustard – 3 tbsp Dijon mustard, 2 tbsp honey, 1 tsp hot sauce (sweet heat balance)
If you want to swap the ground beef for turkey or even a plant-based option, that’s totally doable. For a gluten-free twist, try using gluten-free slider buns or mini lettuce wraps. When fresh herbs aren’t available, a sprinkle of dried oregano or Italian seasoning adds nice flavor too.
Equipment Needed
- Baking dish or 9×13 inch (23×33 cm) casserole pan — perfect for assembling the sliders to bake evenly
- Mixing bowls — for combining fillings and sauces
- Skillet or frying pan — to cook the protein filling
- Sharp knife and cutting board — for chopping onions, garlic, and herbs
- Measuring cups and spoons — for precise sauce and seasoning measurements
- Basting brush — to generously coat the slider tops with melted butter (a silicone brush works great and cleans easily)
If you don’t have a basting brush, a spoon and careful swirling will do the trick. When it comes to the baking dish, glass or metal pans heat differently, so keep an eye on the sliders to avoid over-browning. I’ve made these sliders in a cast iron skillet for a nice crust too, but the casserole pan is easier for pulling apart.
Preparation Method
- Preheat your oven to 350°F (175°C). Lightly grease your baking dish to prevent sticking.
- Cook the filling: Heat a skillet over medium heat, add a drizzle of oil, and sauté the diced onion until translucent — about 3-4 minutes. Add the minced garlic and cook for another 30 seconds until fragrant.
- Add the ground beef (or your chosen protein) to the skillet. Break it up with a wooden spoon and cook until fully browned, about 7-8 minutes. Season with salt and pepper. Drain excess fat if necessary.
- Assemble the sliders: Slice the slider rolls horizontally, keeping the buns attached at the bottom if possible, so they pull apart easily after baking.
- Place the bottom halves in the baking dish snugly. Layer the cooked protein evenly over the buns, then sprinkle the shredded cheddar cheese generously on top.
- Lay the top halves of the buns over the cheese layer, pressing down lightly to keep everything together.
- Mix the melted butter with chopped parsley (if using) and brush the tops of the buns thoroughly. This gives that beautiful golden color and buttery aroma.
- Bake: Place the assembled slider bar in the oven for 15-20 minutes, or until the cheese melts and the tops are golden brown. For extra browning, you can broil for 1-2 minutes, but watch closely to avoid burning.
- Meanwhile, prepare the sauces: In small bowls, whisk together the garlic herb aioli and spicy honey mustard. Warm the BBQ sauce slightly if desired.
- Serve: Remove the slider bar from the oven and let it rest for 5 minutes. Encourage everyone to pull apart their sliders and dip or drizzle with the homemade sauces for a personalized flavor adventure.
If your buns aren’t staying soft or pull-apart enough, next time try brushing with a little extra butter before baking or covering loosely with foil halfway through baking to trap steam. The filling can be made ahead and reheated if you want to save time on busy days.
Cooking Tips & Techniques
One thing I learned is that the quality of your buns seriously changes the whole experience. Soft, slightly sweet rolls like King’s Hawaiian or Parker House rolls give the best pull-apart texture. If your buns are a bit stale, a quick toast or steam before assembling helps.
When cooking the protein, don’t rush the browning process. Letting the meat develop a little crust adds depth and texture instead of just tossing it in and stirring constantly. Drain any excess fat to avoid soggy buns later on.
Brushing the tops with melted butter plus fresh herbs is a game-changer. It adds flavor and helps the buns brown beautifully. If you want a cheesier top, sprinkle some grated Parmesan just before baking.
Multitasking helps here: while the sliders bake, prepare your sauces and set out any extra toppings like pickles or sliced jalapeños so guests can customize their sliders even more.
Finally, patience is key—letting the slider bar rest a few minutes after baking makes pulling apart easier and prevents the cheesy filling from oozing out too much. Trust me, it’s worth that short wait.
Variations & Adaptations
- Vegetarian Option: Swap the meat filling for sautéed mushrooms and black beans or use your favorite plant-based crumbles. Add some smoky paprika to the mix for that savory punch.
- Seasonal Twist: In fall, try adding roasted butternut squash cubes or caramelized apples to the filling for a subtle sweetness that pairs well with the sauces.
- Cheese Swap: Use pepper jack for a spicy kick or mozzarella for a milder, stretchier cheese pull.
- Different Cooking Methods: Assemble the sliders in a cast iron skillet and cook on the stovetop over low heat with a lid for 10-15 minutes, turning halfway, for a crispy-bottomed alternative.
- Personal Favorite: I once added a layer of crispy bacon between the protein and cheese—an indulgence that had everyone asking for the recipe again!
Serving & Storage Suggestions
Serve these sliders warm, right out of the oven, with the three sauces on the side for dipping or drizzling. They pair wonderfully with simple sides like a crisp green salad, crunchy pickles, or even some buffalo cauliflower bites for a fun, spicy contrast.
If you’re serving for a crowd, set up the slider bar with sauces in small bowls and some extra toppings like sliced onions, jalapeños, or pickled veggies for a mini slider buffet vibe.
To store leftovers, cover the slider bar tightly with foil or transfer sliders to an airtight container. Refrigerate for up to 3 days. Reheat in the oven at 325°F (160°C) for about 10 minutes to bring back that melty cheese and warm filling.
Freezing is possible too—wrap individual sliders in plastic wrap and foil, then freeze for up to 2 months. Thaw overnight in the fridge and reheat gently to keep them soft.
Fun fact: the flavors of the sauces actually mellow and blend beautifully if you make them a day ahead, so prepping in advance can save time while intensifying taste.
Nutritional Information & Benefits
Each slider contains approximately 250-300 calories, depending on protein choice and cheese amount. The recipe offers a balanced mix of protein, fats, and carbs for satisfying energy.
Using fresh garlic and herbs in the sauces adds antioxidants and subtle health benefits, while lean ground turkey or chicken options lower saturated fat content.
For gluten-free diets, swapping the slider buns with gluten-free options keeps this recipe accessible without sacrificing flavor. Those watching carbs might enjoy the sliders open-faced atop leafy greens.
While the recipe contains dairy and gluten (unless swapped), the homemade sauces are free of preservatives and artificial ingredients, making this a cleaner comfort food choice compared to store-bought options.
I appreciate how this recipe blends indulgence with practical nutrition—comfort food that doesn’t leave you feeling weighed down.
Conclusion
This flavorful pull-apart slider bar with three irresistible homemade sauces has become a favorite for its simplicity, fun factor, and undeniable taste. It’s a dish that invites everyone to get hands-on and enjoy meal times together, no matter the occasion.
Feel free to tweak the fillings, sauces, or buns to suit your tastes—this recipe is a flexible canvas made for personalization. I love coming back to it when I want something fuss-free but memorable, and I hope you’ll find the same joy making it.
If you try it out, I’d be thrilled to hear how you made it your own. Sharing your favorite sauce combos or slider twists helps keep the recipe evolving and fun for all of us.
Here’s to many delicious, pull-apart moments ahead!
FAQs
Can I make the sliders ahead of time?
Yes! You can assemble the sliders a few hours ahead, cover them tightly, and refrigerate. Bake just before serving for the best texture and fresh cheese melt.
What if I don’t have slider buns?
Regular dinner rolls or small sandwich buns work fine. For a lower-carb option, use lettuce wraps or gluten-free rolls.
How do I store leftover sauces?
Keep homemade sauces in airtight containers in the fridge for up to 5 days. Stir before serving as some separation may occur.
Can I freeze the assembled slider bar?
Freezing is best done with individually wrapped sliders to maintain texture. Thaw overnight and reheat gently in the oven.
What’s the best way to add extra veggies?
Try thinly sliced bell peppers, pickled onions, or shredded lettuce as fresh toppings added after baking for crunch and color.
Pin This Recipe!
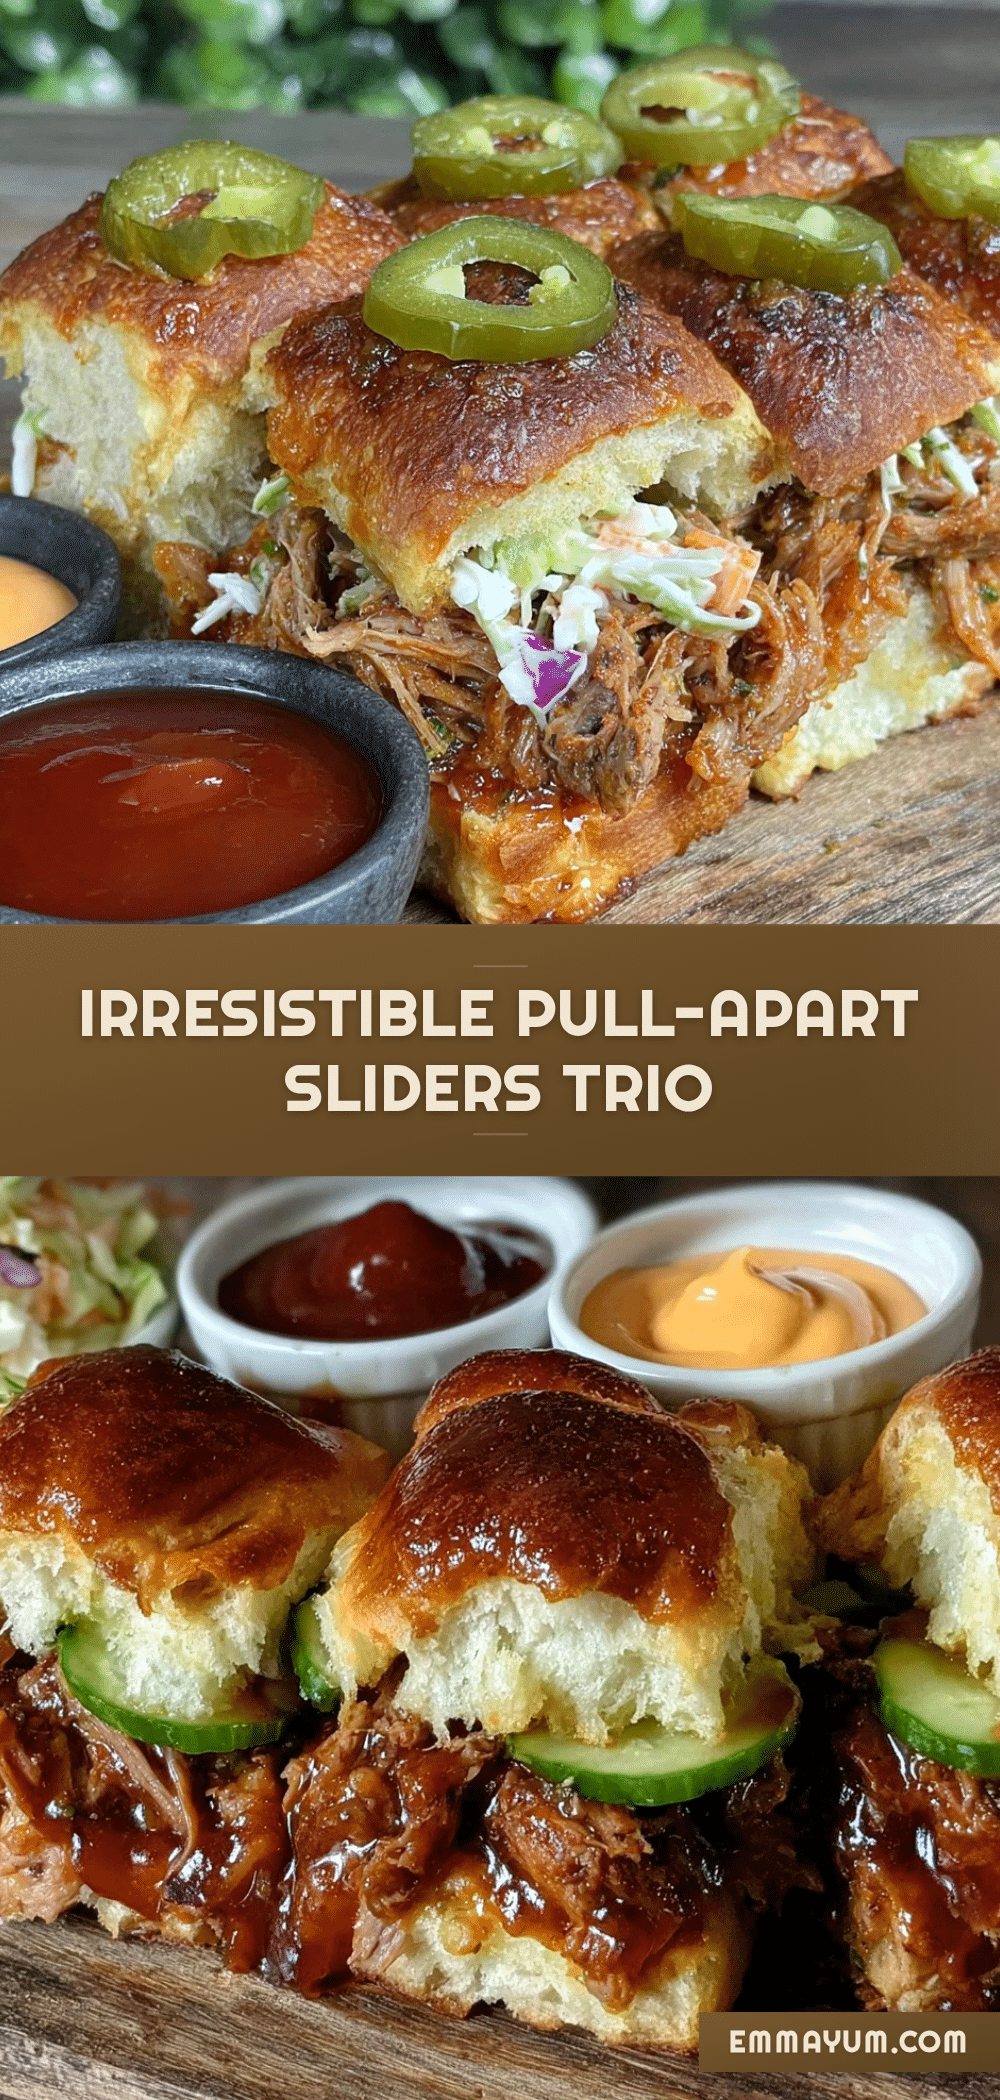
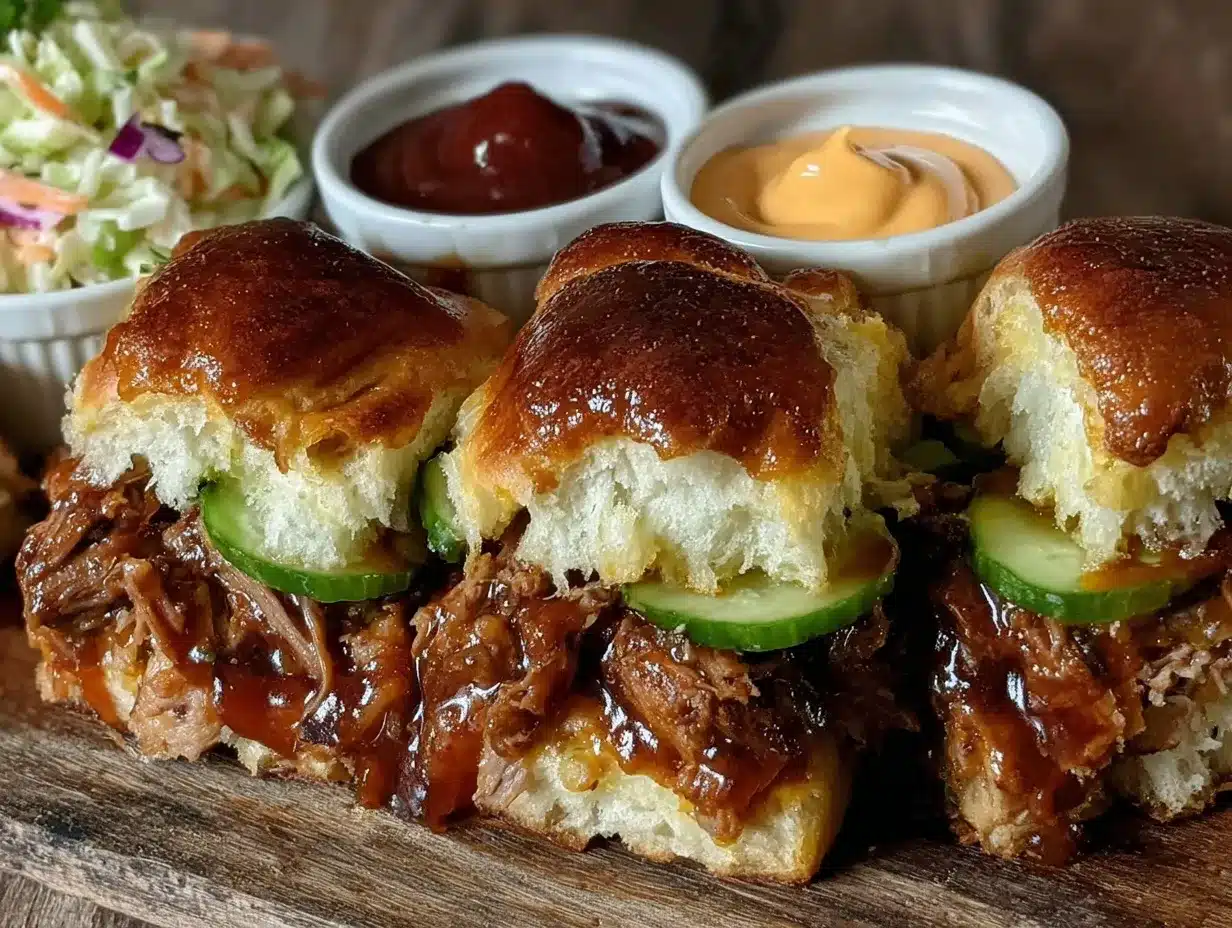
Pull-Apart Slider Bar Recipe with 3 Irresistible Homemade Sauces

A flavorful pull-apart slider bar featuring soft, buttery rolls layered with savory protein filling, melted cheddar cheese, and served with three unique homemade sauces for a customizable and crowd-pleasing meal.
- Prep Time: 15 minutes
- Cook Time: 20 minutes
- Total Time: 35 minutes
- Yield: 12 sliders 1x
- Category: Main Course
- Cuisine: American
Ingredients
- 12 soft pull-apart slider buns (King’s Hawaiian preferred)
- 1 lb ground beef or shredded rotisserie chicken
- 8 oz sharp cheddar cheese, shredded
- 1 small yellow onion, finely diced
- 2 cloves garlic, minced
- 1/2 cup (113 g) butter, melted
- 2 tbsp chopped parsley or chives (optional)
- Salt and pepper to taste
- 1/2 cup smoky BBQ sauce (store-bought or homemade)
- 1/2 cup garlic herb aioli (made with 1/2 cup mayo, 1 minced garlic clove, 1 tbsp lemon juice, 1 tsp Dijon mustard)
- 3 tbsp Dijon mustard
- 2 tbsp honey
- 1 tsp hot sauce
Instructions
- Preheat oven to 350°F (175°C). Lightly grease a baking dish or 9×13 inch casserole pan.
- Heat a skillet over medium heat with a drizzle of oil. Sauté diced onion until translucent, about 3-4 minutes.
- Add minced garlic and cook for 30 seconds until fragrant.
- Add ground beef or chosen protein, break up with a spoon, and cook until browned, about 7-8 minutes. Season with salt and pepper. Drain excess fat if needed.
- Slice slider rolls horizontally, keeping buns attached at the bottom if possible.
- Place bottom halves of buns in the baking dish snugly.
- Layer cooked protein evenly over buns, then sprinkle shredded cheddar cheese on top.
- Place top halves of buns over cheese layer, pressing down lightly.
- Mix melted butter with chopped parsley (if using) and brush tops of buns thoroughly.
- Bake slider bar for 15-20 minutes until cheese melts and tops are golden brown. Optionally broil 1-2 minutes for extra browning, watching carefully.
- Meanwhile, prepare sauces: whisk garlic herb aioli ingredients and spicy honey mustard ingredients in small bowls; warm BBQ sauce if desired.
- Remove slider bar from oven and let rest 5 minutes before serving.
- Serve warm with the three sauces on the side for dipping or drizzling.
Notes
Use soft, slightly sweet rolls like King’s Hawaiian for best pull-apart texture. For gluten-free, substitute buns with gluten-free rolls or lettuce wraps. Brushing buns with butter and herbs before baking enhances flavor and browning. Let sliders rest 5 minutes after baking for easier pulling apart. Sauces can be made ahead and stored up to 5 days refrigerated. Leftovers keep well refrigerated for 3 days or frozen for up to 2 months.
Nutrition
- Serving Size: 1 slider
- Calories: 275
- Sugar: 5
- Sodium: 450
- Fat: 15
- Saturated Fat: 7
- Carbohydrates: 22
- Fiber: 1
- Protein: 14
Keywords: pull-apart sliders, slider bar, homemade sauces, party food, easy dinner, crowd-pleaser, slider recipe, BBQ sliders, garlic aioli, honey mustard