Let me set the scene for you: the scent of smoked meats and tangy cheeses mingling with bursts of fresh fruit—honestly, it’s enough to stop you in your tracks. The first time I put together a charcuterie board for a family get-together, I was instantly hooked. It was one of those moments where you pause, take a deep breath, and just smile because you know you’re onto something truly special (and let’s face it, who doesn’t love a table covered in gorgeous snacks?).
Years ago, when I was knee-high to a grasshopper, my grandma would set out platters of crackers and cheese, but I never realized how much fun you could have with a “perfect appetizer tray” until I tried making a charcuterie board myself. My first attempt wasn’t exactly Pinterest-worthy, but the way my family kept sneaking bites before dinner? That was the true mark of success. These boards have become a staple for our gatherings, whether it’s a rainy weekend or a holiday party. It’s dangerously easy to assemble, provides pure, nostalgic comfort, and honestly—every time I make it, I wish I’d discovered this trick years ago.
There’s something magical about seeing people’s faces light up when they spot a well-made charcuterie board. Kids go straight for the fruit and crackers, while adults linger, debating which cheese to try first. My friends always ask for my “assembly guide,” and I’m more than happy to share. You know what? This appetizer tray is perfect for potlucks, a sweet treat for your book club, or just to brighten up your Pinterest feed. I’ve tested every combination I could think of (in the name of research, of course), and now I can say with confidence—this charcuterie board belongs at every family gathering, holiday, or cozy night in. It honestly feels like a warm hug on a plate, and you’re going to want to bookmark this one!
Why You’ll Love This Recipe
Trust me, after countless family parties, book clubs, and impromptu Friday night gatherings, this perfect appetizer tray charcuterie board has proved its worth. Here’s why it’s such a winner—both from my own kitchen experiments and from feedback I’ve gotten over the years:
- Quick & Easy: Comes together in under 20 minutes, so you can whip it up for last-minute guests or unexpected cravings.
- Simple Ingredients: No need for specialty store runs—most items can be found at your local supermarket or are already hanging out in your fridge.
- Perfect for Any Occasion: Whether it’s brunch, a family movie night, potlucks, or holiday mornings, this tray fits right in.
- Crowd-Pleaser: Kids grab the grapes and crackers, adults go for the cheese and meats—there’s something for everyone.
- Unbelievably Delicious: The combo of textures and flavors—creamy, crunchy, salty, sweet—gives you that next-level comfort food feel.
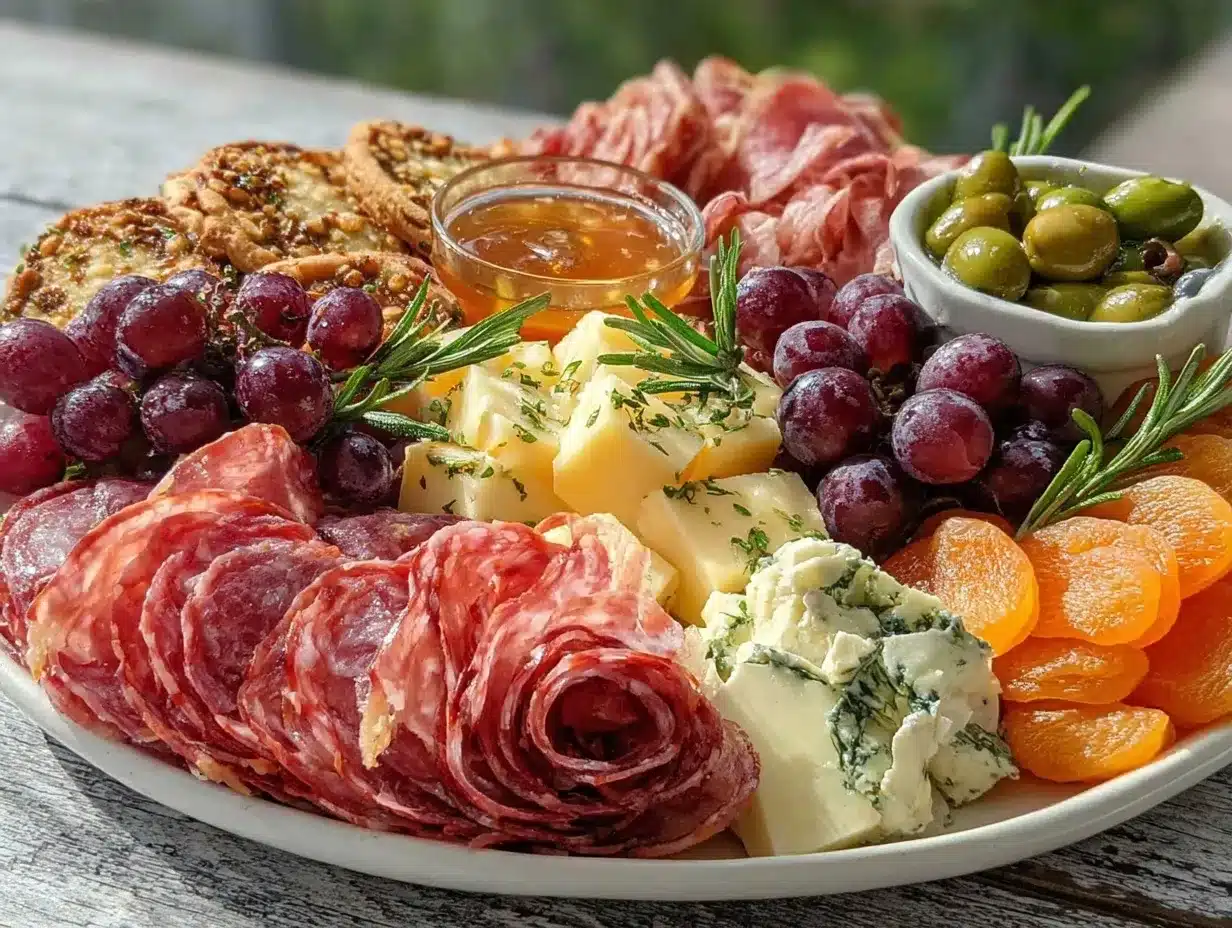
What sets my charcuterie board apart is the way I layer flavors and textures. Seriously, I’ve tried every trick—folding salami into little roses, adding honey for a hint of sweetness, and tossing in roasted nuts for crunch. Unlike the generic supermarket trays, mine always includes a couple of fun twists, like spicy jam or smoked gouda, that get people talking.
Honestly, this isn’t just another cheese and meat board—it’s the one that makes you close your eyes after the first bite and sigh with satisfaction. It’s comfort food reimagined: faster to build, easier to adapt, and just as soul-soothing as grandma’s snack trays. Perfect for impressing guests without breaking a sweat, or just turning a simple night into something memorable. Every time I serve it, I hear, “You always know how to make snacks feel special.” That’s the kind of feedback that keeps me making it over and over!
What Ingredients You Will Need
This perfect appetizer tray charcuterie board uses simple, wholesome ingredients to deliver bold flavors and satisfying texture—no fuss, all fun. Most of these are pantry staples, but you can easily swap in whatever’s seasonal or fits your taste.
- Cheeses
- Sharp cheddar (cubed or sliced; adds a tangy bite)
- Brie or camembert (soft, creamy, perfect for spreading)
- Smoked gouda or provolone (for depth and a hint of smokiness)
- Goat cheese (crumbled; bright and tangy)
- Meats
- Salami (thinly sliced; fold into rosettes for visual appeal)
- Prosciutto (delicate and salty)
- Pepperoni (classic, kid-friendly)
- Chorizo or soppressata (for a spicy kick)
- Crackers & Bread
- Water crackers (neutral flavor, crisp texture)
- Multigrain crisps (adds hearty crunch)
- Mini breadsticks or sliced baguette (for dipping and spreading)
- Fruits
- Grapes (sweet and juicy—always a hit)
- Strawberries or sliced apples (seasonal, fresh)
- Dried apricots or figs (chewy, rich, pairs well with cheese)
- Blueberries or raspberries (scatter for color)
- Nuts
- Roasted almonds (crunchy, healthy)
- Pecans or walnuts (slightly sweet, great with brie)
- Condiments & Extras
- Honey or fig jam (drizzle on cheese for a sweet contrast)
- Whole grain mustard (for a bit of tang)
- Olives (green, black, or stuffed—adds briny pop)
- Pickles or cornichons (crisp, tangy palate cleansers)
In summer, swap in fresh berries instead of dried fruit. For gluten-free boards, use almond flour crackers or rice crisps. I personally love using Trader Joe’s cheeses and Columbus meats—they’re budget-friendly and consistently good. If you’re going dairy-free, try Miyoko’s vegan cheese wheels. Honestly, don’t stress if you’re missing an ingredient—just use what you have and play with the colors and textures. The board should look abundant and inviting!
Equipment Needed
- Large wooden or slate board (or any clean cutting board)
- Small bowls or ramekins (for jams, olives, and nuts)
- Cheese knives (a basic set, or even butter knives work in a pinch)
- Toothpicks or small forks (for picking up meats and cheeses)
- Serving tongs (optional, handy for larger gatherings)
- Paring knife (for slicing fruit and cheeses)
If you don’t have a fancy board, a rimmed baking sheet or even a large plate works just fine—I’ve used everything from pizza stones to cutting boards over the years. For bowls, I often grab mismatched ramekins; they add charm. Maintenance tip: wooden boards last longer when you rub them with mineral oil every few months. If you’re on a budget, check thrift stores for cheese knives and boards—they’re usually tucked in with the kitchen gadgets. Whatever tools you use, just make sure everything is clean and ready to go!
Preparation Method
- Choose Your Board
Select a large board or tray—wood, slate, or ceramic. Aim for at least 18×12 inches (45×30 cm) for a party-sized tray. Wipe clean and dry completely. - Arrange Bowls & Ramekins
Place small bowls for condiments, jams, olives, or nuts around the board. These anchor your layout and keep messy items contained. - Start with Cheese
Slice or cube cheeses for easy grabbing. Fan out slices, crumble goat cheese, and place soft cheeses near the edge for spreading. Allow cheeses to come to room temp (about 20 minutes)—they’ll taste best! - Add Meats
Fold or roll salami, prosciutto, and pepperoni. Arrange in waves or rosettes next to cheeses. If meats are sticking together, separate with parchment paper pieces. - Scatter Crackers & Bread
Fan out crackers in lines or small piles. Tuck bread slices in corners or alongside cheeses for dipping. Keep gluten-free options together for easy grabbing. - Layer Fruits
Add grapes, berries, and sliced fruits in clusters. Place near cheeses for easy pairing. If using apples, brush slices lightly with lemon juice to prevent browning. - Add Nuts & Extras
Sprinkle nuts around the board for crunch. Drop olives and pickles into bowls or nestle into gaps. Drizzle honey or jam beside soft cheese for dipping. - Fill in Gaps
Use extra crackers, fruit, or nuts to fill empty spaces—this gives a “bountiful” look. The board should feel abundant, not sparse. - Final Touches
Add cheese knives and small forks. Tuck in fresh herbs (rosemary, thyme) for aroma and color, if you have them. Step back and check—board should look balanced and colorful. - Troubleshooting
If cheeses sweat or stick, chill briefly before serving. Crackers getting soggy? Place on top of parchment or wait to add until just before serving. If you’re short on space, stack ingredients vertically for visual interest.
I always prep ingredients ahead—slice cheeses, wash fruit, and portion nuts into bowls. Assembly takes 10-15 minutes. If your board looks flat, add extra color with herbs or dried fruit. My best tip? Don’t overthink it! People love an imperfect, abundant tray. And if you’re running late, just pile everything on and call it “rustic.” Works every time.
Cooking Tips & Techniques
Putting together the perfect appetizer tray charcuterie board is more about assembly than actual cooking, but there are some pro tips I’ve learned the hard way:
- Let Cheeses Breathe: Always let cheeses sit out for 20-30 minutes before serving. Flavors develop and textures soften up—trust me, cold cheese is never as good.
- Layer Flavors: Don’t put all the salty items together; spread out meats, cheeses, and sweet extras so every bite is balanced. I once piled all the spicy meats in one spot—my uncle nearly set his mouth on fire!
- Play with Textures: Combine creamy, crunchy, chewy, and crisp—think soft brie, crunchy nuts, chewy dried fruits, and crisp crackers. Too much of one texture gets boring.
- Keep Wet Away from Dry: Place pickles, olives, and jams in bowls so crackers and bread stay crisp. I learned this lesson after a soggy disaster at one family party!
- Multi-task the Prep: Slice cheeses and fruits while meats come to room temperature. Get kids involved in arranging crackers—they love helping.
- Consistency is Key: Cut cheese and meats into similar sizes—makes grabbing easier and looks professional. Oddly sized chunks can be tricky (and sometimes a little awkward).
- Personal Failures: Don’t crowd the board! My first charcuterie attempt was so packed, guests struggled to grab anything. Leave small gaps for easy serving.
Honestly, the best charcuterie boards are the ones that look inviting but not too perfect. Odd shapes, a little overflow—it all adds to the charm. And if you forget an ingredient? No one will even notice. Just enjoy the moment and let everyone dig in!
Variations & Adaptations
One of my favorite things about a charcuterie board is how endlessly adaptable it is. Here are some fun ways to switch things up:
- Dietary Variations: For a vegetarian board, skip the meats and add roasted veggies (like marinated artichokes or grilled peppers). Gluten-free? Use rice crackers or almond flour crisps.
- Seasonal Swaps: In winter, add candied pecans and dried cranberries. In summer, use fresh cherries, peaches, or even melon slices.
- Flavor Twists: Add spicy jalapeño jam, smoked almonds, or blue cheese for bold flavors. Love heat? Toss in peppered salami or hot honey.
- Cooking Methods: Try grilling bread slices for a smoky crunch. Oven-roast nuts with rosemary for added flavor.
- Allergen Substitutions: Dairy-free cheese wheels (like Miyoko’s) and nut-free crackers work great for sensitive guests. Sunflower seeds offer crunch for those who can’t have tree nuts.
- Personal Touch: I once swapped in pickled carrots and homemade cranberry relish—my family loved the tangy surprise!
Don’t be afraid to mix and match—build your board based on what you love and what’s available. The perfect appetizer tray charcuterie board is meant to be customized, so make it your own!
Serving & Storage Suggestions
Serve your charcuterie board at room temperature for the best flavors—cheeses and meats really shine this way. Arrange everything right before guests arrive, and add final touches (like fresh herbs) last. Presentation matters: use varied heights and colors for a Pinterest-worthy look.
- Serving Suggestions: Pair with crisp white wine, sparkling water, or fruity iced tea. Add small plates and napkins for easy snacking.
- Complementary Dishes: Offer a simple salad, mini quiches, or veggie sticks on the side.
- Storage: Leftovers can be wrapped tightly and refrigerated for up to three days. Store crackers separately so they stay crisp. Cheese is happiest in wax paper or a sealed tub.
- Reheating: Bread can be briefly warmed in the oven (325°F/160°C for 5 minutes). Cheeses and meats should be served cold or at room temperature—no need to reheat.
- Flavor Development: Cheeses mellow and blend after a day in the fridge—sometimes leftovers taste even better!
If you’re prepping ahead, slice cheese and fruit, portion nuts, and cover everything tightly. Assemble the board just before serving for maximum freshness and visual appeal.
Nutritional Information & Benefits
Here’s a quick breakdown for a standard serving (about 1/8 of the board):
- Calories: 350-450
- Protein: 15-20g
- Fat: 22-28g
- Carbs: 20-30g
- Sodium: 600-900mg
The perfect appetizer tray charcuterie board is packed with protein from meats and cheeses, healthy fats from nuts, and vitamins from fruit. It’s naturally gluten-free if you choose the right crackers, and can easily be made dairy-free. Watch for allergens—dairy, nuts, and gluten are common, so offer substitutions for sensitive guests.
From my own wellness journey, I love that this board encourages mindful snacking—lots of variety, small portions, and a balance of flavors. It’s a treat that feels indulgent but can be surprisingly nutritious if you build it thoughtfully!
Conclusion
Why try this perfect appetizer tray charcuterie board? It’s easy, fun, and guaranteed to impress—whether you’re hosting a crowd or enjoying a cozy night in. You can customize it endlessly based on your tastes, dietary needs, or seasonal ingredients. Honestly, I love this recipe because it brings people together and sparks conversation (plus, it’s just plain delicious!).
Give it a go—mix and match your favorite flavors, textures, and colors. I’d love to hear what combos you create, so drop a comment below, share your board on Pinterest, or tag me with your twist. The best charcuterie boards are the ones that reflect your style and make you smile. Here’s to many happy snack times ahead—enjoy every bite!
FAQs
How do I keep crackers from getting soggy on my charcuterie board?
Place wet ingredients like pickles, olives, and jams in bowls or ramekins, and add crackers just before serving. This keeps everything crisp and fresh!
What are some good vegetarian substitutes for meats?
Try marinated grilled vegetables, roasted chickpeas, and extra cheeses. Hummus or bean dips also add great flavor and protein.
Can I make a charcuterie board ahead of time?
You can slice cheeses, fruits, and portion out nuts and meats ahead. Assemble the board right before serving to keep everything looking and tasting fresh.
How big should my board be for a party?
For 8-10 people, an 18×12 inch (45×30 cm) board works well. For larger groups, use multiple boards or trays.
What drinks pair best with a charcuterie board?
White wine, rosé, sparkling water, or fruity iced teas are great choices. For something cozy, try pairing with apple cider or even a light beer!
Pin This Recipe!
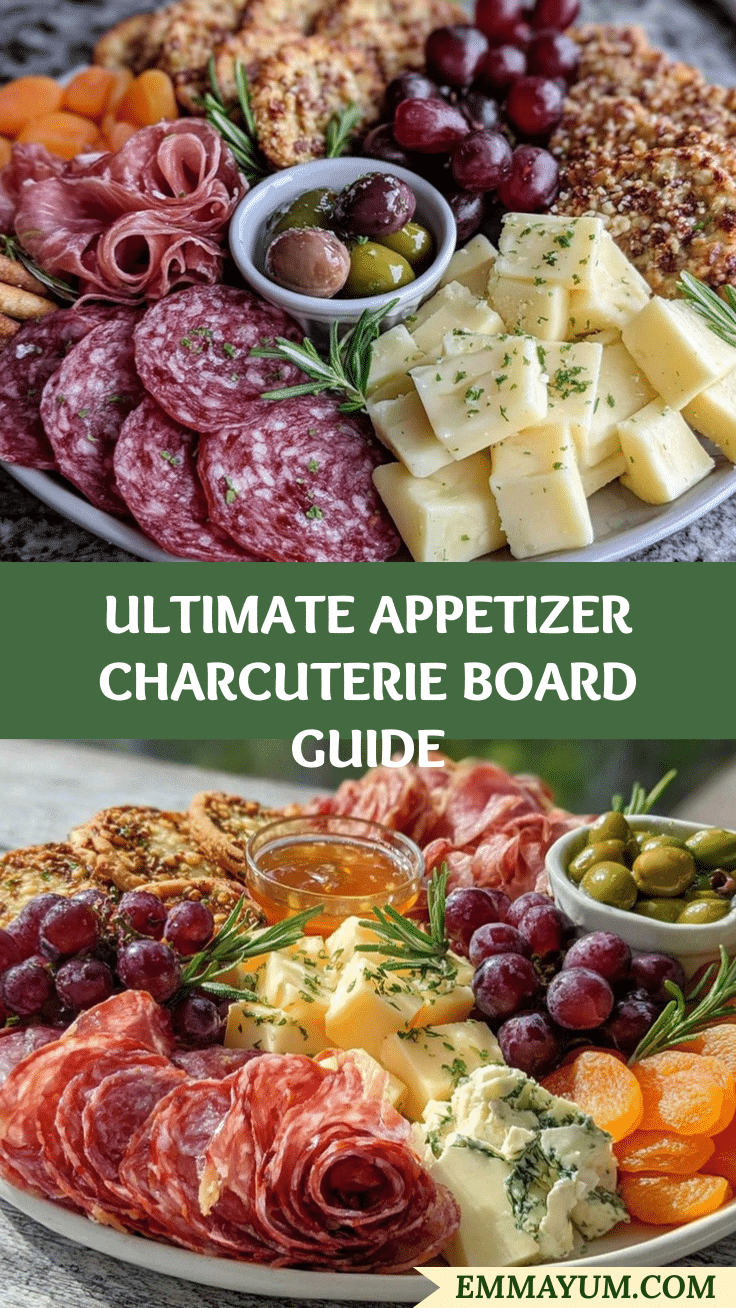
Perfect Appetizer Tray Charcuterie Board Guide: Easy Assembly Tips

This charcuterie board is a crowd-pleasing appetizer tray packed with cheeses, meats, fruits, nuts, and condiments. It’s quick to assemble, endlessly customizable, and perfect for gatherings, holidays, or cozy nights in.
- Prep Time: 15 minutes
- Cook Time: 0 minutes
- Total Time: 15 minutes
- Yield: 8 servings
- Category: Appetizer
- Cuisine: American
Ingredients
- Sharp cheddar cheese, cubed or sliced
- Brie or camembert cheese
- Smoked gouda or provolone cheese
- Goat cheese, crumbled
- Salami, thinly sliced
- Prosciutto
- Pepperoni
- Chorizo or soppressata
- Water crackers
- Multigrain crisps
- Mini breadsticks or sliced baguette
- Grapes
- Strawberries or sliced apples
- Dried apricots or figs
- Blueberries or raspberries
- Roasted almonds
- Pecans or walnuts
- Honey or fig jam
- Whole grain mustard
- Olives (green, black, or stuffed)
- Pickles or cornichons
Instructions
- Choose a large board or tray (wood, slate, or ceramic), at least 18×12 inches. Wipe clean and dry.
- Arrange small bowls or ramekins for condiments, jams, olives, or nuts around the board.
- Slice or cube cheeses for easy grabbing. Fan out slices, crumble goat cheese, and place soft cheeses near the edge for spreading. Allow cheeses to come to room temperature (about 20 minutes).
- Fold or roll salami, prosciutto, and pepperoni. Arrange in waves or rosettes next to cheeses. Separate meats with parchment paper if needed.
- Fan out crackers in lines or small piles. Tuck bread slices in corners or alongside cheeses for dipping. Keep gluten-free options together.
- Add grapes, berries, and sliced fruits in clusters near cheeses. Brush apple slices lightly with lemon juice to prevent browning.
- Sprinkle nuts around the board for crunch. Drop olives and pickles into bowls or nestle into gaps. Drizzle honey or jam beside soft cheese for dipping.
- Fill in gaps with extra crackers, fruit, or nuts for a bountiful look.
- Add cheese knives and small forks. Tuck in fresh herbs (rosemary, thyme) for aroma and color, if desired. Step back and check for balance and color.
- Troubleshooting: If cheeses sweat or stick, chill briefly before serving. Add crackers just before serving to keep them crisp. Stack ingredients vertically for visual interest if space is limited.
Notes
Customize the board with seasonal fruits, gluten-free or dairy-free options, and your favorite condiments. Let cheeses come to room temperature for best flavor. Keep wet ingredients in bowls to prevent soggy crackers. Assemble just before serving for freshness. For vegetarian boards, skip meats and add roasted veggies or extra cheese.
Nutrition
- Serving Size: About 1/8 of the boa
- Calories: 400
- Sugar: 8
- Sodium: 750
- Fat: 25
- Saturated Fat: 10
- Carbohydrates: 25
- Fiber: 3
- Protein: 18
Keywords: charcuterie board, appetizer tray, cheese board, party snacks, easy entertaining, holiday appetizer, grazing board, meat and cheese platter, crowd pleaser, potluck