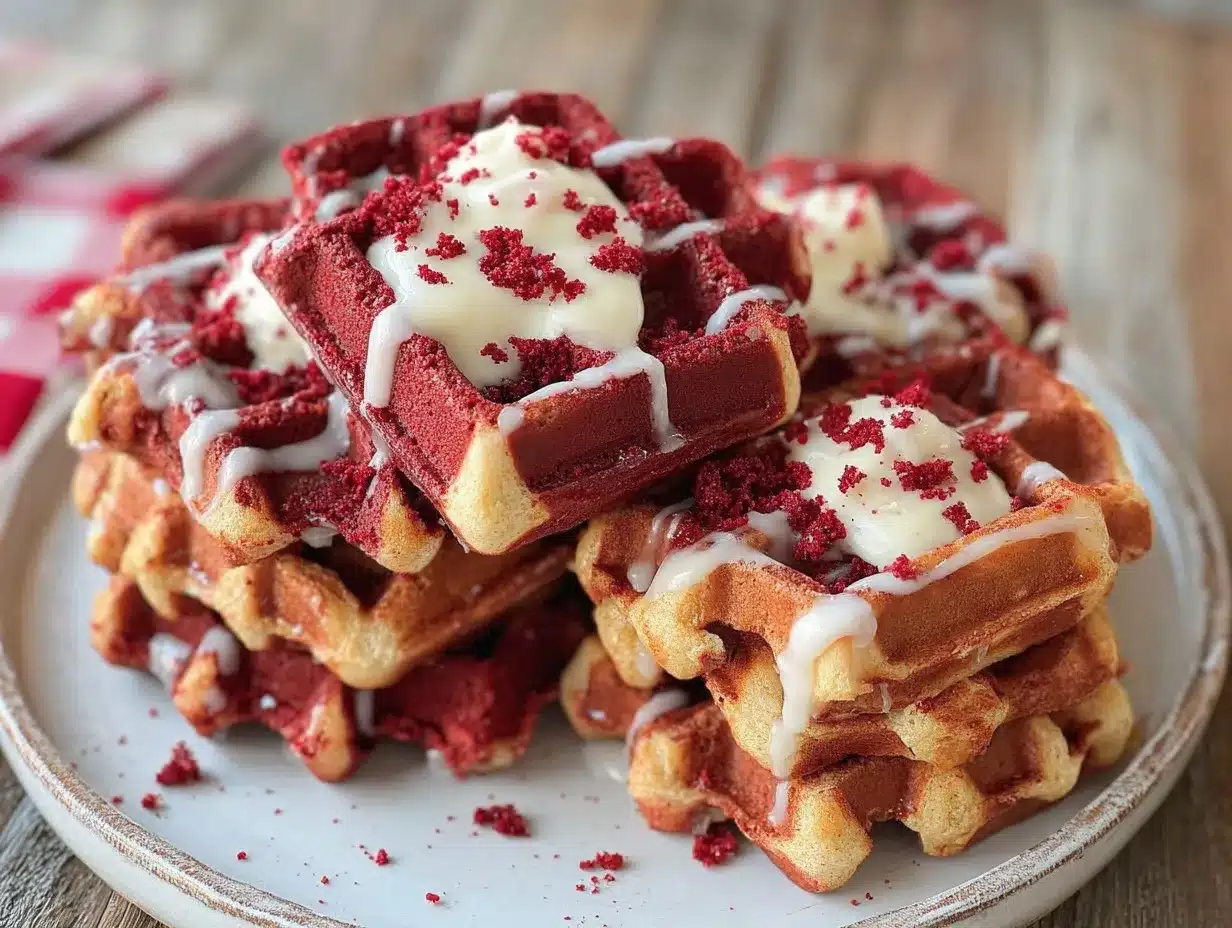
Let me tell you, the scent of cocoa and vanilla swirling through warm, freshly made waffles is enough to flip anyone’s morning right-side up. The first time I made these fluffy red velvet waffles with cream cheese syrup, I was instantly hooked. It was one of those rare moments where you pause, take a deep breath, and just smile because you know you’re onto something truly special. I remember when I was knee-high to a grasshopper, my grandma’s kitchen was the heart of every celebration, and while she never made red velvet waffles, she had a knack for turning simple ingredients into pure, nostalgic comfort. Years ago, I stumbled upon this recipe while trying to recreate that kind of magic on a rainy weekend — and honestly, I wish I’d discovered this sooner.
My family couldn’t stop sneaking them off the cooling rack (and I can’t really blame them). The cream cheese syrup, silky and just sweet enough, is dangerously easy to whip up and pairs perfectly with the waffles’ tender crumb. You know what makes these waffles stand out? That delicate balance of fluffiness and the rich, chocolatey red velvet flavor, all topped with a luscious syrup that feels like a warm hug on a chilly morning. They’re perfect for weekend brunches, sweet treats for your kids, or just brightening up your Pinterest breakfast board.
After testing this recipe multiple times (in the name of research, of course), it’s become a staple for family gatherings and gifting. Trust me — you’re going to want to bookmark this one and keep it in your regular rotation.
Why You’ll Love This Recipe
Having whipped up these fluffy red velvet waffles with cream cheese syrup more times than I can count, I can confidently say this recipe hits all the right notes. Here’s why it’s a keeper:
- Quick & Easy: Comes together in under 30 minutes, perfect for busy mornings or last-minute brunch plans.
- Simple Ingredients: No fancy grocery trips needed; you likely already have everything in your pantry and fridge.
- Perfect for Special Occasions: Whether Valentine’s Day, birthdays, or just because, these waffles add a festive pop of color and flavor.
- Crowd-Pleaser: Kids adore the bright red color, and adults rave about the rich cream cheese syrup.
- Unbelievably Delicious: The texture is fluffy yet substantial, with a subtle cocoa undertone that’s balanced by the sweet, tangy syrup.
This isn’t just another waffle recipe — the secret lies in the way the batter is made fluffy without heaviness, and how the cream cheese syrup isn’t overly sweet but perfectly creamy. It’s comfort food that feels special, and honestly, it’s the kind of recipe that makes you close your eyes after the first bite. Whether you’re impressing guests or treating yourself to a cozy morning, these waffles deliver memorable flavor without fuss.
What Ingredients You Will Need
This recipe uses simple, wholesome ingredients to deliver bold flavor and a satisfying texture without any fuss. Most are pantry staples, and substitutions are easy if you need them.
- For the Waffles:
- All-purpose flour – 1 ¾ cups (220g)
- Granulated sugar – ¼ cup (50g)
- Cocoa powder, unsweetened – 2 tbsp (use a good quality brand like Ghirardelli for best flavor)
- Baking powder – 1 ½ tsp
- Baking soda – ½ tsp
- Salt – ¼ tsp
- Buttermilk – 1 ½ cups (360ml) (adds tenderness; swap with milk + 1 tbsp vinegar if needed)
- Vegetable oil – ½ cup (120ml) (can substitute melted coconut oil)
- Large eggs – 2, room temperature
- Vanilla extract – 1 tsp
- Red food coloring – 2 tbsp (gel food coloring works best for vibrant color)
- White vinegar – 1 tsp (adds a slight tang and helps with fluffiness)
- For the Cream Cheese Syrup:
- Cream cheese – 4 oz (115g), softened (I recommend Philadelphia for smooth texture)
- Powdered sugar – 1 cup (120g)
- Milk – ¼ cup (60ml) (use dairy-free milk like almond or oat for a vegan twist)
- Vanilla extract – ½ tsp
- Butter – 2 tbsp (28g), softened (optional for richer syrup)
Feel free to swap all-purpose flour with gluten-free flour blend if you want a gluten-free option. For a healthier spin, you can replace sugar with coconut sugar or maple syrup, though this will slightly alter the texture and sweetness.
Equipment Needed
- Waffle iron – essential for shaping those classic crispy-edged waffles. A Belgian waffle maker gives thicker, fluffier results.
- Mixing bowls – one large for dry ingredients, one for wet.
- Whisk and spatula – for combining batter smoothly without overmixing.
- Measuring cups and spoons – precise measurements matter for fluffiness!
- Electric hand mixer or stand mixer (optional) – handy for whipping the cream cheese syrup silky smooth.
- Saucepan – to gently warm the syrup ingredients if you prefer a warm drizzle.
If you don’t have a waffle iron, a non-stick griddle or skillet can work in a pinch, but the texture and shape will be different. I’ve tried budget-friendly waffle makers from Hamilton Beach and have found they heat evenly and clean up easily. Remember to keep your waffle iron well-seasoned or lightly oiled for the best release.
Preparation Method
- Preheat your waffle iron according to manufacturer’s instructions. This usually takes about 5-7 minutes.
- Mix the dry ingredients: In a large bowl, whisk together 1 ¾ cups (220g) all-purpose flour, ¼ cup (50g) granulated sugar, 2 tbsp unsweetened cocoa powder, 1 ½ tsp baking powder, ½ tsp baking soda, and ¼ tsp salt. Make sure these are well combined to avoid uneven rising.
- Combine the wet ingredients: In a separate bowl, beat together 1 ½ cups (360ml) buttermilk, ½ cup (120ml) vegetable oil, 2 large eggs (room temp), 1 tsp vanilla extract, 2 tbsp red food coloring, and 1 tsp white vinegar. The vinegar reacts with baking soda to add extra fluffiness, so don’t skip it!
- Make the batter: Pour the wet mixture into the dry ingredients and gently fold together using a spatula. Stir just until combined — a few lumps are okay. Overmixing can make waffles tough.
- Cook the waffles: Lightly grease your waffle iron with oil or cooking spray. Pour about ¾ cup (180ml) of batter onto the center of the iron, spreading slightly. Close the lid and cook for 4-5 minutes, or until steam stops escaping and waffles are crisp on the outside but tender inside.
- Keep waffles warm: Place cooked waffles on a wire rack in a warm oven (about 200°F/95°C) while you finish cooking the rest to keep them crisp.
- Prepare the cream cheese syrup: In a mixing bowl, beat 4 oz (115g) softened cream cheese with 1 cup (120g) powdered sugar until smooth. Gradually add ¼ cup (60ml) milk and ½ tsp vanilla extract, beating until silky and pourable. For a richer syrup, beat in 2 tbsp softened butter. If you prefer a warm syrup, gently heat in a saucepan over low heat, stirring until combined — don’t boil!
- Serve: Stack waffles on plates and generously drizzle with cream cheese syrup. Add fresh berries or a dusting of powdered sugar for extra flair.
Pro tip: If your batter feels too thick, add a splash more buttermilk. If too thin, a spoonful of flour will help. Remember, each waffle iron varies, so adjust cooking time accordingly. The waffles should have crispy edges with a soft, fluffy center — the telltale sign you nailed it!
Cooking Tips & Techniques
Getting fluffy red velvet waffles just right can be a bit tricky if you’re new to waffle making. Here’s what I’ve learned after plenty of trial and error:
- Don’t overmix the batter. It’s tempting to stir it smooth, but lumps keep the waffles tender. Mix until just combined.
- Use room temperature eggs. This helps the batter come together better and results in fluffier waffles.
- Preheat your waffle iron fully. Waffles cooked on a cold iron end up soggy and pale. You want that golden, crispy exterior.
- Lightly grease the waffle iron. Even non-stick models benefit from a quick brush of oil or spray to prevent sticking.
- Keep waffles warm on a wire rack. Placing them directly on a plate traps steam and ruins crispness.
- For the cream cheese syrup, soften ingredients properly. Cold cream cheese can be lumpy, so give it time to come to room temp or warm slightly.
- Timing is key. Make the syrup while waffles cook to serve immediately. Fresh waffles and warm syrup? Pure magic.
Once, I tried speeding up the process by making the syrup the night before. The texture got a bit thick and lost that fresh, pourable quality. Fresh is best, trust me on this one.
Variations & Adaptations
Fluffy red velvet waffles with cream cheese syrup are versatile and easy to tweak. Here are some ideas I’ve tried (and loved):
- Vegan version: Use dairy-free milk like almond or oat, vegan cream cheese, and flax eggs (1 tbsp ground flax + 3 tbsp water per egg). Coconut oil works great instead of vegetable oil.
- Berry twist: Fold fresh or frozen raspberries into the batter for a fruity pop that complements the cocoa flavor beautifully.
- Spiced red velvet: Add ½ tsp cinnamon and a pinch of nutmeg to the dry ingredients for a warm, cozy vibe — perfect for fall mornings.
- Gluten-free option: Swap all-purpose flour with a 1:1 gluten-free baking flour blend. Add 1 tsp xanthan gum if your blend doesn’t contain it to improve texture.
- Chocolate chips: Toss in mini white chocolate chips for a sweet surprise in every bite.
Personally, I often make a double batch of the cream cheese syrup and keep some in the fridge for drizzling over pancakes or toast during the week. It keeps well and adds a little luxury to everyday breakfasts.
Serving & Storage Suggestions
These waffles are best served hot and fresh, drizzled with cream cheese syrup and a sprinkle of powdered sugar or fresh berries. They pair beautifully with a cup of strong coffee or a creamy latte to balance the sweetness.
If you need to store leftovers, let waffles cool completely, then stack with parchment paper between each and store in an airtight container in the refrigerator for up to 2 days or freeze for up to 1 month. To reheat, pop them in a toaster or oven at 350°F (175°C) for 5-7 minutes until crisp again — this keeps that perfect texture intact.
Interestingly, the cream cheese syrup thickens a bit in the fridge, so give it a quick whisk or warm gently before serving again. Over time, the flavors meld and the syrup tastes even richer, so don’t shy away from making it ahead for parties or brunches.
Nutritional Information & Benefits
One serving (1 waffle plus syrup) roughly contains:
| Calories | 350-400 |
|---|---|
| Protein | 7g |
| Carbohydrates | 45g |
| Fat | 16g |
| Fiber | 2g |
The recipe’s key ingredients offer some benefits too: cocoa powder is rich in antioxidants, and buttermilk adds a nice dose of calcium and probiotics. Using real cream cheese gives a creamy texture with some protein, while red food coloring is purely aesthetic (feel free to reduce or omit if you prefer a milder look). For those watching carbs, swapping half the flour for almond flour lowers the carbohydrate load without sacrificing fluffiness.
Just a heads-up: this recipe contains dairy, gluten, and eggs, so it’s not suitable for those with allergies to these ingredients unless adapted.
Conclusion
Fluffy red velvet waffles with cream cheese syrup are truly a treat worth making. They strike that perfect balance of festive color, rich flavor, and tender texture that makes mornings feel special. I encourage you to customize the recipe to your taste — whether that means adding spices, berries, or going dairy-free, there’s room to make this your own.
This recipe holds a special place in my heart because it brings a little celebration to everyday life, and honestly, it’s so simple you can whip it up any day you want a warm, comforting hug on a plate. If you try it, please share your thoughts or your own twists — I love hearing how these waffles brighten up your table!
Give it a go, and trust me, you’ll be bookmarking this one for years to come.
Frequently Asked Questions
Can I make the cream cheese syrup ahead of time?
Yes! You can prepare it up to 2 days ahead and store in the fridge. Just whisk it before serving, and warm gently if you want a pourable consistency.
What can I use instead of red food coloring?
Beet juice or powder is a natural alternative that gives a reddish hue but may alter flavor slightly. Or simply omit for chocolate-flavored waffles without the red tint.
How do I keep waffles crispy after cooking?
Place them on a wire rack in a warm oven (about 200°F/95°C) instead of stacking them directly on a plate. This prevents sogginess from steam.
Can I freeze the waffles?
Absolutely! Freeze them in a single layer with parchment paper between waffles. Reheat in a toaster or oven for best texture.
Is there a dairy-free way to make the cream cheese syrup?
Yes, swap regular cream cheese for a plant-based cream cheese and use your preferred non-dairy milk. Adjust sweetness as needed.
Pin This Recipe!
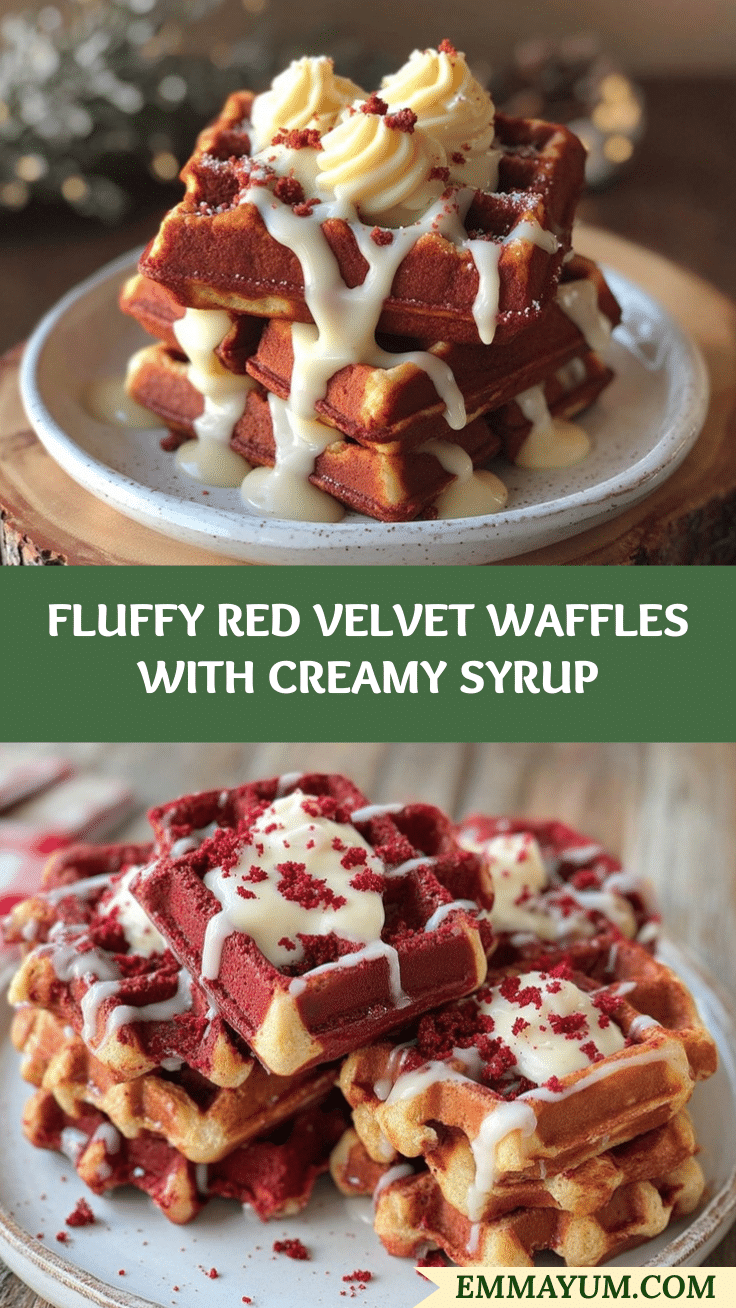
Fluffy Red Velvet Waffles Recipe with Easy Cream Cheese Syrup

These fluffy red velvet waffles feature a tender crumb with rich cocoa flavor, topped with a silky, sweet cream cheese syrup. Perfect for special occasions or a cozy weekend brunch.
- Prep Time: 10 minutes
- Cook Time: 15 minutes
- Total Time: 25 minutes
- Yield: 6 waffles (about 3 servings) 1x
- Category: Breakfast
- Cuisine: American
Ingredients
- 1 ¾ cups (220g) all-purpose flour
- ¼ cup (50g) granulated sugar
- 2 tbsp unsweetened cocoa powder
- 1 ½ tsp baking powder
- ½ tsp baking soda
- ¼ tsp salt
- 1 ½ cups (360ml) buttermilk (or milk + 1 tbsp vinegar)
- ½ cup (120ml) vegetable oil (or melted coconut oil)
- 2 large eggs, room temperature
- 1 tsp vanilla extract
- 2 tbsp red food coloring (gel preferred)
- 1 tsp white vinegar
- 4 oz (115g) cream cheese, softened
- 1 cup (120g) powdered sugar
- ¼ cup (60ml) milk (dairy or dairy-free)
- ½ tsp vanilla extract
- 2 tbsp (28g) butter, softened (optional)
Instructions
- Preheat your waffle iron according to manufacturer’s instructions (about 5-7 minutes).
- In a large bowl, whisk together flour, sugar, cocoa powder, baking powder, baking soda, and salt until well combined.
- In a separate bowl, beat together buttermilk, vegetable oil, eggs, vanilla extract, red food coloring, and white vinegar.
- Pour the wet ingredients into the dry ingredients and gently fold with a spatula until just combined; lumps are okay. Avoid overmixing.
- Lightly grease the waffle iron with oil or cooking spray. Pour about ¾ cup (180ml) batter onto the center, spread slightly, close lid, and cook for 4-5 minutes until steam stops and waffles are crisp outside but tender inside.
- Place cooked waffles on a wire rack in a warm oven (200°F/95°C) to keep warm and crisp while cooking remaining waffles.
- For the cream cheese syrup, beat softened cream cheese with powdered sugar until smooth. Gradually add milk and vanilla extract, beating until silky and pourable. Optionally, beat in softened butter for richer syrup. Warm gently in a saucepan if desired, do not boil.
- Serve waffles stacked and generously drizzled with cream cheese syrup. Optionally garnish with fresh berries or powdered sugar.
Notes
Do not overmix the batter to keep waffles tender. Use room temperature eggs for fluffiness. Preheat waffle iron fully and lightly grease to prevent sticking. Keep waffles warm on a wire rack to maintain crispness. For cream cheese syrup, soften ingredients well and prepare fresh for best texture. Adjust batter thickness with buttermilk or flour as needed.
Nutrition
- Serving Size: 1 waffle with cream
- Calories: 375
- Sugar: 18
- Sodium: 350
- Fat: 16
- Saturated Fat: 6
- Carbohydrates: 45
- Fiber: 2
- Protein: 7
Keywords: red velvet waffles, cream cheese syrup, fluffy waffles, breakfast recipe, brunch, easy waffles, cocoa waffles