Let me tell you, the scent of rich chocolate mingling with sweet, tart cherries wafting from my kitchen is enough to make anyone’s mouth water. The first time I baked these Flavorful Cherry Chocolate Kiss Cookies, I was instantly hooked—the kind of moment where you pause, take a deep breath, and just smile because you know you’re onto something truly special. Years ago, when I was knee-high to a grasshopper, my grandma used to bake these little gems for holiday gatherings, and I never quite forgot that cozy feeling of biting into one.
Honestly, these cookies bring back pure, nostalgic comfort with every bite. My family couldn’t stop sneaking them off the cooling rack (and I can’t really blame them). They’re dangerously easy to make and perfect for potlucks, sweet treats for your kids, or just brightening up your Pinterest cookie board. You know what? I’ve tested this recipe multiple times in the name of research, of course, and it’s become a staple for family gatherings and gifting. If you’re looking for a homemade cookie recipe that feels like a warm hug, you’re going to want to bookmark this one.
Why You’ll Love This Recipe
Let’s face it, finding a cookie recipe that balances flavor, texture, and ease is a win. Here’s why these Flavorful Cherry Chocolate Kiss Cookies should be on your must-make list:
- Quick & Easy: Comes together in under 30 minutes, perfect for busy weeknights or last-minute cravings.
- Simple Ingredients: No fancy grocery trips needed; you likely already have everything in your kitchen.
- Perfect for Any Occasion: Great for cozy dinners, holiday mornings, or sharing at potlucks.
- Crowd-Pleaser: Always gets rave reviews from kids and adults alike—cherry and chocolate is a combo that never disappoints.
- Unbelievably Delicious: The chewy cherry bits paired with the melty chocolate kiss create a next-level comfort food experience.
This recipe isn’t just another cookie—it’s the best version I’ve tried. The secret lies in using just the right balance of sweet cherries and rich chocolate kisses that melt perfectly on top. Honestly, after the first bite, you close your eyes and savor the moment. It’s comfort food reimagined—fast, fuss-free, but packed with soul-soothing satisfaction. Whether you want to impress guests without stress or turn a simple afternoon into something memorable, these cookies fit the bill.
What Ingredients You Will Need
This recipe uses simple, wholesome ingredients to deliver bold flavor and satisfying texture without the fuss. Most are pantry staples, with a few seasonal touches you can swap in or out depending on your mood.
- All-purpose flour – 2 cups (240g), for that perfect cookie structure
- Baking soda – 1/2 teaspoon, helps the cookies rise just right
- Salt – 1/4 teaspoon, balances the sweetness
- Unsalted butter, softened – 3/4 cup (170g) (I prefer using Land O’Lakes for a rich flavor)
- Granulated sugar – 3/4 cup (150g), brings sweetness without overpowering
- Brown sugar, packed – 1/4 cup (50g), adds moisture and chewiness
- Large egg – 1, room temperature for best mixing
- Vanilla extract – 1 teaspoon, pure for that warm aroma
- Dried tart cherries, chopped – 3/4 cup (about 100g), the star ingredient adding bursts of tangy sweetness (fresh or frozen cherries swapped in summer)
- Chocolate kisses – about 36 pieces (one per cookie), semi-sweet or milk chocolate based on preference
Substitution tip: For gluten-free cookies, swap the all-purpose flour with a gluten-free blend of equal weight. If you prefer dairy-free, use coconut oil in place of butter and dairy-free chocolate kisses.
Equipment Needed
- Mixing bowls – a large one for dry ingredients and a medium one for wet
- Electric mixer or sturdy wooden spoon – I find an electric hand mixer speeds things up, but a wooden spoon works fine too
- Baking sheet(s) – lined with parchment paper or silicone baking mats to prevent sticking
- Measuring cups and spoons – for precise ingredient amounts
- Cooling rack – helps cookies cool evenly without getting soggy
- Optional: cookie scoop – makes evenly sized cookies and keeps your hands clean
If you don’t have a cookie scoop, a tablespoon works just fine too. I’ve used inexpensive silicone mats that last forever and save on cleanup—highly recommend grabbing one if you bake often. Keeping your baking sheets clean and dry between batches really helps cookies bake evenly, a little tip I learned the hard way.
Preparation Method
- Preheat your oven to 350°F (175°C). Line your baking sheets with parchment paper or silicone mats—this keeps cookies from sticking and helps with even baking. (10 minutes prep)
- Mix the dry ingredients: In a large bowl, whisk together 2 cups (240g) all-purpose flour, 1/2 teaspoon baking soda, and 1/4 teaspoon salt. Set this aside. (5 minutes)
- Cream the butter and sugars: In a medium bowl, use an electric mixer or wooden spoon to beat 3/4 cup (170g) softened unsalted butter, 3/4 cup (150g) granulated sugar, and 1/4 cup (50g) packed brown sugar until the mixture is light and fluffy. This usually takes about 3-4 minutes—don’t rush this step because it sets the foundation for soft cookies.
- Add egg and vanilla: Beat in 1 large room temperature egg and 1 teaspoon pure vanilla extract until combined. The batter will look creamy and smooth. (2 minutes)
- Combine wet and dry: Gradually add the dry ingredients to the butter mixture, stirring just until combined. Be careful not to overmix; the dough should be soft but not sticky. Overmixing can make cookies tough. (3 minutes)
- Fold in chopped dried tart cherries: Gently fold in 3/4 cup (100g) chopped dried cherries. These little bursts of tang make all the difference. (1 minute)
- Scoop the dough: Using a cookie scoop or tablespoon, drop rounded balls of dough about 2 inches apart on your prepared baking sheets. (5 minutes)
- Bake: Place in the preheated oven and bake for 10-12 minutes. You’ll know they’re ready when the edges are set but the centers still look slightly soft. (Tip: Keep an eye on the first batch to avoid overbaking.)
- Add chocolate kisses: Immediately after taking the cookies out of the oven, press one chocolate kiss gently into the center of each cookie. The heat will melt the base slightly, securing the kiss as it cools. (2 minutes)
- Cool: Let the cookies cool on the baking sheet for 5 minutes before transferring to a wire rack to cool completely. This helps them firm up without breaking apart. (15-20 minutes cooling)
If you want cookies that are perfectly chewy with a little crisp on the edges, don’t skip that cooling step. Trust me, I learned the hard way by trying to move them too soon!
Cooking Tips & Techniques
Here are some nuggets I’ve picked up over the years making these Flavorful Cherry Chocolate Kiss Cookies:
- Softened butter is key: If your butter is too cold, it won’t cream properly with the sugars. Too melted? Your cookies will spread too much. Aim for room temp—soft enough to leave an indent but not shiny or greasy.
- Don’t overmix: Mixing the flour too long develops gluten, making cookies tough. Stop as soon as the flour disappears.
- Cherry chopping matters: Chop dried cherries into bite-sized pieces so you get even bursts of flavor without big clumps.
- Watch your oven temps: Ovens vary, so keep an eye on the first batch. Cookies finish baking on the sheet after removal, so it’s fine if centers look a little soft when you pull them out.
- Cookie size consistency: Using a scoop helps them bake evenly and look uniform, which is nice if you’re gifting or photographing them.
- Multitasking tip: While cookies bake, clean up your bowls and prep your cooling racks for a smooth workflow.
Variations & Adaptations
Want to switch things up with these cherry chocolate kiss cookies? Here are some tasty ideas:
- Dietary swap: Use almond flour or a gluten-free blend for a gluten-free batch. Coconut oil replaces butter for dairy-free versions, and dairy-free chocolate kisses make it vegan-friendly.
- Seasonal twist: In summer, swap dried cherries for fresh or frozen ones (pat dry first) or use dried cranberries for a slightly different tartness.
- Flavor kick: Add a teaspoon of cinnamon or orange zest to the dough for a warm, cozy note. I once added a pinch of chili powder for a surprising but delightful contrast!
- Nutty addition: Toss in chopped toasted pecans or walnuts for crunch and depth.
- Chocolate variations: Swap semi-sweet for dark chocolate or white chocolate kisses for different flavor profiles.
Serving & Storage Suggestions
These cookies are best served at room temperature so the chocolate kisses remain creamy and the cherries chewy. Pair them with a glass of cold milk or a warm cup of tea—perfect for afternoon snack time or after-dinner indulgence.
To store, place cooled cookies in an airtight container at room temperature for up to 4 days. For longer storage, freeze cookies in a single layer on a baking sheet, then transfer to a freezer bag for up to 3 months. When ready to enjoy, thaw at room temperature and warm gently in a 300°F (150°C) oven for 5 minutes to revive that fresh-baked feel.
Fun fact: The flavors actually deepen after a day, so if you can wait, these cookies taste even better the next day. But honestly, I rarely manage to wait that long!
Nutritional Information & Benefits
Each cookie (based on 36 cookies per batch) contains approximately:
| Calories | 110 |
|---|---|
| Fat | 6g |
| Carbohydrates | 14g |
| Sugar | 9g |
| Protein | 1g |
The dried cherries add antioxidants and vitamin C, while the chocolate kiss provides a little mood-boosting indulgence. This recipe is naturally gluten-containing but easily adapted with gluten-free flour blends. It contains dairy and egg, so keep that in mind for allergen concerns.
From a wellness perspective, these cookies satisfy sweet cravings without going overboard—perfect for when you want a treat that feels homemade and wholesome, not overly processed.
Conclusion
If you’re looking for a cookie recipe that’s simple, irresistibly flavorful, and brings that comforting homemade vibe, these Flavorful Cherry Chocolate Kiss Cookies are it. You can tweak them to your taste, swap ingredients based on what’s on hand, and still end up with a crowd-pleaser every time.
Honestly, I love how these cookies make me feel—like I’m sharing a little piece of warmth and sweetness with family and friends. Give them a try, and don’t be shy about letting me know how you made them your own!
Go ahead, bake a batch, share some love, and drop your thoughts or twists in the comments—I’m all ears. Happy baking!
FAQs
Can I use fresh cherries instead of dried cherries?
Yes! If using fresh or frozen cherries, make sure to pat them dry to avoid extra moisture in the dough. You may want to reduce other liquids slightly.
How do I prevent the cookies from spreading too much?
Make sure your butter is softened but not melted. Also, chilling the dough for 30 minutes before baking can help keep the shape.
Can I make these cookies ahead of time?
Absolutely! You can prepare the dough and refrigerate it for up to 2 days or freeze it for up to 3 months before baking.
What if I don’t have chocolate kisses?
No worries! You can use chocolate chips or chunks instead, pressing one into each cookie after baking.
Are these cookies suitable for a dairy-free diet?
They can be! Use dairy-free butter substitutes and dairy-free chocolate kisses to make the recipe dairy-free.
Pin This Recipe!

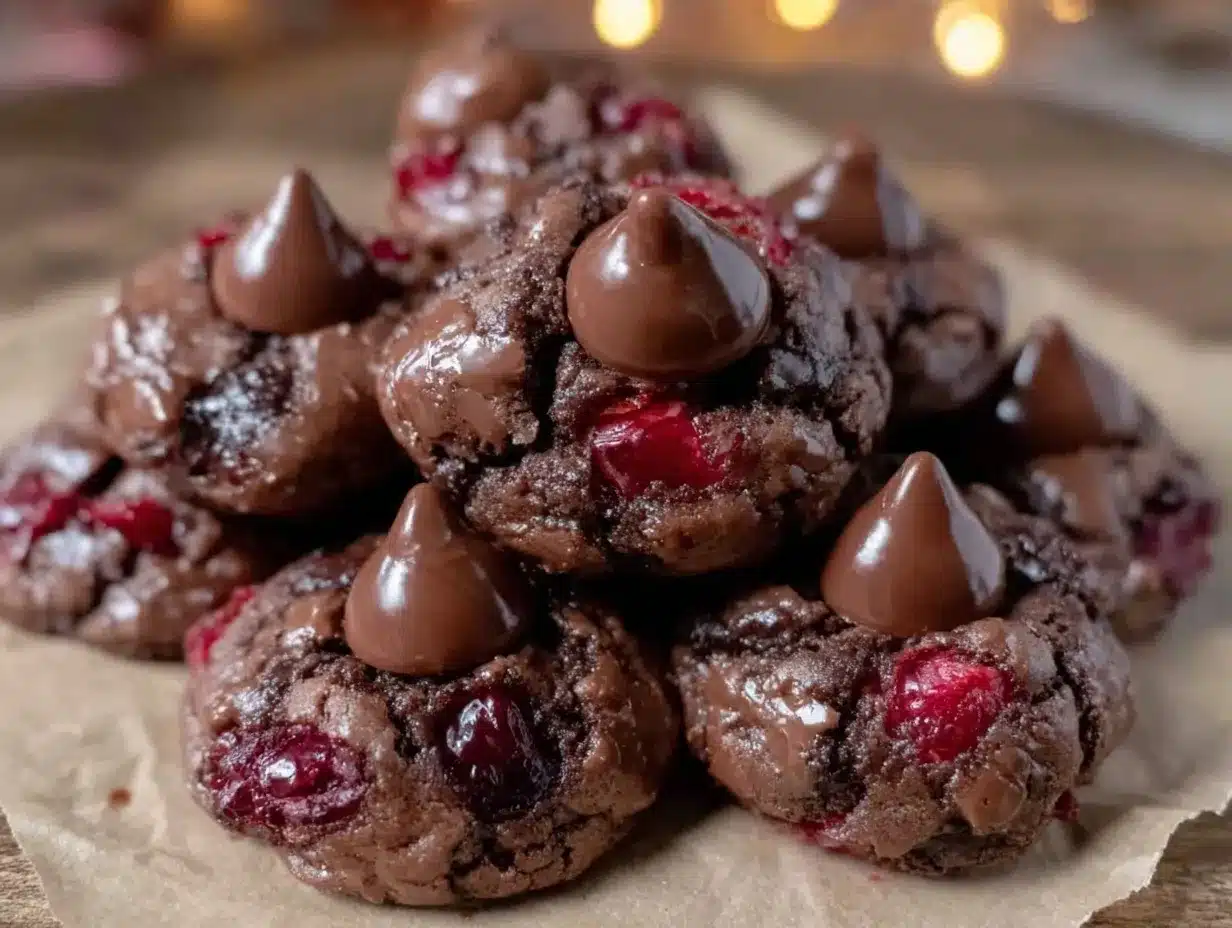
Flavorful Cherry Chocolate Kiss Cookies

These cookies combine rich chocolate kisses with sweet, tart cherries for a chewy, comforting treat that’s quick and easy to make. Perfect for family gatherings, potlucks, or a cozy homemade snack.
- Prep Time: 15 minutes
- Cook Time: 12 minutes
- Total Time: 27 minutes
- Yield: 36 cookies 1x
- Category: Dessert
- Cuisine: American
Ingredients
- 2 cups (240g) all-purpose flour
- 1/2 teaspoon baking soda
- 1/4 teaspoon salt
- 3/4 cup (170g) unsalted butter, softened
- 3/4 cup (150g) granulated sugar
- 1/4 cup (50g) packed brown sugar
- 1 large egg, room temperature
- 1 teaspoon vanilla extract
- 3/4 cup (about 100g) dried tart cherries, chopped
- About 36 chocolate kisses (semi-sweet or milk chocolate)
Instructions
- Preheat your oven to 350°F (175°C). Line baking sheets with parchment paper or silicone mats.
- In a large bowl, whisk together the flour, baking soda, and salt. Set aside.
- In a medium bowl, beat the softened butter, granulated sugar, and brown sugar until light and fluffy, about 3-4 minutes.
- Beat in the egg and vanilla extract until combined and smooth.
- Gradually add the dry ingredients to the wet mixture, stirring just until combined. Do not overmix.
- Fold in the chopped dried tart cherries gently.
- Using a cookie scoop or tablespoon, drop rounded balls of dough about 2 inches apart on the prepared baking sheets.
- Bake for 10-12 minutes until edges are set but centers are slightly soft.
- Immediately press one chocolate kiss into the center of each cookie after removing from the oven.
- Let cookies cool on the baking sheet for 5 minutes, then transfer to a wire rack to cool completely.
Notes
Use softened butter at room temperature for best creaming results. Do not overmix the dough to avoid tough cookies. Chop cherries into bite-sized pieces for even flavor bursts. Press chocolate kisses into cookies immediately after baking to allow melting and secure placement. Cooling cookies on the baking sheet before transferring helps maintain shape and texture. Dough can be chilled for 30 minutes to reduce spreading. For gluten-free or dairy-free versions, substitute flour and butter accordingly.
Nutrition
- Serving Size: 1 cookie
- Calories: 110
- Sugar: 9
- Fat: 6
- Carbohydrates: 14
- Protein: 1
Keywords: cherry chocolate cookies, chocolate kiss cookies, homemade cookies, easy cookie recipe, holiday cookies, chewy cookies