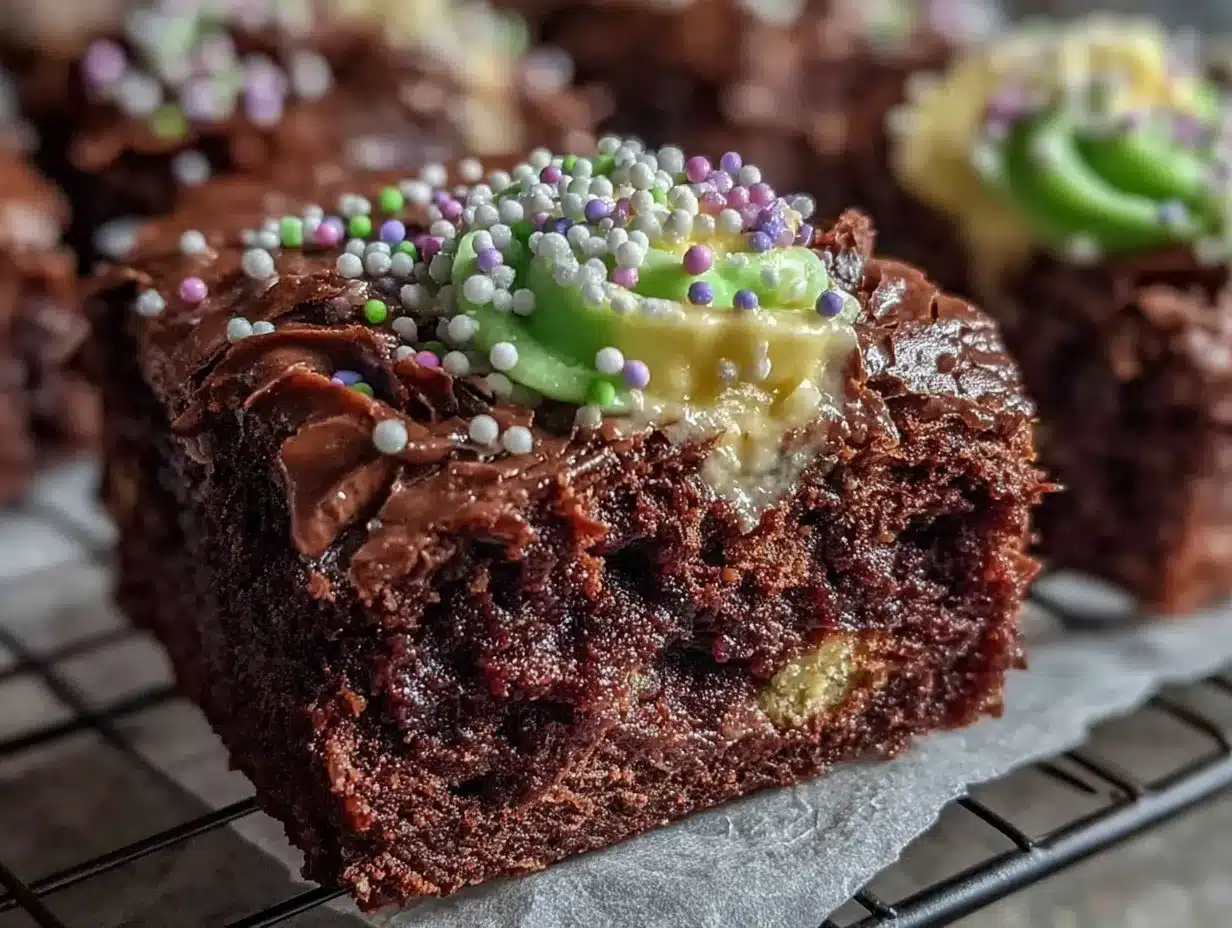
Let me tell you, the smell of rich chocolate brownies baking in the oven, mingled with a hint of vanilla and a subtle swirl of team-colored frosting, is enough to make any game day feel extra special. The first time I whipped up these flavorful bracket brownies with team colors, I was instantly hooked. It was one of those moments where you pause, take a deep breath, and just smile because you know you’ve stumbled onto something that’s going to bring smiles around the TV.
Years ago, when I was knee-high to a grasshopper, my grandma’s kitchen was the heart of our family’s game day rituals. We’d gather around with snacks that were as fun as they were delicious, but honestly, nothing quite matched the excitement of these brownies. I stumbled upon this recipe on a rainy weekend when I wanted to create a treat that was both homemade and visually festive. My family couldn’t stop sneaking them off the cooling rack (and I can’t really blame them).
These flavorful bracket brownies with team colors are dangerously easy to make, and they bring pure, nostalgic comfort with a playful twist. Whether you’re hosting a game day party, looking for a sweet treat for your kids, or just want to brighten up your Pinterest cookie board with something unique, these brownies are the perfect choice. After testing this recipe multiple times—in the name of research, of course—it’s become a staple for family gatherings and gifting alike. Trust me, it feels like a warm hug in every bite, and you’re going to want to bookmark this one.
Why You’ll Love This Recipe
Honestly, these flavorful bracket brownies with team colors aren’t your average brownies. They come with a few special touches that make them stand out from the crowd. Here’s why I keep making them for every game day:
- Quick & Easy: The whole batter comes together in under 20 minutes, perfect for last-minute cravings or when you want to impress without stress.
- Simple Ingredients: No need for fancy or hard-to-find items. You probably have everything already in your pantry, from cocoa powder to the sprinkles that bring those team colors to life.
- Perfect for Game Day: These brownies bring spirit to your party table, showing off your team pride in a fun and tasty way.
- Crowd-Pleaser: Kids and adults alike rave about the moist, fudgy texture paired with that colorful frosting pop.
- Unbelievably Delicious: The rich chocolate base with a slight chew and a hint of vanilla in the frosting hits the comfort food jackpot.
What sets this recipe apart is the way the frosting is whipped up—light, smooth, and easy to tint with your team’s colors without being overly sweet. I’ve tried other versions that got too sugary or stiff, but this one strikes the perfect balance. It’s the kind of brownie you close your eyes to savor after the first bite. Whether you’re aiming to wow guests or just want a fun treat that feels like a little celebration, these brownies tick all the boxes.
What Ingredients You Will Need
This recipe uses simple, wholesome ingredients to deliver bold flavor and satisfying texture without the fuss. Most of these are pantry staples, and the team-colored frosting is just a fun twist that makes these brownies stand out.
- For the Brownie Batter:
- 1 cup (226g) unsalted butter, melted (adds richness and fudgy texture)
- 2 cups (400g) granulated sugar
- 4 large eggs, room temperature (helps with structure and moisture)
- 1 tablespoon vanilla extract (for that comforting aroma)
- 1 cup (120g) all-purpose flour (use gluten-free flour blend for GF option)
- 1 cup (85g) unsweetened cocoa powder (I prefer Ghirardelli for deep chocolate flavor)
- 1/2 teaspoon salt (balances sweetness)
- 1/2 teaspoon baking powder (for slight lift without drying out)
- For the Frosting:
- 1/2 cup (115g) unsalted butter, softened (room temp is key for smooth frosting)
- 2 cups (240g) powdered sugar, sifted (use a trusted brand like Domino)
- 2 tablespoons whole milk or cream (use dairy-free milk if needed)
- 1 teaspoon vanilla extract
- Food coloring gels in your team’s colors (gel provides vibrant color without watery frosting)
- Optional Toppings:
- Colored sprinkles matching team colors
- Mini chocolate chips or edible glitter for extra flair
When picking your cocoa powder, a natural unsweetened option works best for a classic chocolate taste, but Dutch-processed cocoa can be used if you want a smoother, less acidic flavor. For substitutions, almond flour works okay but expect a slightly different texture. I’ve also swapped out the butter for coconut oil in a pinch, though it changes the flavor profile a bit.
Equipment Needed
- 9×13 inch (23×33 cm) baking pan – a standard size that yields perfect brownies every time. You can use a glass or metal pan; I prefer metal for crisper edges.
- Mixing bowls – one large for batter, and one for frosting.
- Hand mixer or stand mixer – makes frosting smooth and fluffy. You can also whisk by hand if you have a strong arm!
- Measuring cups and spoons – precise measurements are key for consistent brownies.
- Spatula – for folding and spreading the batter evenly.
- Wire cooling rack – helps brownies cool down without getting soggy.
If you don’t have a mixer, no worries—just whisk the frosting ingredients longer to prevent lumps. For budget-friendly options, silicone spatulas and non-stick baking pans work wonders and are easy to clean. A good thermometer isn’t necessary here, but if you want to be exact, brownies are done when an inserted toothpick comes out with a few moist crumbs.
Preparation Method
- Preheat your oven to 350°F (175°C). Lightly grease your 9×13 inch pan or line it with parchment paper for easy removal. This should take about 10 minutes.
- Prepare the brownie batter: In a large bowl, combine the melted butter and granulated sugar. Stir until glossy and smooth—this step is crucial to get that fudgy texture. (About 2-3 minutes)
- Add eggs one at a time, mixing well after each addition. This helps the batter emulsify nicely. Stir in the vanilla extract. The batter will start to look shiny and thick. (2 minutes)
- In a separate bowl, sift together the flour, cocoa powder, salt, and baking powder. Dry ingredients should be well combined to avoid lumps.
- Gradually fold the dry ingredients into the wet mixture using a spatula. Be gentle to keep the batter light but fully incorporated. The batter should be thick, glossy, and rich chocolate brown. (3-4 minutes)
- Pour the batter into your prepared pan and spread evenly. Tap the pan gently on the counter to release any air bubbles. (1 minute)
- Bake for 25-30 minutes. Start checking at 25 minutes with a toothpick inserted in the center. It should come out with moist crumbs but not wet batter. Avoid overbaking to keep them fudgy. (25-30 minutes)
- While the brownies bake, prepare the frosting: Beat the softened butter on medium speed until creamy (about 2 minutes). Gradually add powdered sugar, alternating with milk, beating well after each addition. Add vanilla extract.
- Divide the frosting into small bowls and tint each with your team’s colors. Use food coloring gels for vibrant shades. Mix well until smooth.
- Once brownies are completely cooled on a wire rack, spread the colored frosting in sections or swirls to mimic the bracket design. Add sprinkles or additional decorations as desired.
Tip: For cleaner lines, pipe the frosting using a piping bag or a zip-top bag with a corner snipped off. When frosting, work quickly to prevent it from melting into the warm brownies. If your frosting gets too soft, pop it in the fridge for 10 minutes before continuing.
Cooking Tips & Techniques
Let’s face it, brownies can be tricky! Here are some tips I’ve learned through trial and error to make your flavorful bracket brownies with team colors turn out just right every time:
- Don’t overmix the batter: Stir just until combined after adding dry ingredients. Overmixing develops gluten and makes brownies cakey instead of fudgy.
- Use room temperature eggs: They blend better and help the batter rise evenly.
- Measure your flour properly: Spoon it into the cup and level it off—don’t scoop directly with the cup or you’ll get too much, leading to dry brownies.
- Watch your bake time closely: Oven temperatures vary, and brownies can go from moist to dry in minutes. Start checking early!
- Cooling is key: Frost only when brownies are completely cool. Warm brownies will melt the frosting and create a mess.
- For vibrant team colors: Use gel food coloring instead of liquid. It won’t thin out your frosting and gives you bright, true colors.
- Multitasking: While brownies bake, whip up your frosting and prep your decorating station to save time.
I once left the frosting out too long on a hot day, and it turned runny—lesson learned! Keep your frosting chilled if you’re working in warm kitchens. Also, if your frosting is too stiff, add a splash more milk, but add it slowly to avoid thinning.
Variations & Adaptations
One of the best things about these flavorful bracket brownies with team colors is how adaptable they are. Here are a few ways you can switch things up:
- Dietary Adaptation: Swap all-purpose flour for a gluten-free blend to keep these brownies safe for gluten-sensitive friends. Use dairy-free butter and plant-based milk to make them vegan-friendly.
- Flavor Twists: Add a teaspoon of espresso powder to the batter to deepen the chocolate flavor. Or mix in chopped nuts or swirls of peanut butter for extra texture and taste.
- Seasonal Colors: Change the frosting colors to match the season—orange and black for Halloween, red and green for Christmas, or pastels for spring.
- Cooking Method: For a fun twist, bake these brownies in individual muffin tins for portion control and easy serving at parties.
- Personal Variation: I once tried a salted caramel drizzle on top of the frosted brownies, which added a lovely sweet-salty contrast that my family couldn’t get enough of.
Feel free to customize the colors and flavors to fit your team or event. The frosting is a blank canvas—get creative with piping designs or sprinkle patterns to make your bracket brownies truly your own.
Serving & Storage Suggestions
These flavorful bracket brownies with team colors shine best served at room temperature so the frosting is soft and the brownie base is chewy. I like to slice them into small squares or rectangular “brackets” to mimic the game day theme.
They pair wonderfully with a cold glass of milk, a hot cup of coffee, or even a festive cocktail if you’re celebrating. For a little extra fun, serve with fresh berries or a scoop of vanilla ice cream.
To store, keep them in an airtight container at room temperature for up to 3 days. If your kitchen is warm, refrigeration is fine but bring them back to room temp before serving for best texture. These brownies also freeze well—wrap individual pieces tightly in plastic wrap and place in a freezer bag for up to 3 months.
When reheating, a quick 10-second zap in the microwave revives that fudgy softness and slightly melts the frosting for pure indulgence. Flavors actually deepen after a day or two, so if you can wait, they taste even better the next day.
Nutritional Information & Benefits
Here’s a rough estimate per serving (makes about 24 brownies): approximately 180 calories, 9g fat, 25g carbohydrates, and 2g protein. These brownies are a treat, but they also provide some benefits thanks to the cocoa powder, which is rich in antioxidants and can boost your mood during those tense game moments.
Using real butter and eggs adds some wholesome fats and protein, making these more satisfying than store-bought sweets. For dietary considerations, this recipe can be adapted gluten-free and vegan as noted above.
Just a heads-up: these brownies contain dairy and eggs, so not suitable for those with allergies to those ingredients unless substitutions are made. Overall, these brownies are a fun, festive indulgence that bring a bit of joy and team spirit to your table.
Conclusion
Flavorful bracket brownies with team colors are an absolute game changer for any sports day celebration. They’re easy to make, fun to customize, and downright delicious—the kind of treat that brings everyone together and sparks smiles. You can tweak the colors, flavors, and toppings to suit your style and team pride perfectly.
Honestly, I love how these brownies combine simple ingredients with a playful twist that feels homemade but special. They’ve become a go-to recipe for me, and I hope you find them just as irresistible. I’d love to hear how you put your own spin on these—drop a comment, share your photos, or tell me your favorite team colors to try next.
Go ahead, make these brownies your own, and enjoy every fudgy, colorful bite—game day just got tastier!
FAQs
Can I make these brownies ahead of time?
Yes! You can bake the brownies a day or two in advance. Store them unfrosted in an airtight container and frost just before serving for the freshest look.
What if I don’t have gel food coloring?
Gel food coloring works best for vibrant colors without thinning the frosting, but liquid food coloring can be used. Just add it sparingly to avoid runny frosting.
Can I use boxed brownie mix instead of making batter from scratch?
You can, but homemade brownies allow better control over texture and flavor, especially since this recipe focuses on fudgy, rich brownies that hold up well to frosting and decoration.
How do I store leftover frosted brownies?
Store frosted brownies in an airtight container at room temperature for up to 3 days. If your kitchen is warm, refrigeration is better—just bring them back to room temp before serving.
Can I freeze these brownies?
Absolutely! Wrap individual pieces tightly and freeze for up to 3 months. Thaw at room temperature and refresh with a quick microwave zap before serving.
Pin This Recipe!
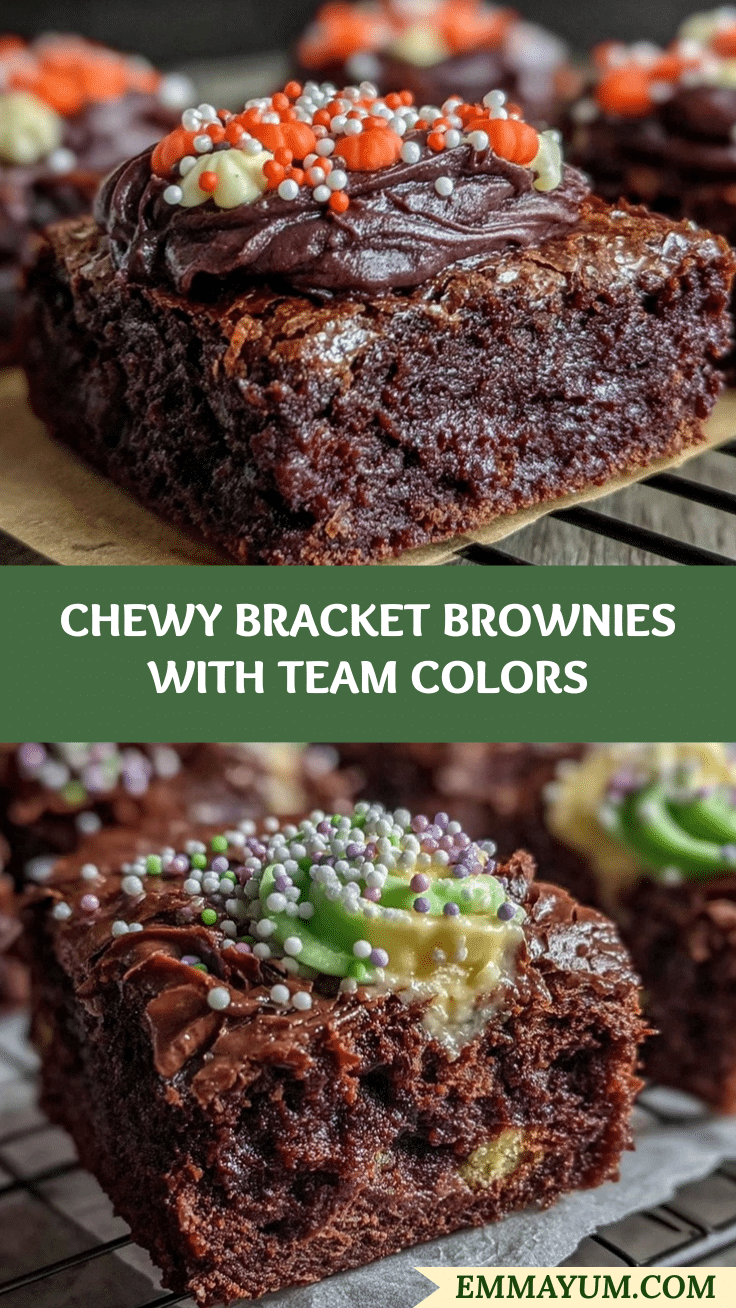
Flavorful Bracket Brownies Recipe Easy Homemade Game Day Treats with Team Colors
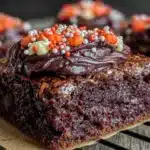
Rich, fudgy chocolate brownies topped with light, colorful team-colored frosting, perfect for game day celebrations and family gatherings.
- Prep Time: 15 minutes
- Cook Time: 25-30 minutes
- Total Time: 40-45 minutes
- Yield: 24 servings 1x
- Category: Dessert
- Cuisine: American
Ingredients
- 1 cup (226g) unsalted butter, melted
- 2 cups (400g) granulated sugar
- 4 large eggs, room temperature
- 1 tablespoon vanilla extract
- 1 cup (120g) all-purpose flour (use gluten-free flour blend for GF option)
- 1 cup (85g) unsweetened cocoa powder
- 1/2 teaspoon salt
- 1/2 teaspoon baking powder
- 1/2 cup (115g) unsalted butter, softened
- 2 cups (240g) powdered sugar, sifted
- 2 tablespoons whole milk or cream
- 1 teaspoon vanilla extract
- Food coloring gels in your team’s colors
- Optional toppings: colored sprinkles matching team colors, mini chocolate chips, edible glitter
Instructions
- Preheat your oven to 350°F (175°C). Lightly grease a 9×13 inch baking pan or line it with parchment paper.
- In a large bowl, combine the melted butter and granulated sugar. Stir until glossy and smooth (2-3 minutes).
- Add eggs one at a time, mixing well after each addition. Stir in vanilla extract (2 minutes).
- In a separate bowl, sift together flour, cocoa powder, salt, and baking powder.
- Gradually fold the dry ingredients into the wet mixture using a spatula, being gentle to keep batter light and fully incorporated (3-4 minutes).
- Pour the batter into the prepared pan and spread evenly. Tap the pan gently to release air bubbles (1 minute).
- Bake for 25-30 minutes. Check at 25 minutes with a toothpick; it should come out with moist crumbs but not wet batter.
- While brownies bake, prepare frosting: beat softened butter on medium speed until creamy (about 2 minutes). Gradually add powdered sugar alternating with milk, beating well after each addition. Add vanilla extract.
- Divide frosting into small bowls and tint each with your team’s colors using gel food coloring. Mix until smooth.
- Once brownies are completely cooled on a wire rack, spread colored frosting in sections or swirls to mimic bracket design. Add sprinkles or decorations as desired.
Notes
Do not overmix the batter to keep brownies fudgy. Use room temperature eggs for better mixing. Use gel food coloring for vibrant frosting without thinning. Frost brownies only when completely cooled. If frosting softens too much, chill for 10 minutes before continuing. For gluten-free or vegan adaptations, use gluten-free flour blend, dairy-free butter, and plant-based milk.
Nutrition
- Serving Size: 1 brownie (1/24th of
- Calories: 180
- Fat: 9
- Carbohydrates: 25
- Protein: 2
Keywords: brownies, game day treats, chocolate brownies, team colors, frosting, easy brownies, homemade brownies, fudgy brownies