“I wasn’t expecting to find a dessert so simple and yet so indulgently creamy when I stumbled upon this recipe scribbled on a crumpled napkin at my local coffee shop,” my friend whispered, sliding the note across the table. It was a random Tuesday afternoon, the kind where caffeine seemed not enough, and the idea of a fuss-free treat was just what the doctor ordered. That’s how this easy no-bake chocolate eclair cake with creamy layers made its way into my kitchen—and honestly, it’s been a game changer ever since.
You know that feeling when you want something sweet, comforting, and totally satisfying but don’t want to spend hours in the kitchen? That’s exactly what this recipe delivers. One evening, I was mid-chaos trying to get dinner and dessert ready for a last-minute gathering, and this cake saved the day. The layers of chocolate and creamy filling came together with no oven fuss, just a little patience in the fridge, and a bit of playful anticipation.
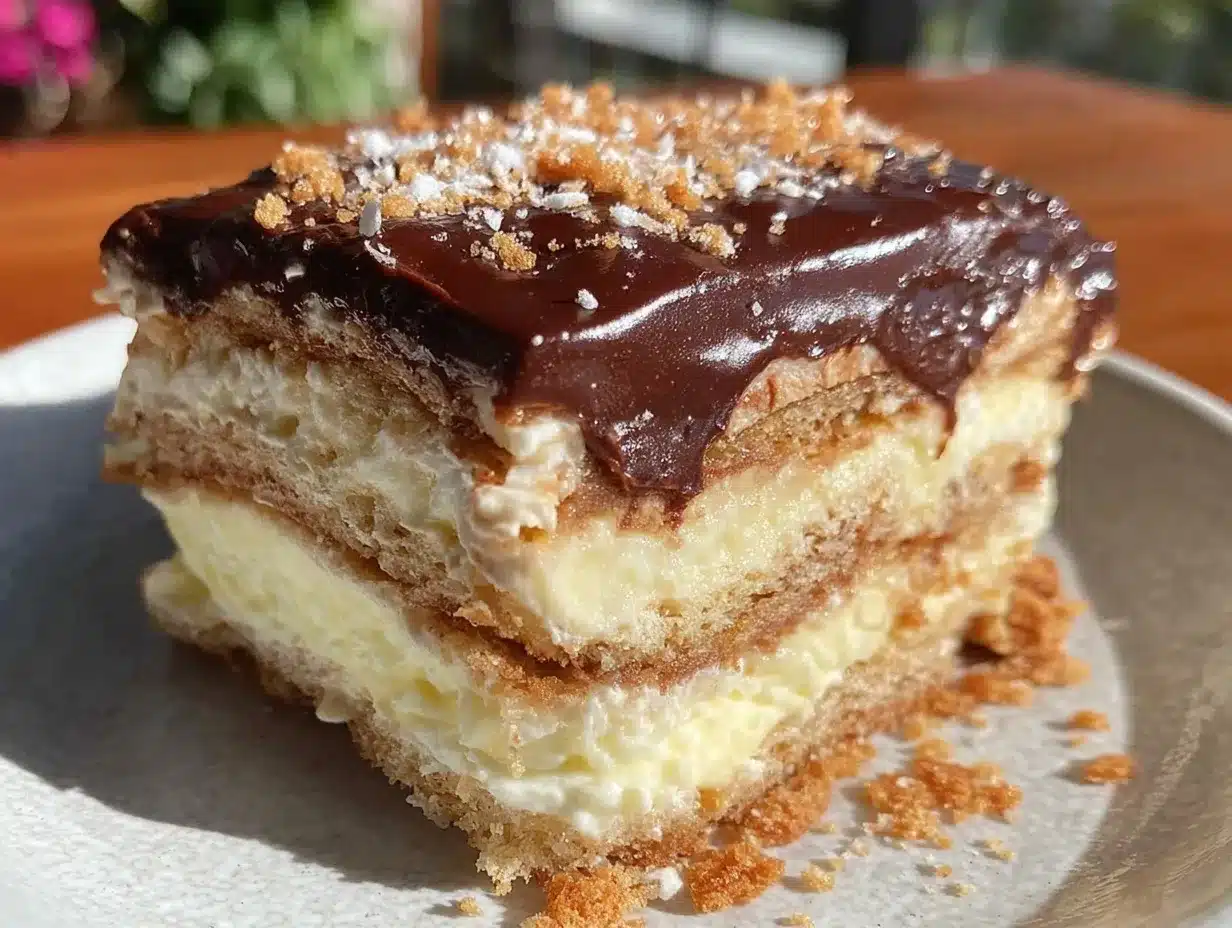
Let me tell you, the magic lies in those dreamy layers that feel like a chocolate eclair reinterpreted in cake form. I forgot to grab the vanilla wafers one time and ended up using graham crackers instead—talk about a happy accident. The texture was just as delightful, which made me realize this recipe is forgiving and flexible, perfect for those “let’s just wing it” moments. If you’ve ever felt the urge to whip up something impressive without the stress, you might find yourself making this one again and again, just like me.
Why You’ll Love This Recipe
From my many kitchen trials (and a few hilarious mishaps), this easy no-bake chocolate eclair cake with creamy layers has stood out as a reliable crowd-pleaser. Here’s why it quickly became a staple in my dessert repertoire:
- Quick & Easy: Comes together in about 20 minutes, with just a few hours chilling time—perfect for last-minute dessert plans or busy weeknights.
- Simple Ingredients: Pantry staples like vanilla wafers, pudding mix, and chocolate frosting mean no frantic grocery runs.
- Perfect for Gatherings: Whether it’s a potluck, family dinner, or casual get-together, this cake always earns compliments without fuss.
- Crowd-Pleaser: Kids adore the creamy layers, and adults appreciate the nostalgic nod to classic eclairs.
- Unbelievably Delicious: The silky pudding layers paired with rich chocolate frosting make every bite feel like a comforting hug.
What sets this recipe apart is the effortless layering technique and the creamy custard made from instant pudding mix, which means no heavy cream or complicated custard-making skills needed. I also love that the vanilla wafers soak up just enough moisture, creating a soft cake-like texture that melts in your mouth. Honestly, it’s like getting the best of a pastry shop treat but without the long lines or price tag. If you’re after a dessert that’s both nostalgic and fresh, this is the one to try.
What Ingredients You Will Need
This recipe uses simple, wholesome ingredients to deliver bold flavor and satisfying texture without the fuss. Most of these are pantry staples, so you might already have everything at home. Here’s the breakdown to get you ready:
- Vanilla Wafers: About 4 cups (approx. 300 grams). These form the cake’s layers and absorb the creamy filling beautifully. Substitute with graham crackers for a slight twist.
- Instant Vanilla Pudding Mix: 2 packages (3.4 oz each). I recommend brands like Jell-O or Kozy Shack for best texture.
- Milk: 4 cups (960 ml), cold. Whole milk gives the creamiest result, but 2% works fine too.
- Whipped Topping: 16 oz (about 450 grams), thawed (like Cool Whip). Adds lightness and smoothness to the layers.
- Chocolate Frosting: 1 container (about 16 oz or 450 grams). I prefer a rich chocolate frosting like Hershey’s or Duncan Hines for that perfect finish.
- Optional: A teaspoon of vanilla extract (if you want to deepen the custard flavor).
For those looking for dairy-free options, swap milk with almond or oat milk and choose a dairy-free whipped topping. Gluten-free vanilla wafers are also available if you want to keep it gluten-free.
Equipment Needed
- 9×13-inch Baking Dish: Glass or ceramic works best for even chilling and serving. If you don’t have one, a disposable aluminum pan is a budget-friendly option.
- Mixing Bowls: One large bowl for pudding, another for whipped topping.
- Whisk or Electric Mixer: To combine pudding mix and milk smoothly. An electric hand mixer speeds things up but a whisk works fine too.
- Measuring Cups and Spoons: For precise ingredient amounts.
- Spatula: For folding whipped topping and spreading layers evenly.
If you don’t have an electric mixer, no worries—just whisk a bit longer to avoid lumps in the pudding. I once made this in my tiny college apartment kitchen with a fork and a patience level of a saint, and it still turned out amazing.
Preparation Method
- Prepare the Pudding Mixture: In a large bowl, whisk together the 2 packages of instant vanilla pudding mix and 4 cups (960 ml) of cold milk for about 2 minutes until it thickens. Let it sit for 5 minutes to fully set. (Pro tip: Make sure your milk is cold from the fridge—it helps the pudding set faster.)
- Fold in the Whipped Topping: Gently fold 16 oz (450 g) of thawed whipped topping into the pudding mixture using a spatula. Be careful not to overmix; you want the mixture smooth but still light and airy.
- Layer the Vanilla Wafers: In your 9×13-inch baking dish, spread a single layer of vanilla wafers evenly across the bottom. This will be your base.
- Add a Layer of Pudding Cream: Spoon about one-third of the pudding and whipped topping mixture over the wafers. Use the spatula to spread it gently into an even layer, covering all the wafers.
- Repeat Layers: Add another layer of vanilla wafers over the pudding layer, followed by another third of the pudding mixture. Repeat one more time, finishing with a final layer of vanilla wafers on top.
- Top with Chocolate Frosting: Spread the entire container of chocolate frosting (about 16 oz) evenly over the top layer of vanilla wafers. For easier spreading, you can warm the frosting slightly in the microwave for 10-15 seconds.
- Chill the Cake: Cover the dish with plastic wrap and refrigerate for at least 4 hours, preferably overnight. This resting time allows the wafers to soften and the flavors to meld beautifully.
- Serve: Once chilled and set, slice into squares and serve chilled. (If you want neat slices, dip your knife in warm water and wipe clean between cuts.)
If the pudding feels too thick at step 1, add a splash of milk and whisk some more. Also, sometimes the wafers might break a bit while layering—don’t stress; broken wafers soak up the cream just as well. I’ve learned that patience during the chilling step is key. The longer you wait, the creamier and more eclair-like the cake becomes.
Cooking Tips & Techniques
This easy no-bake chocolate eclair cake is incredibly forgiving, but here are some insider tips to nail it every time:
- Cold Milk is Crucial: Use cold milk straight from the fridge when mixing the pudding. It helps the instant pudding thicken properly without lumps.
- Gentle Folding: When combining whipped topping with pudding, fold gently with a spatula to keep the mixture light. Overmixing can deflate the fluffiness.
- Layer Evenly: Spread the vanilla wafers and pudding layers evenly for consistent texture throughout. Uneven layers can cause some bites to be dry or overly soft.
- Chill Time Patience: Don’t rush the chilling—at least 4 hours is needed for the wafers to soften and flavors to meld. Overnight is even better.
- Frosting Warm-Up: Warm the chocolate frosting slightly before spreading for a smooth, glossy finish that’s easy to work with.
- Knife Warm-Up Trick: For clean slices, dip your knife in hot water and wipe it dry before cutting. Repeat between slices for best results.
Once, I tried to cut into the cake right after removing it from the fridge and ended up with a messy mess. Since then, I always let it sit for 10 minutes at room temperature before slicing. Trust me, it makes all the difference.
Variations & Adaptations
- Fruit Infusion: Add a layer of fresh sliced strawberries or bananas between the vanilla wafers and pudding for a fruity twist. Summer berries work especially well.
- Peanut Butter Swirl: Mix a few tablespoons of creamy peanut butter into the pudding mixture before folding in the whipped topping. It adds a rich, nutty flavor that pairs beautifully with chocolate.
- Gluten-Free Version: Use gluten-free vanilla wafers or substitute with gluten-free graham crackers to accommodate dietary restrictions.
- Dairy-Free Adaptation: Swap milk with almond or oat milk and use dairy-free whipped topping and frosting. The texture will be slightly different but still delicious.
- Mocha Flavor: Stir a teaspoon of instant espresso powder into the chocolate frosting for a subtle coffee kick that complements the creamy layers.
I once tried a tropical version by folding in shredded coconut and pineapple chunks into the pudding layer. It was an unexpected but delightful surprise that my guests loved!
Serving & Storage Suggestions
This cake is best served chilled, fresh from the fridge, where the creamy layers hold their shape and the wafers are perfectly softened. For presentation, I like to dust a little cocoa powder or sprinkle shaved chocolate on top for extra flair.
Pair it with a cup of strong coffee or a glass of cold milk for a classic combo. It also goes surprisingly well with a scoop of vanilla ice cream if you want to get a bit fancy.
Store leftovers tightly covered in the refrigerator for up to 4 days. The flavors actually deepen over time, making the cake even more luscious the next day. If you want to freeze portions, wrap individual slices in plastic wrap and place in an airtight container for up to 2 months. Thaw overnight in the fridge before serving.
When reheating, I recommend letting the cake come to room temperature rather than microwaving it, as this preserves the creamy texture best.
Nutritional Information & Benefits
Per serving (approximate, based on 12 servings):
| Calories | 320 |
|---|---|
| Fat | 14g |
| Carbohydrates | 44g |
| Protein | 4g |
| Sugar | 30g |
The vanilla wafers provide a satisfying crunch and moderate carbohydrates, while the pudding and whipped topping contribute to the creamy mouthfeel. Though this dessert is indulgent, using instant pudding and whipped topping keeps preparation straightforward without heavy creams or complicated custards.
For those mindful of allergens, note this recipe contains dairy and gluten (unless gluten-free wafers are used). It’s a treat best enjoyed occasionally, but the simple ingredients and no-bake method make it a decent option for a quick homemade dessert that doesn’t rely on processed mixes or artificial flavors.
Conclusion
This easy no-bake chocolate eclair cake with creamy layers is a charming little secret for dessert lovers who want to impress without stress. It’s got that perfect balance of nostalgic tastes and modern convenience that keeps me coming back. You can tweak it with your favorite add-ins or keep it classic—either way, it’s a winner.
If you try this recipe, don’t hesitate to share your twists or favorite ways to serve it. I mean, isn’t that part of the fun? Making a recipe your own is what keeps the kitchen lively and your taste buds curious. So, grab those vanilla wafers, whip up that pudding, and get ready for a creamy treat that’s as easy on your schedule as it is on your palate.
Happy baking (or rather, no-baking) and please drop a comment below to tell me how your cake turned out!
FAQs
Can I make this cake ahead of time?
Absolutely! In fact, chilling it overnight enhances the flavors and softens the wafers perfectly.
What if I don’t have vanilla wafers?
You can substitute graham crackers or even ladyfingers. Just keep in mind the texture might change slightly.
Can I use homemade pudding instead of instant pudding mix?
Yes, but homemade pudding is thicker and sets differently. You might need to adjust the milk quantity and chilling time.
Is it possible to make this recipe vegan?
With some ingredient swaps—like dairy-free milk, whipped topping, and vegan chocolate frosting—you can create a vegan-friendly version.
How long does this cake last in the refrigerator?
Stored in an airtight container, it stays fresh for up to 4 days. The texture and flavor improve after resting overnight.
Pin This Recipe!
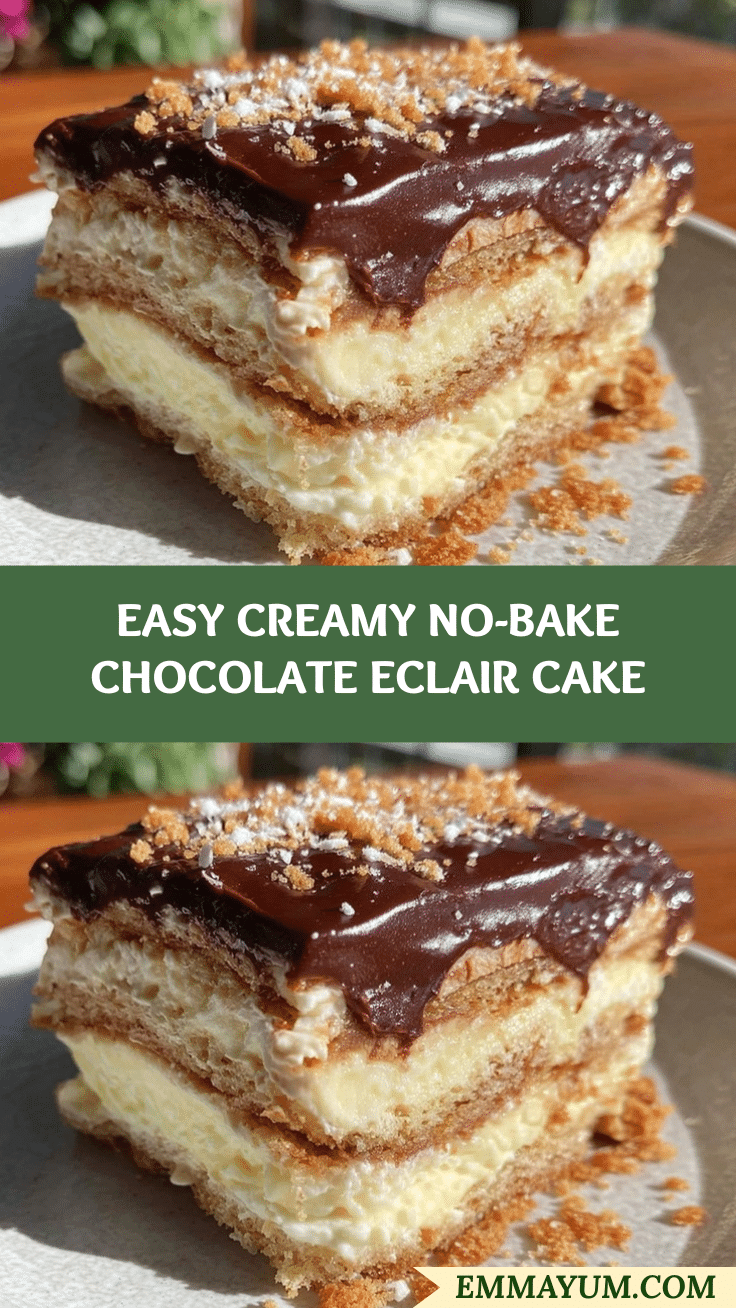
Easy No-Bake Chocolate Eclair Cake Recipe with Creamy Layers Perfect for Dessert
A simple, indulgently creamy no-bake chocolate eclair cake with layers of vanilla wafers, pudding, whipped topping, and chocolate frosting. Perfect for quick, fuss-free dessert that delights both kids and adults.
- Prep Time: 20 minutes
- Cook Time: 0 minutes
- Total Time: 4 hours 20 minutes
- Yield: 12 servings 1x
- Category: Dessert
- Cuisine: American
Ingredients
- 4 cups vanilla wafers (approx. 300 grams)
- 2 packages instant vanilla pudding mix (3.4 oz each)
- 4 cups cold milk (960 ml), whole or 2%
- 16 oz thawed whipped topping (about 450 grams, e.g., Cool Whip)
- 1 container chocolate frosting (about 16 oz or 450 grams)
- Optional: 1 teaspoon vanilla extract
Instructions
- In a large bowl, whisk together the 2 packages of instant vanilla pudding mix and 4 cups cold milk for about 2 minutes until thickened. Let sit for 5 minutes to fully set.
- Gently fold 16 oz of thawed whipped topping into the pudding mixture using a spatula, keeping it light and airy.
- Spread a single layer of vanilla wafers evenly across the bottom of a 9×13-inch baking dish.
- Spoon about one-third of the pudding and whipped topping mixture over the wafers and spread evenly.
- Repeat layering with vanilla wafers and pudding mixture two more times, finishing with a final layer of vanilla wafers on top.
- Spread the entire container of chocolate frosting evenly over the top layer of vanilla wafers. Warm frosting slightly if needed for easier spreading.
- Cover the dish with plastic wrap and refrigerate for at least 4 hours, preferably overnight, to allow wafers to soften and flavors to meld.
- Slice into squares and serve chilled. For neat slices, dip knife in warm water and wipe clean between cuts.
Notes
Use cold milk from the fridge to help pudding set faster. Fold whipped topping gently to keep mixture light. Chill at least 4 hours or overnight for best texture. Warm frosting slightly for easier spreading. Dip knife in warm water for clean slices. Can substitute graham crackers for vanilla wafers. For dairy-free or gluten-free versions, use appropriate substitutes.
Nutrition
- Serving Size: 1 slice (1/12th of c
- Calories: 320
- Sugar: 30
- Fat: 14
- Carbohydrates: 44
- Protein: 4
Keywords: no-bake, chocolate eclair cake, easy dessert, creamy layers, vanilla wafers, pudding, chocolate frosting, quick dessert, crowd-pleaser