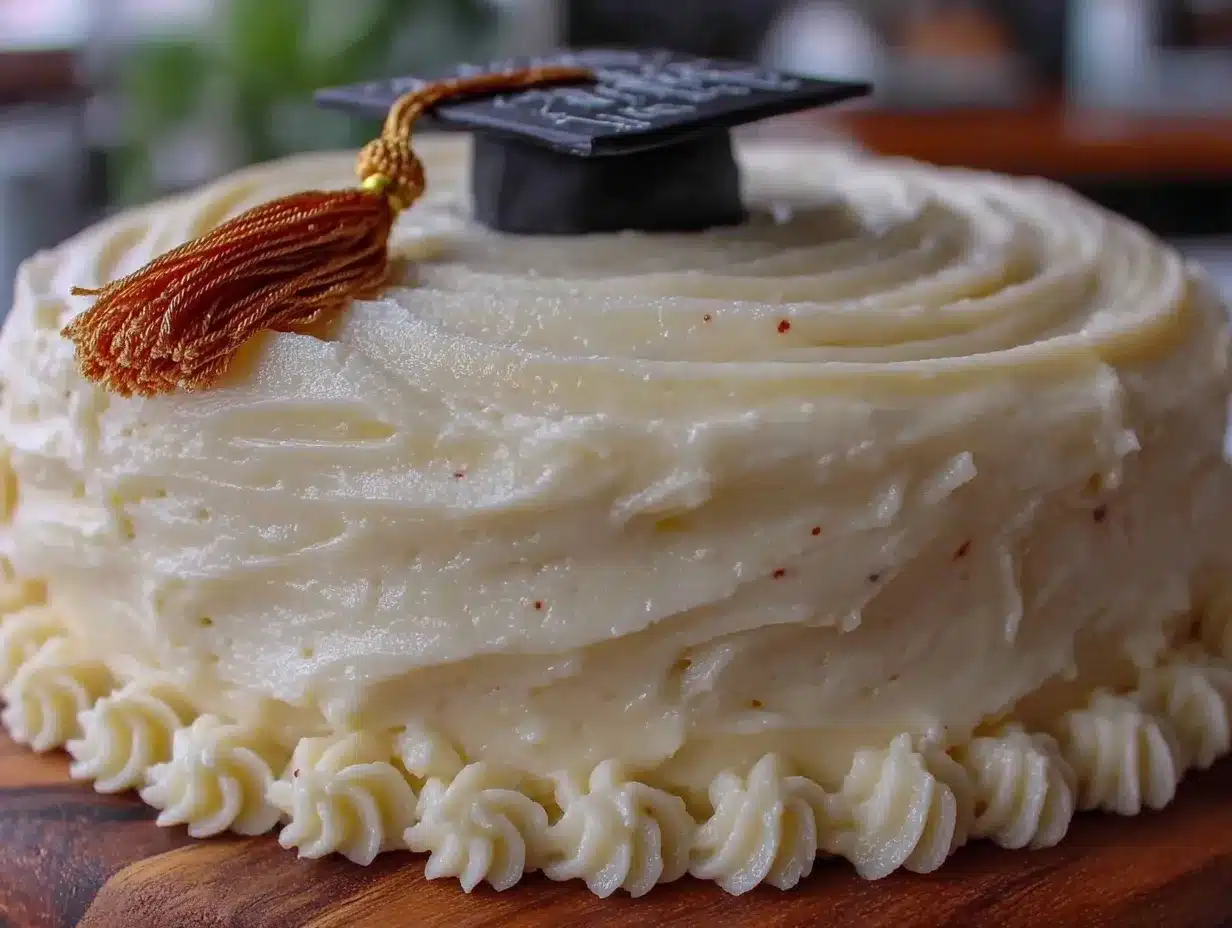
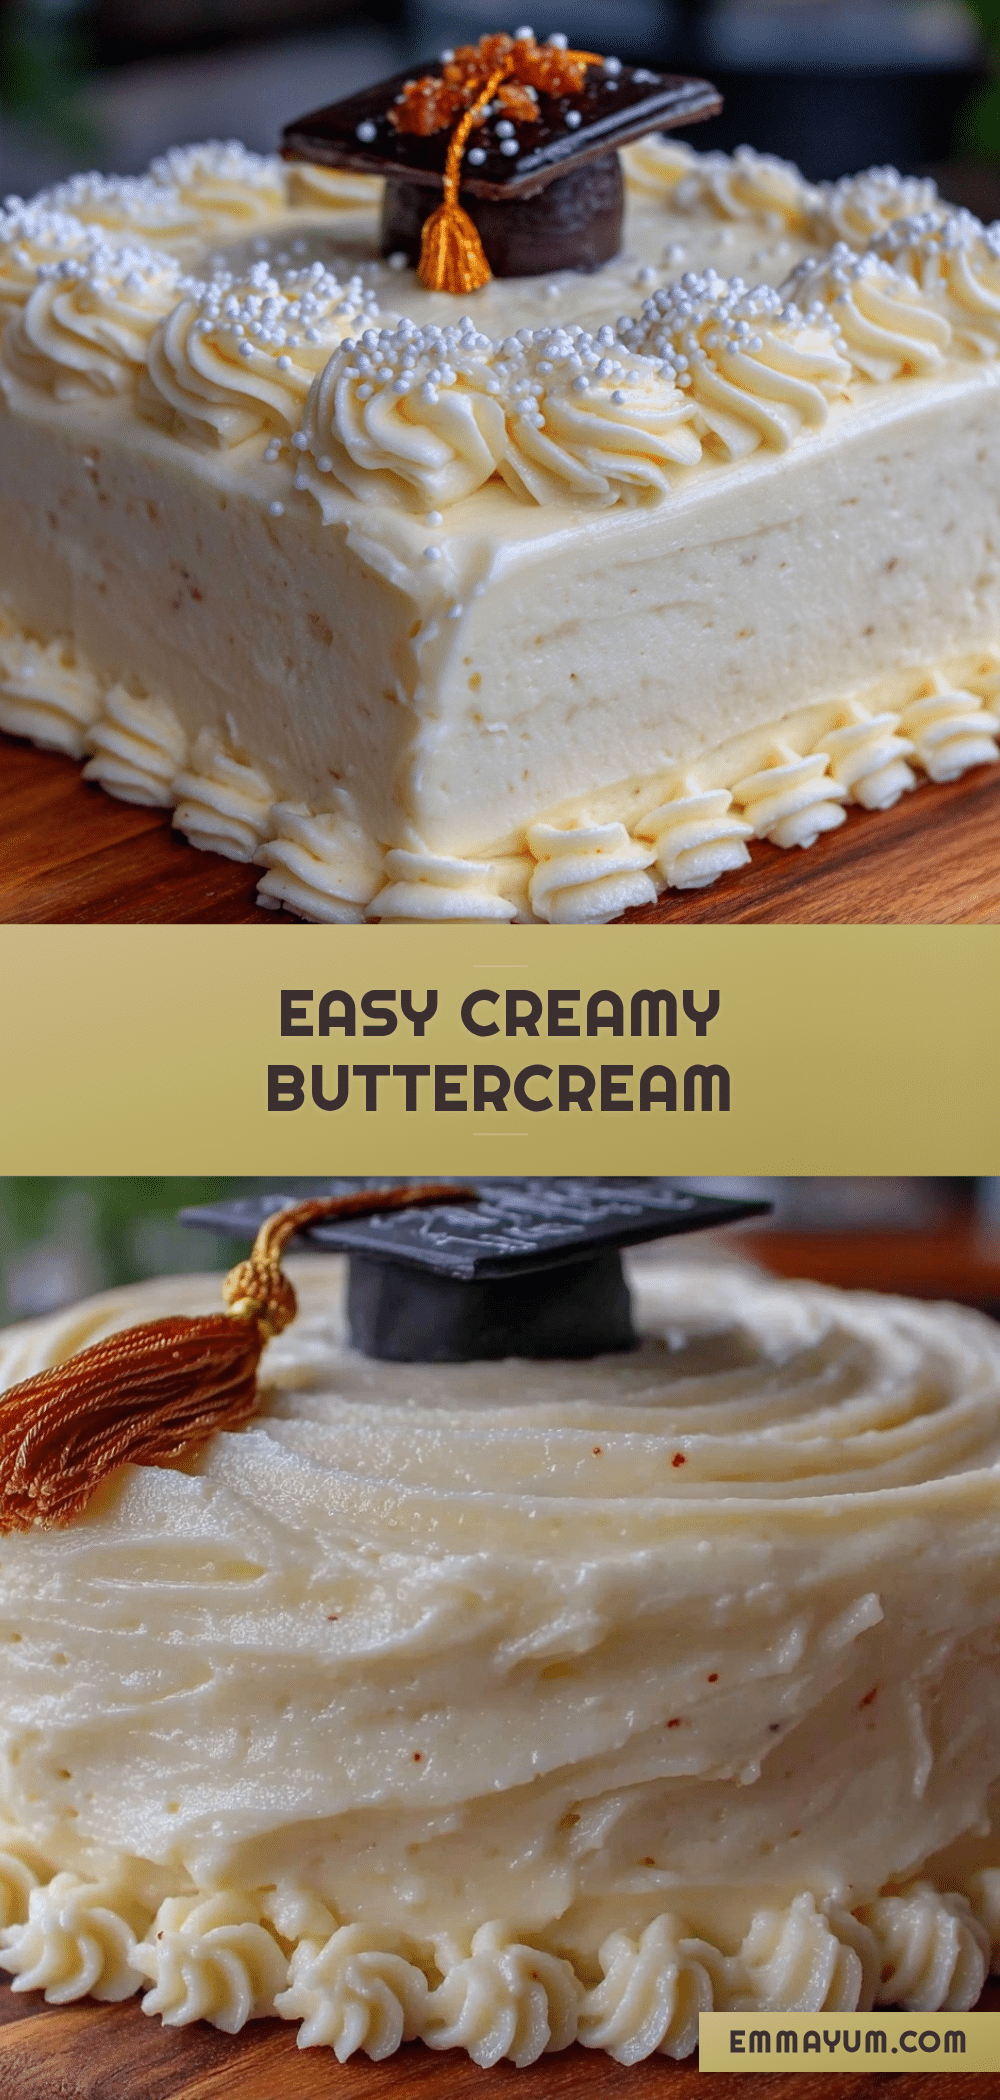
“You think you’ve got a simple sheet cake down, then you try to decorate it with a graduation cap and suddenly it’s an art project,” my sister joked as I fumbled with piping bags and fondant. Honestly, the first time I made this Easy Creamy Buttercream Graduation Cap Sheet Cake, it was a last-minute save for a party when the bakery let us down. I was skeptical—how could a quick homemade cake look festive enough for a graduation celebration? But as I smoothed the luscious buttercream and carefully shaped that little cap on top, the chaos in the kitchen faded away.
The cake’s creamy texture and simple design soon won over everyone, including me. It’s funny how something so straightforward became the highlight of the day, sparking compliments and requests for the recipe. I found myself making this cake not just once but a few times that month (and probably will again before the next graduation season rolls around). It’s the kind of recipe that feels like a small victory when life is busy and unpredictable.
What stuck with me most was how the creamy buttercream frosting adds a cozy softness, almost like comfort wrapped in celebration. This cake isn’t just dessert; it’s a quiet reminder that simple ingredients and a little patience can turn a stressful moment into a sweet memory.
Why You’ll Love This Recipe
After testing countless buttercream recipes and decorating techniques, this Easy Creamy Buttercream Graduation Cap Sheet Cake is hands down my go-to for graduation parties. Here’s why it shines:
- Quick & Easy: Ready in under 90 minutes from start to finish, it fits perfectly into busy schedules without sacrificing taste or appearance.
- Simple Ingredients: No need to hunt for fancy baking supplies—basic pantry staples like all-purpose flour, sugar, butter, and eggs make this cake accessible.
- Perfect for Graduation Celebrations: The iconic graduation cap detail adds a festive touch that’s sure to impress your grad and guests alike.
- Crowd-Pleaser: The creamy buttercream frosting is rich without being overwhelming, winning over both kids and adults at any gathering.
- Unbelievably Delicious: The moist cake layers paired with velvety frosting create a texture and flavor combo that’s pure comfort food with a celebratory twist.
What sets this apart from other sheet cakes is the frosting’s smooth, creamy consistency achieved by beating butter and sugar just right—no grainy texture here. Plus, the graduation cap decoration is a simple yet impactful detail that anyone can replicate without fancy tools. Honestly, it’s the kind of cake that makes you pause, close your eyes after the first bite, and think, “Yep, this is exactly what a graduation party cake should taste like.”
Whether you’re hosting a casual backyard celebration or an elegant indoor party, this cake balances ease and elegance like a pro. And if you’re looking for other crowd-pleasing recipes, you might enjoy the easy no-churn cookies and cream ice cream for dessert or the crispy oven-fried buttermilk chicken tenders as a savory party favorite.
What Ingredients You Will Need
This Easy Creamy Buttercream Graduation Cap Sheet Cake relies on simple, wholesome ingredients that come together to create both flavor and texture without fuss. Most are pantry staples, and substitutions are easy if you’re dealing with allergies or preferences.
- For the Cake:
- All-purpose flour (2 ½ cups / 312 grams) – Provides structure and a tender crumb
- Granulated sugar (2 cups / 400 grams) – Sweetens and helps with moisture retention
- Baking powder (2 ½ tsp) and baking soda (½ tsp) – Leavening agents for a light rise
- Salt (½ tsp) – Balances sweetness and enhances flavor
- Unsalted butter (¾ cup / 170 grams), softened – Adds richness and moisture (I prefer Land O’Lakes for consistent results)
- Whole milk (1 cup / 240 ml), room temperature – Keeps the batter smooth and tender
- Large eggs (3), room temperature – Binds ingredients and adds richness
- Pure vanilla extract (2 tsp) – Adds warm, aromatic flavor
- For the Creamy Buttercream Frosting:
- Unsalted butter (1 ½ cups / 340 grams), softened – The base of the frosting, gives creamy texture
- Powdered sugar (5 cups / 600 grams), sifted – Sweetens and thickens the frosting
- Heavy cream (4 tbsp / 60 ml) – Adds smoothness and helps spreadability
- Pure vanilla extract (1 ½ tsp) – For depth of flavor
- Pinch of salt – Balances the sweetness and prevents it from being cloying
- For the Graduation Cap Decoration:
- Black fondant (about 4 oz / 115 grams) – Easy to mold and keeps its shape (Wilton brand works well)
- Edible gold or yellow gel food coloring or piping gel – For tassel details
- Optional: Edible silver beads for added decoration
If you want to make this gluten-free, swapping the all-purpose flour for a 1:1 gluten-free baking flour blend works nicely. For a dairy-free option, substitute the butter and milk with plant-based alternatives like vegan butter and almond milk. This recipe’s flexibility is one reason it’s become a staple for me.
Equipment Needed
- 9×13 inch (23×33 cm) sheet cake pan – The perfect size to feed a crowd and showcase the graduation cap decoration
- Electric mixer (stand or hand-held) – Essential for beating butter and sugar to that ultra-creamy buttercream texture
- Mixing bowls – At least two, one for dry and one for wet ingredients
- Measuring cups and spoons – For precise measurements
- Rubber spatula – Great for scraping the bowl and smoothing the batter
- Offset spatula or bench scraper – For spreading and smoothing frosting on the cake
- Rolling pin – To roll out the fondant for the graduation cap
- Sharp knife or pizza cutter – For cutting the fondant into cap shapes
- Piping bag with small round tip – To pipe the tassel details with colored gel
If you don’t have a stand mixer, a hand mixer works just fine (though it might take a bit longer). For fondant, if you’re not comfortable rolling it out yourself, many stores sell pre-rolled sheets that you can cut to size. Keeping your tools clean and dry, especially for frosting, helps avoid any lumps or texture issues. I keep an extra spatula handy just to keep things moving smoothly!
Preparation Method
- Preheat and Prepare: Preheat your oven to 350°F (175°C). Grease your 9×13 inch sheet pan with butter or non-stick spray and lightly dust with flour to prevent sticking.
- Mix Dry Ingredients: In a large bowl, whisk together the flour (312 grams), baking powder (2 ½ tsp), baking soda (½ tsp), and salt (½ tsp). Set aside.
- Cream Butter and Sugar: Using your mixer, beat the softened butter (170 grams) and granulated sugar (400 grams) on medium-high speed for about 3-4 minutes until pale and fluffy. This step is crucial for a light cake texture.
- Add Eggs and Vanilla: Beat in eggs one at a time, followed by the vanilla extract (2 tsp). Make sure each egg is fully incorporated before adding the next. The batter should be smooth and creamy.
- Alternate Adding Dry Ingredients and Milk: With mixer on low, add the dry ingredients in three parts, alternating with the milk (240 ml), starting and ending with the dry. Mix just until combined—overmixing can make the cake tough.
- Pour and Bake: Pour the batter into your prepared pan, smoothing the top with a spatula. Bake for 35-40 minutes, or until a toothpick inserted in the center comes out clean. Avoid opening the oven door early to prevent sinking.
- Cool the Cake: Let the cake cool completely in the pan on a wire rack. This usually takes about 1 hour; frosting a warm cake will melt the buttercream.
- Make the Buttercream: Beat softened butter (340 grams) on medium speed until creamy, about 2 minutes. Gradually add sifted powdered sugar (600 grams), then the vanilla (1 ½ tsp), salt, and heavy cream (60 ml). Beat on high for 3-4 minutes until fluffy and spreadable. Adjust consistency by adding more cream or powdered sugar if needed.
- Frost the Cake: Spread a thin crumb coat layer of frosting over the cake. Chill for 15 minutes, then apply a final smooth layer of buttercream using your offset spatula or bench scraper.
- Create the Graduation Cap: Roll out black fondant about ¼ inch thick. Cut out a square approximately 4 inches (10 cm) wide for the top of the cap. Cut a smaller rectangle for the base. Assemble on the cake, attaching pieces gently with a dab of water. Pipe a tassel using edible gel colored gold or yellow.
- Final Touches: Add any optional decorations like edible silver beads. Refrigerate the cake until ready to serve but bring to room temperature before slicing for best flavor and texture.
Pro tip: If your buttercream feels too soft, chill it for 10 minutes and re-whip before frosting. And don’t rush the cooling step—patience here pays off in a smooth finish.
Cooking Tips & Techniques
Getting the perfect creamy buttercream and moist cake can be tricky, but I’ve learned a few things the hard way. First, always use room temperature ingredients, especially eggs and butter. Cold butter just won’t whip up to that fluffy stage you need.
When mixing, don’t skip the creaming of butter and sugar—it traps air, which helps the cake rise nicely. Also, alternate adding dry ingredients and milk to keep the batter smooth; overmixing after adding flour can make the cake dense.
For buttercream, sift your powdered sugar to avoid lumps—trust me, biting into a sugar lump is not fun. Beat the frosting long enough to get that light, airy texture, but not so long that it becomes greasy or too soft.
When decorating, rolling fondant too thin can cause it to tear, so keep it about ¼ inch thick. If it’s sticky, dust lightly with powdered sugar or cornstarch. Using a small amount of water as “glue” helps attach fondant details without mess.
Last but not least, timing matters. Bake your cake a day ahead and refrigerate after frosting. It helps the flavors meld and makes cutting cleaner. On serving day, let the cake sit at room temp for 30 minutes before slicing to bring out the creamy softness.
Variations & Adaptations
There’s room to play with this recipe depending on dietary needs or flavor preferences. Here are some ideas I’ve tried or thought about:
- Chocolate Version: Swap ½ cup of flour for unsweetened cocoa powder for a rich chocolate cake base. Pair with a chocolate or mocha buttercream for a decadent twist.
- Fruit-Flavored Frosting: Add 2 tbsp of pureed fresh strawberries or raspberries to the buttercream for a subtle fruity note. This adds a pop of color and brightness.
- Vegan Adaptation: Use plant-based butter and milk alternatives, and replace eggs with flax eggs (1 tbsp ground flaxseed + 3 tbsp water per egg). The cake will be slightly denser but still moist and tasty.
- Nut-Free Option: This recipe is naturally nut-free, but double-check any store-bought fondant and food coloring to avoid cross-contamination.
- Alternate Decorations: Instead of fondant, pipe the graduation cap with black buttercream using a flat square tip for a simpler approach. You can also use edible markers on fondant for personalized messages.
Once, I made a version with a lemon glaze drizzle on the sides—it was a hit at a spring graduation party, adding a zesty brightness to balance the creamy sweetness. Feel free to experiment with flavors or decorations to suit your celebration style.
Serving & Storage Suggestions
This cake serves best at room temperature, so take it out of the fridge 30-45 minutes before serving. The buttercream softens and the flavors open up, making each bite melt in your mouth. Serve with fresh berries or a light fruit salad to complement the richness.
For storage, cover the cake loosely with plastic wrap and refrigerate. It keeps well for up to 4 days. If you need longer storage, wrap tightly and freeze for up to 2 months. When freezing, it’s best to freeze unfrosted cake layers and frost after thawing for best texture.
Reheat slices gently in the microwave for 10-15 seconds if you prefer warm cake. The buttercream will soften nicely without melting away.
Fun fact: I’ve noticed the flavors actually deepen after a day, making leftovers even more satisfying. It’s a handy trick if you’re prepping ahead for a party.
Nutritional Information & Benefits
This Easy Creamy Buttercream Graduation Cap Sheet Cake is definitely a treat, but here’s a rough estimate per serving (1 slice out of 12):
| Calories | 360 kcal |
|---|---|
| Fat | 18 g |
| Carbohydrates | 48 g |
| Protein | 3 g |
| Sugar | 35 g |
Key ingredients like butter and eggs provide fat-soluble vitamins and protein, while vanilla and sugar add flavor and energy. If you use whole milk, you get a bit of calcium too. This cake is not gluten-free unless you make the substitution mentioned earlier, and it contains dairy and eggs, so keep that in mind for allergies.
From a wellness perspective, I see this cake as an occasional celebratory indulgence—perfect for marking milestones with joy and togetherness. Pair it with a nutritious meal or fresh fruit to balance the day.
Conclusion
This Easy Creamy Buttercream Graduation Cap Sheet Cake has become my favorite way to add a sweet, personal touch to graduation parties. It’s simple enough to whip up when time is tight, yet special enough to make the day memorable. What I love most is how it combines comfort and celebration in every bite—creamy, moist, and just the right amount of festive.
Feel free to tweak the flavors or decorations to fit your style. After all, no two graduations are alike, and neither should their cake be. I’d love to hear how your cake turns out or any fun twists you add. Drop a comment or share your photos!
Here’s to sweet moments and new beginnings.
FAQs
Can I make this cake a day ahead?
Yes, it actually tastes better after resting overnight. Just keep it covered in the fridge and bring it to room temperature before serving.
What if I don’t want to use fondant for the graduation cap?
You can pipe the cap with black buttercream using a flat piping tip, or use black edible markers on fondant sheets for a simpler decoration.
Can I freeze this cake?
Yes, freeze the unfrosted cake layers wrapped well, then thaw and frost fresh. The frosted cake can also be frozen, but texture might be slightly affected.
How do I make the buttercream less sweet?
Try reducing the powdered sugar by ½ cup (about 60 grams) and add a pinch more salt to balance the flavors. Keep in mind that texture may change slightly.
Is this recipe suitable for beginners?
Absolutely! The steps are straightforward, and the decorations can be as simple or fancy as you like. It’s a great cake to build confidence with buttercream and fondant.
Pin This Recipe!
Easy Creamy Buttercream Graduation Cap Sheet Cake
A simple and festive sheet cake with creamy buttercream frosting and a graduation cap decoration, perfect for graduation parties. Quick to make with basic pantry ingredients and a moist, comforting texture.
- Prep Time: 20 minutes
- Cook Time: 40 minutes
- Total Time: 1 hour 15 minutes
- Yield: 12 servings 1x
- Category: Dessert
- Cuisine: American
Ingredients
- 2 ½ cups all-purpose flour (312 grams)
- 2 cups granulated sugar (400 grams)
- 2 ½ tsp baking powder
- ½ tsp baking soda
- ½ tsp salt
- ¾ cup unsalted butter, softened (170 grams)
- 1 cup whole milk, room temperature (240 ml)
- 3 large eggs, room temperature
- 2 tsp pure vanilla extract
- 1 ½ cups unsalted butter, softened (340 grams) for frosting
- 5 cups powdered sugar, sifted (600 grams)
- 4 tbsp heavy cream (60 ml)
- 1 ½ tsp pure vanilla extract for frosting
- Pinch of salt for frosting
- About 4 oz black fondant (115 grams) for decoration
- Edible gold or yellow gel food coloring or piping gel for tassel
- Optional: edible silver beads for decoration
Instructions
- Preheat oven to 350°F (175°C). Grease a 9×13 inch sheet pan with butter or non-stick spray and lightly dust with flour.
- In a large bowl, whisk together flour, baking powder, baking soda, and salt. Set aside.
- Using a mixer, beat softened butter and granulated sugar on medium-high speed for 3-4 minutes until pale and fluffy.
- Beat in eggs one at a time, then add vanilla extract. Mix until smooth and creamy.
- On low speed, alternately add dry ingredients and milk in three parts, starting and ending with dry ingredients. Mix just until combined.
- Pour batter into prepared pan and smooth the top. Bake for 35-40 minutes or until a toothpick inserted in the center comes out clean.
- Cool cake completely in the pan on a wire rack, about 1 hour.
- For the buttercream, beat softened butter on medium speed until creamy, about 2 minutes. Gradually add sifted powdered sugar, then vanilla, salt, and heavy cream. Beat on high for 3-4 minutes until fluffy and spreadable. Adjust consistency if needed.
- Spread a thin crumb coat of frosting on the cooled cake. Chill for 15 minutes, then apply a final smooth layer of buttercream.
- Roll out black fondant to about ¼ inch thick. Cut a 4-inch square for the cap top and a smaller rectangle for the base. Assemble on the cake using a dab of water as glue.
- Pipe a tassel with edible gold or yellow gel. Add optional edible silver beads.
- Refrigerate cake until ready to serve. Bring to room temperature 30-45 minutes before slicing.
Notes
Use room temperature ingredients for best results. Avoid overmixing batter to keep cake tender. Chill buttercream if too soft and re-whip before frosting. Bake cake a day ahead and refrigerate after frosting for better flavor and easier slicing. Bring cake to room temperature before serving. For gluten-free, substitute flour with 1:1 gluten-free blend. For dairy-free, use plant-based butter and milk alternatives. Fondant can be replaced with black buttercream for simpler decoration.
Nutrition
- Serving Size: 1 slice (1/12 of cak
- Calories: 360
- Sugar: 35
- Fat: 18
- Carbohydrates: 48
- Protein: 3
Keywords: graduation cake, buttercream cake, sheet cake, easy cake recipe, party cake, creamy frosting, fondant decoration