Let me tell you, the smell of melted cheese mingling with seasoned ground beef and crunchy tortilla chips is enough to make anyone’s mouth water. The first time I made these Easy Cheesy Walking Tacos in a Bag, I was instantly hooked. It was one of those moments where you pause, take a deep breath, and just smile because you know you’re onto something truly special. Years ago, when I was knee-high to a grasshopper, family picnics were all about simple, handheld treats, but nothing quite hit the spot like these walking tacos do now.
Honestly, they’re dangerously easy and packed with pure, nostalgic comfort. My family couldn’t stop sneaking them off the cooling rack (and I can’t really blame them). You know what? This recipe is perfect for quick snacks, casual get-togethers, or even a fun lunch on a busy day. It’s the kind of dish that brightens up your Pinterest cookie board but with savory vibes instead of sweets. After testing this recipe multiple times in the name of research, of course, it’s become a staple for family gatherings, last-minute meals, and even gifting at potlucks. Trust me, you’re going to want to bookmark this one.
Why You’ll Love This Recipe
Having whipped up countless taco variations over the years, I can say this Easy Cheesy Walking Tacos in a Bag recipe stands out for all the right reasons. It’s super approachable, quick, and a guaranteed crowd-pleaser.
- Quick & Easy: Comes together in under 20 minutes — perfect for busy weeknights or last-minute cravings.
- Simple Ingredients: No fancy grocery trips needed; you likely already have everything in your kitchen.
- Perfect for Casual Occasions: Great for backyard barbecues, potlucks, or as a fun snack for kids’ parties.
- Crowd-Pleaser: Always gets rave reviews from kids and adults alike, thanks to the cheesy, crunchy goodness.
- Unbelievably Delicious: The texture combo of crunchy chips, melty cheese, and seasoned beef is pure comfort food magic.
This isn’t just another taco recipe—it’s the best version I’ve found that balances all the flavors without fuss. The secret? Keeping the chips in individual bags means less mess and maximum portability. Plus, mixing in a little creamy cheese sauce (I love a sharp cheddar blend for richness) takes it over the top. Honestly, after the first bite, you might just close your eyes and savor every mouthful. It’s comfort food with a no-fuss twist, perfect for impressing guests or just treating yourself.
What Ingredients You Will Need
This recipe uses simple, wholesome ingredients to deliver bold flavor and satisfying texture without the fuss. Most are pantry staples, so it’s super easy to whip up whenever the craving hits.
- Ground Beef (1 lb / 450 g): Use lean or regular, depending on your preference (I go for 85% lean for juicy flavor).
- Taco Seasoning (2 tbsp): Store-bought works fine, but homemade blends add a personal touch (cumin, chili powder, garlic powder).
- Mini Nacho Cheese Tortilla Chips (4 individual bags): The smaller chip size fits perfectly in the bags; I recommend Fritos Scoops or any sturdy chip brand.
- Shredded Cheddar Cheese (1 cup / 100 g): Sharp cheddar gives that perfect tangy kick (feel free to mix with Monterey Jack).
- Cheese Sauce (½ cup / 120 ml): Optional but highly recommended for extra creaminess (you can make a quick cheese sauce or buy pre-made queso).
- Diced Tomatoes (½ cup / 120 g): Fresh or canned, drained (adds freshness and color).
- Chopped Green Onions (2 tbsp): For a mild onion bite and pop of green.
- Sour Cream (¼ cup / 60 ml): Optional, adds a cool, tangy contrast.
- Fresh Cilantro (a few sprigs): For garnish, totally optional but brightens the flavor.
- Salt and Pepper: To taste, balancing all the flavors.
You can swap out ground beef for ground turkey or plant-based crumbles for a lighter or vegetarian-friendly option. If you like, try dairy-free cheese and sour cream to make it vegan. In summer, fresh pico de gallo or sliced jalapeños can add a bit of zing!
Equipment Needed
- Large Skillet or Frying Pan: For browning the ground beef evenly. A non-stick pan helps reduce sticking, but any heavy-bottomed skillet works.
- Mixing Spoon or Spatula: For stirring the beef and seasoning.
- Measuring Spoons and Cups: To get those taco seasoning and cheese amounts just right.
- Bowl: For mixing any cheese sauce or toppings if you’re making them from scratch.
- Serving Spoon or Tongs: To portion out the beef into the chip bags.
If you don’t have a skillet, a sauté pan or even a cast iron works great and adds a nice sear. For budget-friendly options, many grocery stores carry affordable non-stick pans that make cleanup a breeze. I’ve found that a sturdy spatula with a silicone edge is perfect for scraping up every bit of seasoned beef—it’s a game changer!
Preparation Method

- Brown the Ground Beef (8-10 minutes): Heat your skillet over medium-high heat. Add the ground beef and break it apart with your spoon. Cook until no longer pink and slightly browned, about 8 to 10 minutes. Drain excess fat if needed.
- Season the Meat (2 minutes): Lower the heat to medium, sprinkle 2 tablespoons of taco seasoning evenly over the beef. Stir well to coat every bit. Add a splash of water (about ¼ cup / 60 ml) and let it simmer until the liquid mostly evaporates, about 2 minutes. This locks in flavor and keeps the beef juicy.
- Prepare Cheese Sauce (Optional, 5 minutes): While the beef cooks, whisk together your cheese sauce or heat pre-made queso. A quick homemade sauce involves melting 2 tablespoons butter, stirring in 2 tablespoons flour, then gradually whisking in ½ cup milk until thickened. Stir in shredded cheese until smooth.
- Assemble the Walking Tacos (3-5 minutes): Open the mini chip bags and gently crush the chips a bit inside the bag to make room. Spoon seasoned beef evenly into each bag over the chips.
- Add Cheese and Toppings: Drizzle cheese sauce over the beef or sprinkle shredded cheddar directly. Add diced tomatoes, chopped green onions, and a dollop of sour cream if desired. Finish with cilantro garnish for a fresh touch.
- Serve Immediately: Hand out forks or spoons for easy eating right from the bag—no plates needed!
Note: If the beef seems dry, add a splash more water during cooking or a spoonful of salsa. The chips will soften slightly from the beef juices and cheese, which is exactly what you want—soft crunch!
Cooking Tips & Techniques
From personal experience, the best walking tacos balance textures—you want the crunch of chips with the melty, juicy beef and cheese.
- Don’t overcook the beef: Keep an eye so it stays juicy, not dried out. A slightly pink center before seasoning helps keep moisture.
- Season gradually: Add taco seasoning in two steps if you want a more layered flavor; taste test as you go.
- Cheese sauce consistency: If making your own, keep whisking to avoid lumps. If it gets too thick, thin with a little milk.
- Chip choice matters: Use sturdy chips that won’t turn to mush too quickly—Scoop-style or thick nachos are perfect.
- Multitask smartly: While beef simmers, prep toppings to save time. This keeps everything fresh and ready right when you finish cooking.
One cooking fail I learned from: trying to mix everything early on in the pan made the chips soggy—assembling in bags last minute keeps that perfect walking taco texture intact!
Variations & Adaptations
Walking tacos are ridiculously flexible. Here are some of my favorite twists:
- Vegetarian Version: Swap ground beef for seasoned black beans or lentils. Add corn and avocado for extra texture.
- Spicy Kick: Mix in diced jalapeños or a dash of hot sauce to the beef. Swap mild cheddar for pepper jack cheese.
- Low-Carb Adaptation: Skip the chips and serve the beef and toppings over a bed of shredded lettuce or in a low-carb taco bowl.
- Seasonal Twist: In summer, add fresh corn kernels and pico de gallo. In winter, swap tomatoes for roasted peppers.
Personally, I once tried a BBQ walking taco version with pulled pork instead of beef and smoky cheddar. It was a total hit at a weekend cookout. Don’t be afraid to get creative—you can cater these to any taste!
Serving & Storage Suggestions
These Easy Cheesy Walking Tacos are best served immediately while the cheese is melty and the chips still have crunch. They’re perfect handheld snacks for outdoor parties or casual lunches. Pair them with a cold soda, iced tea, or a fresh lime agua fresca for a refreshing combo.
Leftovers can be stored in an airtight container in the refrigerator for up to 2 days. The chips will soften, so I recommend separating the beef and toppings from the chips before storing if you want to keep the crunch. Reheat the beef gently in a skillet or microwave, then assemble fresh chips when ready to eat.
Flavors actually deepen after resting, so if you have time, letting the beef sit in the fridge overnight can make your walking tacos even tastier the next day.
Nutritional Information & Benefits
Each serving of these walking tacos provides a good balance of protein, fats, and carbs, making it a satisfying snack or light meal. The ground beef offers iron and B vitamins, while cheese adds calcium and a creamy texture. Using lean beef keeps the fat content moderate.
This recipe can be easily modified for gluten-free diets by choosing certified gluten-free chips and seasoning. Plus, swapping sour cream for Greek yogurt boosts protein and adds probiotics.
From a wellness perspective, the ingredients are straightforward and wholesome, without fillers or preservatives often found in processed snacks. It’s a fun way to enjoy comfort food with some nutritional balance.
Conclusion
Easy Cheesy Walking Tacos in a Bag are a delicious, fuss-free snack that’s sure to become a favorite in your recipe lineup. They’re perfect for busy days, casual gatherings, or just when you want something tasty without the hassle. I love how customizable and quick they are—plus, who doesn’t enjoy eating right out of the bag? This recipe brings together all the best flavors and textures in a way that feels both fun and satisfying.
If you give this recipe a try, please leave a comment or share how you made it your own. I’m always eager to hear your twists and tips! Remember, cooking is all about experimenting and having fun, so feel free to play around with ingredients and make these walking tacos truly yours. Happy munching!
FAQs
Can I make walking tacos ahead of time?
It’s best to prepare the beef and toppings ahead but assemble the tacos just before serving to keep the chips crunchy.
What chips are best for walking tacos?
Mini nacho chips like Fritos Scoops or sturdy tortilla chips hold up best without getting soggy quickly.
Can I use ground turkey or chicken instead of beef?
Absolutely! Ground turkey or chicken works well; just adjust seasoning and cooking times accordingly.
How do I make a quick cheese sauce for these tacos?
Melt butter, whisk in flour, slowly add milk until thickened, then stir in shredded cheese until smooth—easy and tasty!
Are walking tacos gluten-free?
They can be if you use gluten-free chips and seasoning. Always check labels to be sure.
Pin This Recipe!
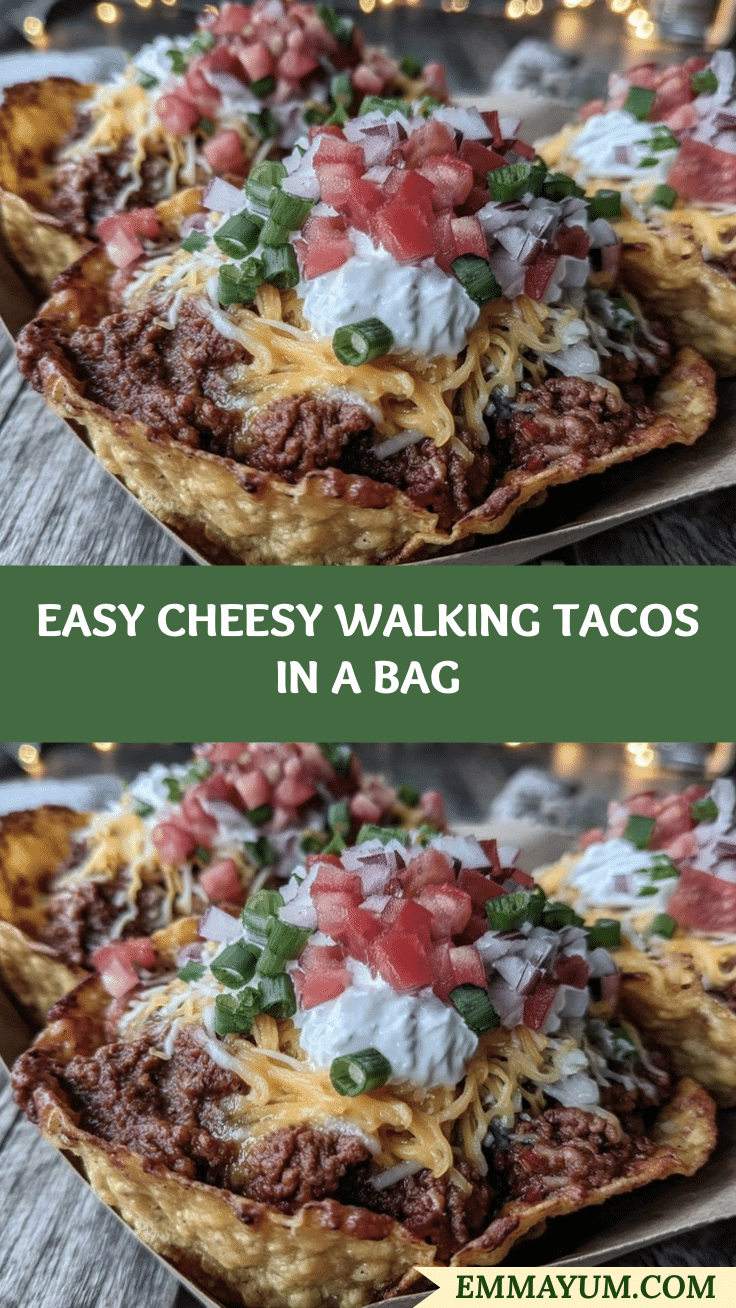
Easy Cheesy Walking Tacos in a Bag

A quick and easy recipe for cheesy walking tacos served in individual chip bags, perfect for snacks, casual gatherings, or fun lunches.
- Prep Time: 5 minutes
- Cook Time: 15 minutes
- Total Time: 20 minutes
- Yield: 4 servings 1x
- Category: Snack
- Cuisine: Mexican-American
Ingredients
- 1 lb ground beef (85% lean preferred)
- 2 tbsp taco seasoning (store-bought or homemade blend of cumin, chili powder, garlic powder)
- 4 individual bags mini nacho cheese tortilla chips (e.g., Fritos Scoops)
- 1 cup shredded cheddar cheese (sharp cheddar recommended)
- ½ cup cheese sauce (optional, homemade or pre-made queso)
- ½ cup diced tomatoes (fresh or canned, drained)
- 2 tbsp chopped green onions
- ¼ cup sour cream (optional)
- Fresh cilantro sprigs (optional, for garnish)
- Salt and pepper to taste
Instructions
- Heat a large skillet over medium-high heat. Add ground beef and break apart with a spoon. Cook until no longer pink and slightly browned, about 8 to 10 minutes. Drain excess fat if needed.
- Lower heat to medium. Sprinkle 2 tablespoons taco seasoning evenly over the beef. Stir well to coat. Add about ¼ cup water and simmer until liquid mostly evaporates, about 2 minutes.
- (Optional) Prepare cheese sauce by melting 2 tablespoons butter, stirring in 2 tablespoons flour, then gradually whisking in ½ cup milk until thickened. Stir in shredded cheese until smooth.
- Open mini chip bags and gently crush chips inside to make room. Spoon seasoned beef evenly into each bag over the chips.
- Drizzle cheese sauce over beef or sprinkle shredded cheddar cheese directly. Add diced tomatoes, chopped green onions, and a dollop of sour cream if desired. Garnish with cilantro.
- Serve immediately with forks or spoons for easy eating right from the bag.
Notes
Use sturdy mini nacho chips like Fritos Scoops to prevent sogginess. Assemble tacos just before serving to keep chips crunchy. For a vegetarian version, substitute ground beef with seasoned black beans or lentils. Cheese sauce is optional but adds creaminess. Leftovers should be stored separately to maintain chip crunch.
Nutrition
- Serving Size: 1 walking taco bag
- Calories: 450
- Sugar: 3
- Sodium: 650
- Fat: 28
- Saturated Fat: 12
- Carbohydrates: 28
- Fiber: 3
- Protein: 22
Keywords: walking tacos, cheesy tacos, quick snacks, easy taco recipe, family-friendly, handheld tacos, taco in a bag