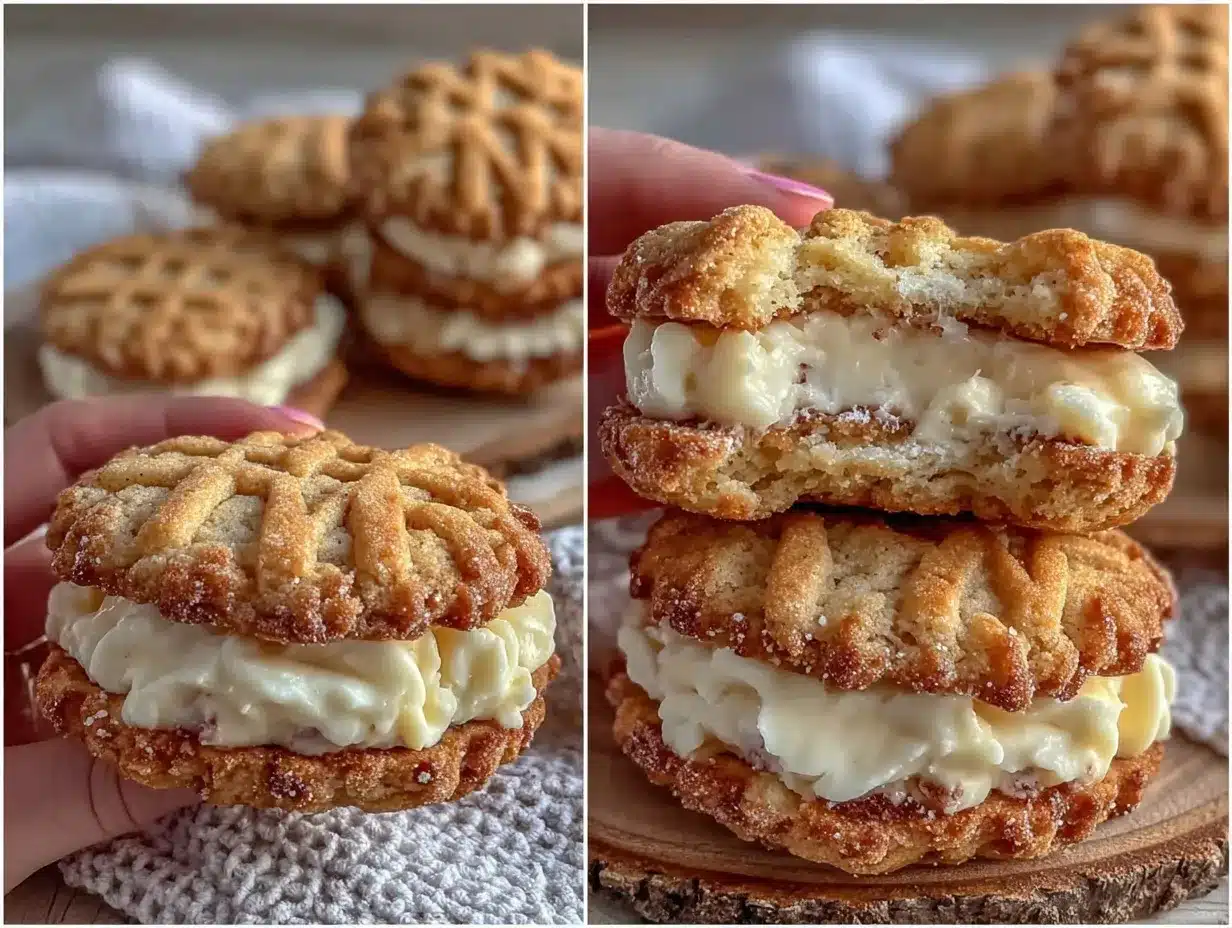
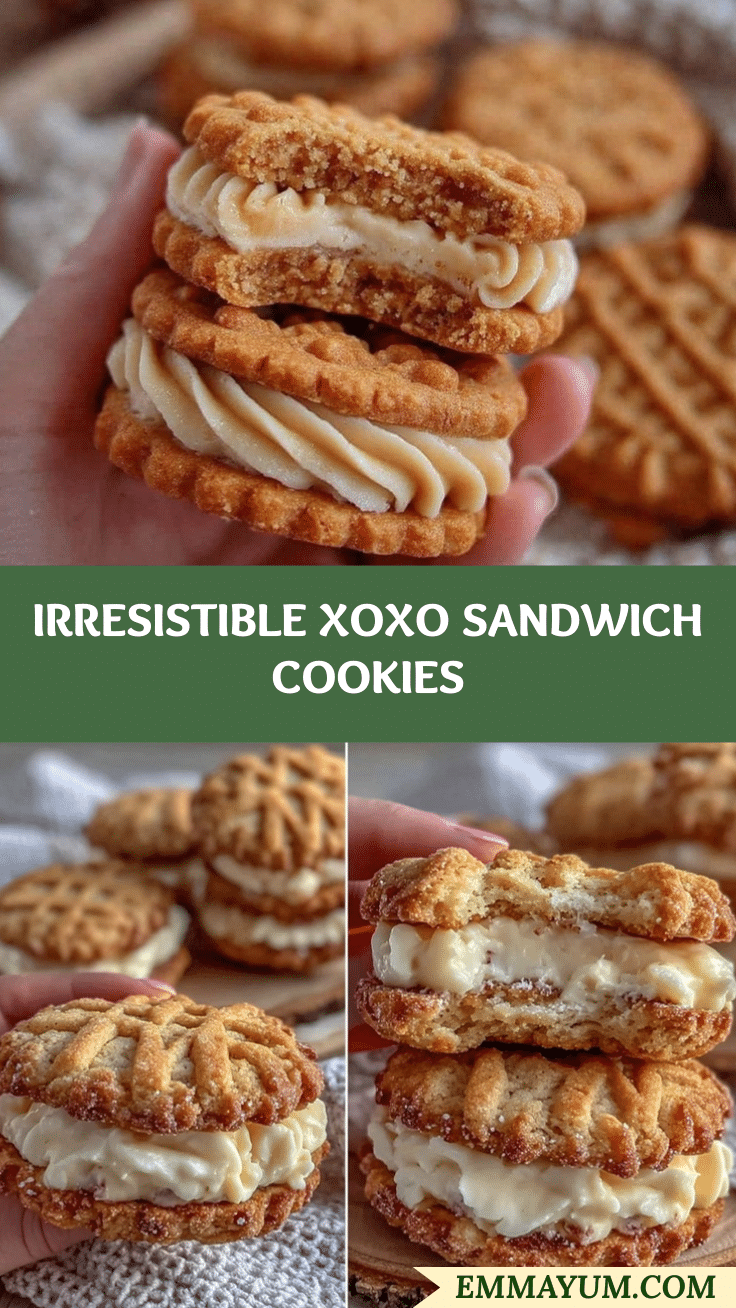
Let me tell you, the scent of buttery vanilla wafting from my oven as these Classic Homemade XOXO Sandwich Cookies bake is enough to make anyone’s mouth water. The first time I baked these charming little treats, I was instantly hooked—the kind of moment where you pause, take a deep breath, and just smile because you know you’re onto something truly special. Years ago, when I was knee-high to a grasshopper, my grandma used to make something similar, but these cookies bring back that nostalgic comfort with a fresh, homemade twist.
Honestly, my family couldn’t stop sneaking them off the cooling rack (and I can’t really blame them). You know what makes these XOXO cookies dangerously easy and perfect? They’re not just pretty with their classic “X” and “O” imprints—they’re also the perfect sweet treat for your kids, a delightful surprise at potlucks, or a way to brighten up your Pinterest cookie board with something timeless and utterly delicious. I’ve tested this recipe more times than I can count (in the name of research, of course), and it’s become a staple for family gatherings and gifting. These cookies feel like a warm hug wrapped in vanilla-scented dough—you’re going to want to bookmark this one, trust me!
Why You’ll Love This Recipe
Coming from plenty of kitchen experiments and heartfelt family feedback, this Classic Homemade XOXO Sandwich Cookies recipe is something I’m proud to share. Here’s why you’ll absolutely love it:
- Quick & Easy: This recipe comes together in under an hour, perfect for busy weeknights or last-minute cookie cravings.
- Simple Ingredients: No fancy grocery store trips needed—you likely have everything in your pantry already.
- Perfect for Any Occasion: Whether it’s a cozy afternoon tea, a festive potluck, or a sweet treat for your kids, these cookies fit right in.
- Crowd-Pleaser: Always gets rave reviews from kids and adults alike, thanks to the classic vanilla filling and buttery cookie base.
- Unbelievably Delicious: The crisp texture of the cookies combined with the creamy vanilla filling is next-level comfort food.
What sets this recipe apart isn’t just the traditional design—it’s the balance. The dough is perfectly tender, not too crumbly, and the creamy filling is just sweet enough, with that homemade vanilla essence that feels both nostalgic and fresh. I’ve swapped in a little cornstarch here and there for a melt-in-your-mouth texture, and trust me, it makes all the difference. This isn’t just another sandwich cookie recipe—it’s the one that makes you close your eyes after the first bite and smile. It’s comfort food reimagined for today’s kitchen, and it’s ready to impress without any stress.
What Ingredients You Will Need
This recipe uses simple, wholesome ingredients to deliver bold flavor and satisfying texture without the fuss. Most are pantry staples, and substitutions are easy, so you can feel confident baking these anytime.
- For the Cookie Dough:
- 1 cup (227g) unsalted butter, softened (I recommend Land O Lakes for best creaminess)
- 3/4 cup (150g) granulated sugar
- 1 large egg, room temperature
- 2 teaspoons pure vanilla extract (look for Nielsen-Massey for top-notch flavor)
- 2 1/2 cups (312g) all-purpose flour
- 1/2 teaspoon baking powder
- 1/4 teaspoon salt
- 1 tablespoon cornstarch (adds tenderness and that delicate crumb)
- For the Creamy Vanilla Filling:
- 1/2 cup (115g) unsalted butter, softened
- 1 1/2 cups (180g) powdered sugar, sifted
- 1 teaspoon pure vanilla extract
- 1-2 tablespoons whole milk or heavy cream (use dairy-free milk if needed)
For a gluten-free twist, swap the all-purpose flour with a 1:1 gluten-free baking flour blend. I’ve tried this with Bob’s Red Mill gluten-free flour, and it works beautifully. And if you’re dairy-free, swapping butter with a plant-based alternative and using coconut or almond milk in the filling turns these cookies into a dairy-free delight without losing that classic flavor you crave.
Equipment Needed
- Mixing bowls (preferably two: one for dough, one for filling)
- Electric hand mixer or stand mixer (helps whip butter and sugar perfectly—though a sturdy whisk works in a pinch)
- Measuring cups and spoons (accuracy is key for perfect cookies)
- Rolling pin (a silicone or wooden one works fine)
- XOXO cookie stamp or rolling cutter (optional but really adds the classic touch)
- Baking sheets lined with parchment paper or silicone baking mats
- Cooling racks (to cool cookies evenly and avoid sogginess)
If you don’t have an XOXO cookie stamp, you can simply use a small fork or toothpick to create the “X” and “O” patterns—makes for a fun DIY touch. For budget-friendly options, silicone mats are reusable and save on parchment paper waste. I’ve found that mixing the dough with a stand mixer saves wrist strain, but my grandma used to do it by hand, so it’s totally doable without fancy gadgets.
Preparation Method
- Prepare the Dough: In a large mixing bowl, cream 1 cup (227g) softened unsalted butter with 3/4 cup (150g) granulated sugar using an electric mixer on medium speed for about 3-4 minutes until fluffy and pale. You should see it lighten up and feel airy to the touch.
- Add Egg and Vanilla: Beat in 1 large room temperature egg and 2 teaspoons pure vanilla extract until fully combined, scraping down the sides as needed.
- Combine Dry Ingredients: In a separate bowl, whisk together 2 1/2 cups (312g) all-purpose flour, 1/2 teaspoon baking powder, 1/4 teaspoon salt, and 1 tablespoon cornstarch.
- Mix Dry into Wet: Gradually add the dry ingredients to the butter mixture on low speed, mixing just until a soft dough forms. Avoid overmixing, or the cookies may turn tough.
- Chill the Dough: Shape the dough into a disk, wrap tightly in plastic wrap, and refrigerate for at least 1 hour. This step is crucial—it firms up the dough, making it easier to roll and helps the cookies keep their shape.
- Preheat and Roll: Preheat your oven to 350°F (175°C). On a lightly floured surface, roll the dough out to about 1/4 inch (6mm) thickness. Use your XOXO cookie stamp or cookie cutter to cut out shapes. Place cookies about 1 inch (2.5 cm) apart on parchment-lined baking sheets.
- Stamp or Decorate: If you don’t have a cookie stamp, gently press a fork or toothpick to create “X” and “O” patterns on alternating cookies for that classic look.
- Bake: Bake for 10-12 minutes or until edges are just starting to turn golden. The centers should still look a bit soft—that’s perfect for that tender texture.
- Cool Completely: Let the cookies cool on the baking sheet for 5 minutes, then transfer to a wire rack to cool completely. This prevents soggy bottoms and keeps them crisp.
- Prepare the Filling: In a clean bowl, beat 1/2 cup (115g) softened unsalted butter until creamy. Gradually add 1 1/2 cups (180g) sifted powdered sugar, beating on low speed until smooth. Mix in 1 teaspoon vanilla extract and 1-2 tablespoons whole milk or cream until you get a spreadable, fluffy consistency.
- Assemble the Sandwiches: Spread a generous tablespoon of vanilla filling on the flat side of one cookie, then gently press another cookie on top to form a sandwich. Repeat with remaining cookies.
- Rest and Serve: Let the assembled cookies rest for about 15 minutes so the filling can set slightly—this makes them easier to handle and even more delicious.
Pro tip: If your dough feels sticky after chilling, sprinkle a little flour when rolling, but don’t overdo it or the cookies get dry. And honestly, stamping the cookies right before baking is key—if you wait too long, the dough warms up and loses definition.
Cooking Tips & Techniques
One thing I’ve learned making these XOXO sandwich cookies is that chilling the dough is non-negotiable. I once skipped that step (rookie mistake) and ended up with cookies that spread too much and lost their signature shape. Chilling firms up the butter and prevents spreading, so don’t rush it.
When creaming butter and sugar, patience pays off. Beat it long enough until it’s light and fluffy—that’s what creates the perfect texture inside the cookie. Also, use room temperature eggs; cold eggs can cause the dough to seize up, making it harder to mix smoothly.
Another trick is to sift your powdered sugar for the filling. It prevents lumps, giving you that silky smooth texture that spreads easily and tastes heavenly. When adding milk or cream to the filling, add it gradually—too much and the frosting gets runny, too little and it’s crumbly.
Timing is everything: bake your cookies just until the edges are golden, not brown. They continue to firm up as they cool, so pulling them out at the right time ensures a tender bite. To multitask, prep your filling while the cookies bake and cool. This keeps the workflow smooth, and you won’t rush the delicate frosting step.
Variations & Adaptations
- Chocolate XOXO Cookies: Add 1/3 cup (35g) cocoa powder to the dry ingredients for a rich chocolate twist. Swap vanilla filling for a chocolate ganache or chocolate buttercream.
- Gluten-Free Version: Use a 1:1 gluten-free baking flour blend (Bob’s Red Mill is my go-to). The texture may be slightly different but still deliciously tender.
- Seasonal Flavors: In the filling, try swapping vanilla extract for almond or peppermint extract for holiday vibes. You can also add finely grated lemon zest for a springtime zing.
- Dairy-Free Adaptation: Use vegan butter and coconut or almond milk in the filling. The cookies maintain their charm and flavor without dairy.
- Nutty Delight: Add 1/4 cup finely chopped toasted pecans or walnuts to the dough for a subtle crunch—my family loved this variation!
Personally, I once made a batch swapping vanilla extract in the filling for bourbon vanilla—just a splash. The depth it added was unexpected but absolutely delightful. Feel free to play around with flavorings to find your perfect match.
Serving & Storage Suggestions
These Classic Homemade XOXO Sandwich Cookies are best served at room temperature to enjoy their full flavor and soft, buttery texture. They’re perfect alongside a cup of tea or a glass of cold milk, especially for afternoon snacking or after-dinner treats.
When serving at parties or potlucks, arrange them on a pretty platter with a dusting of powdered sugar for that extra touch of charm. They also make fantastic gifts when wrapped in parchment paper and tied with a ribbon.
To store, place the cookies in an airtight container at room temperature for up to 4 days. For longer storage, refrigerate for up to 1 week or freeze for up to 3 months. When freezing, separate layers with parchment paper to avoid sticking. Thaw in the fridge overnight and bring to room temperature before serving.
Reheating is usually not necessary, but if you want a freshly baked feel, warm them gently in a low oven (about 275°F or 135°C) for 5 minutes. Keep in mind the filling softens, so handle with care. Flavors actually mellow and deepen after a day or two, so if you can wait, they taste even better the next day.
Nutritional Information & Benefits
Estimated per cookie (one sandwich): approximately 150-180 calories, 8g fat, 20g carbohydrates, and 1.5g protein. These cookies are a treat, so enjoying them in moderation is the way to go.
The star ingredients—real butter and vanilla—offer more than just taste. Butter contains fat-soluble vitamins and contributes to that satisfying mouthfeel, while vanilla extract adds antioxidants and a natural comforting aroma. Using real, simple ingredients means you know exactly what’s going into your cookies, avoiding unnecessary preservatives or artificial flavors.
For those keeping an eye on dietary needs, swapping to gluten-free flour or dairy-free alternatives makes this recipe friendly for many. Just be mindful of cross-contamination if allergies are a concern. These cookies can be a sweet moment of indulgence that fits within a balanced lifestyle.
Conclusion
Classic Homemade XOXO Sandwich Cookies with Creamy Vanilla Filling are more than just a pretty face on your cookie tray—they’re a nostalgic, buttery, vanilla-scented bite of happiness that anyone can make at home. Whether you customize the flavors, bake them for a special occasion, or share them with loved ones, this recipe is a keeper.
I love this recipe because it’s simple, reliable, and always brings smiles. It’s the kind of baking project that feels rewarding but never overwhelming. So go ahead, make a batch, and tweak it to fit your taste buds. I’d love to hear how you make it your own—drop a comment or share your photos!
Happy baking, and may your kitchen smell like vanilla dreams!
FAQs about Classic Homemade XOXO Sandwich Cookies
Can I make the cookie dough ahead of time?
Absolutely! The dough can be made and refrigerated for up to 3 days before rolling out and baking. Just keep it tightly wrapped to prevent drying out.
How do I keep the “X” and “O” impressions sharp?
Chill your dough well before stamping, and press firmly but gently. If the dough gets too warm, pop it back in the fridge for 10 minutes before continuing.
What’s the best way to store these sandwich cookies?
Store them in an airtight container at room temperature for up to 4 days, or freeze for longer storage. Separate layers with parchment paper to avoid sticking.
Can I use a different filling for these cookies?
Yes! Cream cheese frosting, chocolate ganache, or flavored buttercreams all work well. Just make sure the filling isn’t too runny to avoid messy sandwiches.
Are these cookies kid-friendly?
Definitely! Kids love the fun “X” and “O” shapes and the creamy vanilla filling. They’re perfect for baking together or packing into lunchboxes.
Pin This Recipe!
Classic Homemade XOXO Sandwich Cookies Easy Recipe with Creamy Vanilla Filling

These Classic Homemade XOXO Sandwich Cookies feature a tender buttery vanilla cookie with a creamy vanilla filling, perfect for any occasion and easy to make.
- Prep Time: 15 minutes
- Cook Time: 12 minutes
- Total Time: 1 hour 30 minutes
- Yield: 24 sandwich cookies 1x
- Category: Dessert
- Cuisine: American
Ingredients
- 1 cup (227g) unsalted butter, softened
- 3/4 cup (150g) granulated sugar
- 1 large egg, room temperature
- 2 teaspoons pure vanilla extract
- 2 1/2 cups (312g) all-purpose flour
- 1/2 teaspoon baking powder
- 1/4 teaspoon salt
- 1 tablespoon cornstarch
- For the Creamy Vanilla Filling:
- 1/2 cup (115g) unsalted butter, softened
- 1 1/2 cups (180g) powdered sugar, sifted
- 1 teaspoon pure vanilla extract
- 1–2 tablespoons whole milk or heavy cream
Instructions
- In a large mixing bowl, cream 1 cup softened unsalted butter with 3/4 cup granulated sugar using an electric mixer on medium speed for about 3-4 minutes until fluffy and pale.
- Beat in 1 large room temperature egg and 2 teaspoons pure vanilla extract until fully combined, scraping down the sides as needed.
- In a separate bowl, whisk together 2 1/2 cups all-purpose flour, 1/2 teaspoon baking powder, 1/4 teaspoon salt, and 1 tablespoon cornstarch.
- Gradually add the dry ingredients to the butter mixture on low speed, mixing just until a soft dough forms. Avoid overmixing.
- Shape the dough into a disk, wrap tightly in plastic wrap, and refrigerate for at least 1 hour.
- Preheat oven to 350°F (175°C). On a lightly floured surface, roll the dough out to about 1/4 inch thickness.
- Use an XOXO cookie stamp or cookie cutter to cut out shapes. Place cookies about 1 inch apart on parchment-lined baking sheets.
- If no cookie stamp, gently press a fork or toothpick to create ‘X’ and ‘O’ patterns on alternating cookies.
- Bake for 10-12 minutes or until edges are just starting to turn golden. Centers should still look a bit soft.
- Let cookies cool on the baking sheet for 5 minutes, then transfer to a wire rack to cool completely.
- Prepare the filling: Beat 1/2 cup softened unsalted butter until creamy. Gradually add 1 1/2 cups sifted powdered sugar, beating on low speed until smooth.
- Mix in 1 teaspoon vanilla extract and 1-2 tablespoons whole milk or cream until spreadable and fluffy.
- Spread a generous tablespoon of vanilla filling on the flat side of one cookie, then gently press another cookie on top to form a sandwich.
- Let assembled cookies rest for about 15 minutes so the filling can set slightly before serving.
Notes
Chill dough for at least 1 hour to prevent spreading and maintain shape. Use room temperature eggs for smooth mixing. Sift powdered sugar for smooth filling. Bake until edges just turn golden for tender cookies. If dough is sticky after chilling, lightly flour surface when rolling. Stamp cookies right before baking for best imprint definition.
Nutrition
- Serving Size: 1 sandwich cookie
- Calories: 165
- Sugar: 12
- Sodium: 70
- Fat: 8
- Saturated Fat: 5
- Carbohydrates: 20
- Fiber: 0.3
- Protein: 1.5
Keywords: XOXO cookies, sandwich cookies, vanilla filling, homemade cookies, easy cookie recipe, buttery cookies, vanilla sandwich cookies