“You really have to try these,” my coworker said, pushing a pale yellow popsicle toward me during our mid-afternoon break. Honestly, I was skeptical—frozen banana pops, chocolate, and peanut butter? It sounded like a kid’s snack, not something grown-ups would rave about. But as soon as I took that first bite, the creamy richness hit me like a little happy accident. It wasn’t just a frozen treat; it was a perfectly balanced combo of flavors and textures that felt both indulgent and kind of wholesome.
That afternoon, I found myself making these creamy frozen chocolate peanut butter banana pops three times over the week. The recipe is ridiculously simple—only five ingredients!—and yet, somehow, it delivers this smooth, dreamy experience you don’t expect from something so quick and easy. Plus, the pops are like a little reset button when the day’s chaos has you craving something comforting but light.
What really sold me was how the peanut butter and chocolate play off each other, with the banana adding natural sweetness and creaminess. And no, you don’t need fancy gear or a million steps. I learned that the key is in the ripeness of the bananas and using a good-quality peanut butter—creamy, not super oily—and trust me, choosing the right chocolate makes all the difference.
Now, these pops have slid into regular rotation in my freezer, perfect for those moments when you want something sweet but don’t want to spend forever in the kitchen. They’re a little reminder that sometimes the best recipes come from the simplest ideas—a little twist on classic flavors that turns into something you didn’t know you needed. If you’re looking for a treat that’s quick, creamy, and refreshingly nostalgic, these pops just might be it.
Why You’ll Love This Recipe
After testing dozens of frozen treats, I can confidently say these creamy frozen chocolate peanut butter banana pops have a special place in my snack repertoire. They’re a perfect blend of comfort and convenience, giving you a dessert that feels homemade without the fuss.
- Quick & Easy: Ready in under 10 minutes before freezing, ideal for busy days or last-minute cravings.
- Simple Ingredients: You won’t have to dash to the store for anything exotic—just pantry staples like ripe bananas, peanut butter, chocolate, and a touch of honey.
- Perfect for Summer and Beyond: Whether it’s a hot afternoon or you want a cozy snack, these pops hit the spot without being too heavy.
- Crowd-Pleaser: Kids, adults, and even picky eaters have given these a thumbs up—so they’re great for parties or casual family treats.
- Unbelievably Delicious: The creamy texture comes from blending frozen banana with peanut butter, and the chocolate shell adds a satisfying snap that feels indulgent but balanced.
What sets this recipe apart is the way the ingredients come together effortlessly, no ice cream maker needed. I’ve tried versions where the chocolate coating was too thick or the pops were icy, but this recipe nails the texture every time. Plus, the natural sweetness from the bananas means you’re not overloaded with sugar, which makes it feel like a treat you can enjoy without the usual guilt.
Honestly, it’s the kind of dessert that makes you pause for a moment and savor it—like the easy no-churn cookies and cream ice cream I love for lazy weekends or the cinnamon roll mug cake that’s perfect for quick sweet fixes. These pops bring that same kind of comfort—simple, satisfying, and just right.
What Ingredients You Will Need
This recipe uses simple, wholesome ingredients to deliver bold flavor and satisfying texture without any fuss. Most of these are pantry staples, and you can easily swap a few to fit your preferences or dietary needs.
- Ripe Bananas (3 medium, peeled and sliced, frozen): The base of your creamy pop—makes it naturally sweet and smooth.
- Creamy Peanut Butter (½ cup / 120 ml): Choose a smooth, natural peanut butter without added sugar or oils for the best texture and flavor.
- Honey (2 tablespoons / 30 ml): Adds a touch of natural sweetness and helps bind the flavors.
- Dark Chocolate Chips (1 cup / 170 g): Use good-quality dark chocolate (60-70% cocoa) for a rich, slightly bitter contrast that pairs beautifully with peanut butter. I prefer Ghirardelli or Lindt for melting.
- Coconut Oil (1 teaspoon / 5 ml): Helps smooth the chocolate coating and gives it a nice shine once hardened.
For substitutions, almond or cashew butter works well instead of peanut butter if you prefer a milder nut flavor. Maple syrup can replace honey for a vegan option, and dairy-free chocolate chips keep it vegan-friendly too. In summer, fresh frozen berries mixed into the banana base add a pleasant tart pop, making the pops even more colorful and refreshing.
Equipment Needed
- Blender or Food Processor: Essential for blending the frozen bananas into a creamy base. A high-speed blender like a Vitamix works best, but a sturdy food processor can do the job.
- Mixing Bowls: For combining peanut butter and honey smoothly before adding to the banana mixture.
- Popsicle Molds: Standard molds with sticks—silicone molds are easier for removing the pops without breaking.
- Microwave-Safe Bowl: For melting chocolate and coconut oil together gently.
- Baking Sheet or Tray: To place pops on when freezing for easy storage and transfer.
If you don’t have popsicle molds, small paper cups and wooden sticks work fine too. Just make sure to freeze them upright. For chocolate melting, a double boiler is nice if you want to avoid the microwave, but I find short bursts in the microwave with stirring in between works fine too.
Preparation Method
- Freeze the Bananas: Peel and slice 3 medium ripe bananas into coins about ½ inch thick. Arrange them on a parchment-lined tray and freeze until solid—about 2 hours or overnight for best results.
- Blend the Base: Place the frozen banana slices into your blender or food processor. Blend until smooth and creamy, scraping down the sides as needed. This may take 2-3 minutes depending on your machine. The mixture should resemble soft-serve ice cream.
- Mix Peanut Butter and Honey: In a separate bowl, combine ½ cup creamy peanut butter with 2 tablespoons honey. Stir well until fully combined and smooth.
- Combine: Add the peanut butter-honey mixture to the banana base. Blend again briefly just to combine evenly, about 30 seconds. Avoid over-blending or the mixture may become too soft.
- Fill the Molds: Spoon the creamy mixture into popsicle molds, leaving a little space at the top to allow for expansion when frozen. Insert sticks and freeze for at least 4 hours, preferably overnight.
- Prepare Chocolate Coating: In a microwave-safe bowl, melt 1 cup dark chocolate chips with 1 teaspoon coconut oil in 20-second intervals, stirring in between until smooth and glossy.
- Coat the Pops: Once the pops are fully frozen, carefully remove them from molds. Quickly dip each pop into the melted chocolate, letting excess drip off. Return to a parchment-lined tray and freeze again for 15-20 minutes to set the chocolate shell.
- Serve or Store: Enjoy immediately or keep frozen in an airtight container for up to 2 weeks.
Tip: If the chocolate begins to harden too quickly while dipping, warm it slightly again in the microwave.
When blending, if the mixture feels too thick, add a teaspoon of almond milk or water to help it blend smoothly without losing creaminess.
Cooking Tips & Techniques
Getting that perfect creamy texture is all about the bananas. I’ve learned that using bananas that are just ripe—yellow with a few brown spots—gives you the best natural sweetness and creaminess. If they’re too green, the flavor is bland; too overripe, and the pops can be a bit mushy.
One common pitfall is blending the bananas too briefly. You want to reach that soft-serve consistency, so be patient and scrape down the sides. If your blender isn’t super powerful, pulse and stir often.
When mixing the peanut butter and honey, make sure it’s well combined and smooth before adding to the banana base. This ensures even flavor throughout the pops. Also, avoid over-blending after adding peanut butter to keep the texture nice and firm.
Melting the chocolate slowly is key to avoiding graininess. Low and slow in 20-second bursts works well. Adding coconut oil thins the chocolate, making it easier to coat the pops and gives a shiny finish.
Don’t skip the freezing time between making the pops and dipping in chocolate. If your pops aren’t frozen solid, the chocolate will melt and slide off.
For multitasking, you can freeze the bananas and prepare the chocolate coating while the pops set. It cuts down on overall wait time.
Variations & Adaptations
- Nut-Free Version: Swap peanut butter for sunflower seed butter or soy nut butter to avoid allergens without sacrificing creaminess.
- Chocolate Swirl: Instead of fully coating in chocolate, drizzle melted chocolate over the pops for a lighter touch and pretty presentation.
- Berry Boost: Add ½ cup frozen mixed berries to the banana base for a fruity twist that also adds vibrant color.
- Vegan Friendly: Use maple syrup instead of honey and ensure your chocolate chips are dairy-free to keep the recipe fully plant-based.
- Peanut Butter Crunch: Sprinkle chopped roasted peanuts on the chocolate coating before it sets for added texture and nutty flavor.
One variation I love is mixing in a pinch of cinnamon or a splash of vanilla extract into the banana base before freezing. It deepens the flavor and makes the pops feel a bit more special without extra effort.
Serving & Storage Suggestions
These frozen pops are best served straight from the freezer, especially on warm days when you want a cold, creamy treat. You can plate them on a small dish or serve them as handheld snacks at parties.
Pairing them with a cup of iced coffee or a glass of cold milk makes for a nostalgic combo that’s hard to beat. For a fun brunch, they also complement lighter fare like yogurt parfaits or fresh fruit salad.
Store any extras in an airtight container or resealable freezer bag to prevent freezer burn. They keep well for up to two weeks without losing their creamy texture or rich flavor.
To re-soften slightly before serving, leave them at room temperature for 3-5 minutes. This makes the chocolate shell a little less brittle without melting the pops completely.
Over time, the flavors meld even more, so if you make them a day ahead, expect a slightly richer taste experience—like a quick frozen dessert that gets better with a little patience.
Nutritional Information & Benefits
These creamy frozen chocolate peanut butter banana pops offer a surprisingly nutritious treat with natural sweetness and protein from peanut butter. Here’s an estimated breakdown per pop (makes 6):
| Calories | 150-180 kcal |
|---|---|
| Protein | 5 g |
| Fat | 9 g (mostly healthy fats from peanut butter) |
| Carbohydrates | 18 g (natural sugars from bananas and honey) |
| Fiber | 3 g |
The recipe is naturally gluten-free and can be adapted for vegan diets. Bananas provide potassium and essential vitamins, while peanut butter adds heart-healthy fats and protein to keep you satisfied.
It’s a better-for-you dessert option compared to many store-bought frozen treats, especially since you control the ingredients. Plus, making these at home means no preservatives or artificial additives.
Conclusion
These creamy frozen chocolate peanut butter banana pops have become my go-to for a quick, satisfying treat that feels both indulgent and wholesome. They’re easy enough to whip up after dinner or prep in advance for a weekend snack stash. The magic is really in the simple combination of ingredients that work so well together—creamy banana, nutty peanut butter, and rich chocolate.
Whether you’re treating yourself or making something fun for the kids, this recipe is forgiving and flexible, so don’t hesitate to tweak it to your taste. I love having them on hand for those moments when a little sweetness is just what the day calls for.
And if you’re curious about other creamy, comforting desserts that come together quickly, you might enjoy my creamy slow cooker potato soup for cozy nights or the crispy oven-fried buttermilk chicken tenders that always impress without stress.
Give these pops a try—you might just find a new favorite frozen treat that’s as easy to love as it is to make.
FAQs About Creamy Frozen Chocolate Peanut Butter Banana Pops
Can I use crunchy peanut butter instead of creamy?
You can, but creamy peanut butter blends more smoothly and helps achieve that silky texture. Crunchy will add a bit of texture, which some may enjoy, but may not blend as evenly.
How long do these pops keep in the freezer?
Stored in an airtight container, they stay fresh and creamy for up to two weeks. After that, they may start to develop freezer burn or lose texture.
Can I make these without a blender?
While a blender or food processor is best for smooth texture, you can mash very ripe bananas by hand and mix thoroughly with peanut butter and honey. The texture will be chunkier but still tasty.
What’s the best way to remove the pops from molds?
Run warm water over the outside of the mold for a few seconds to loosen the pops. Avoid soaking to prevent melting.
Can I add other flavors or mix-ins?
Yes! Cinnamon, vanilla extract, or frozen berries mixed into the base work well. Just be careful not to add too much liquid or the pops won’t freeze properly.
Pin This Recipe!
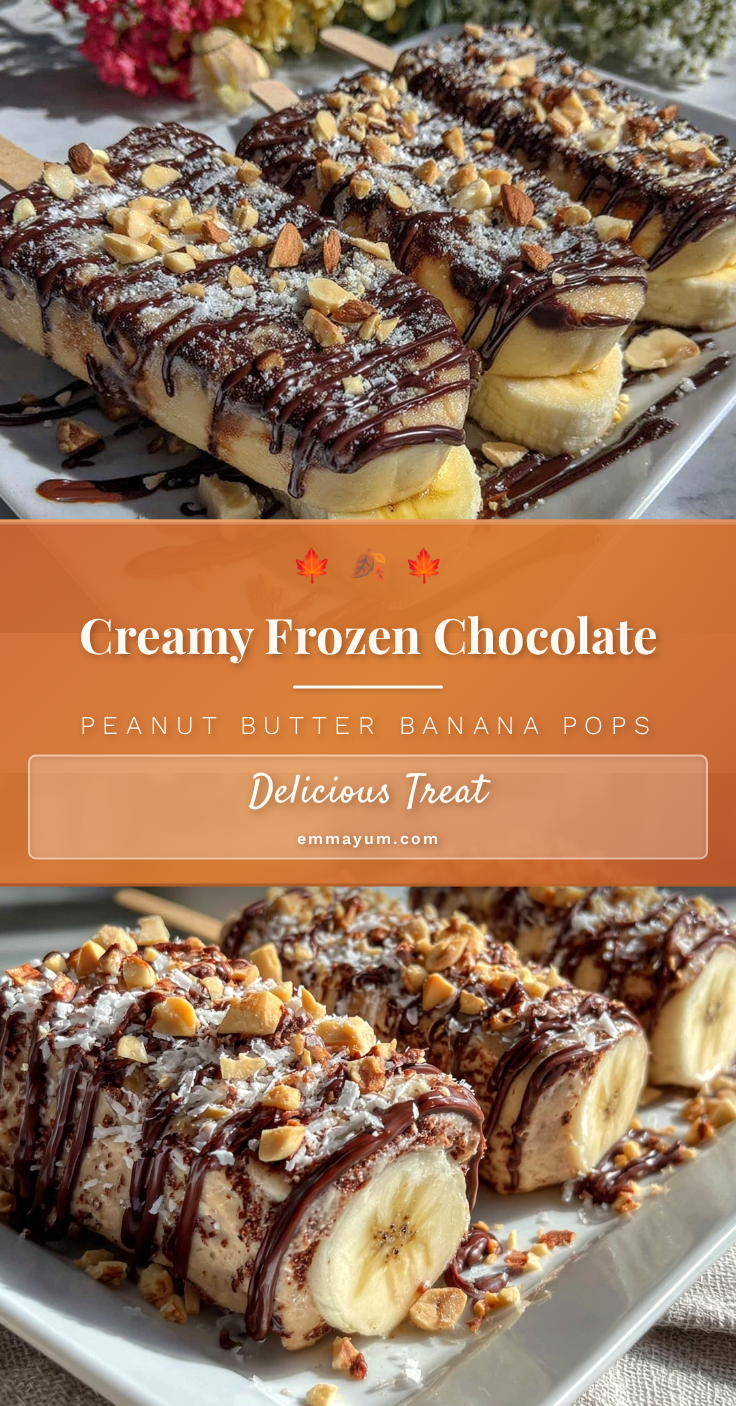
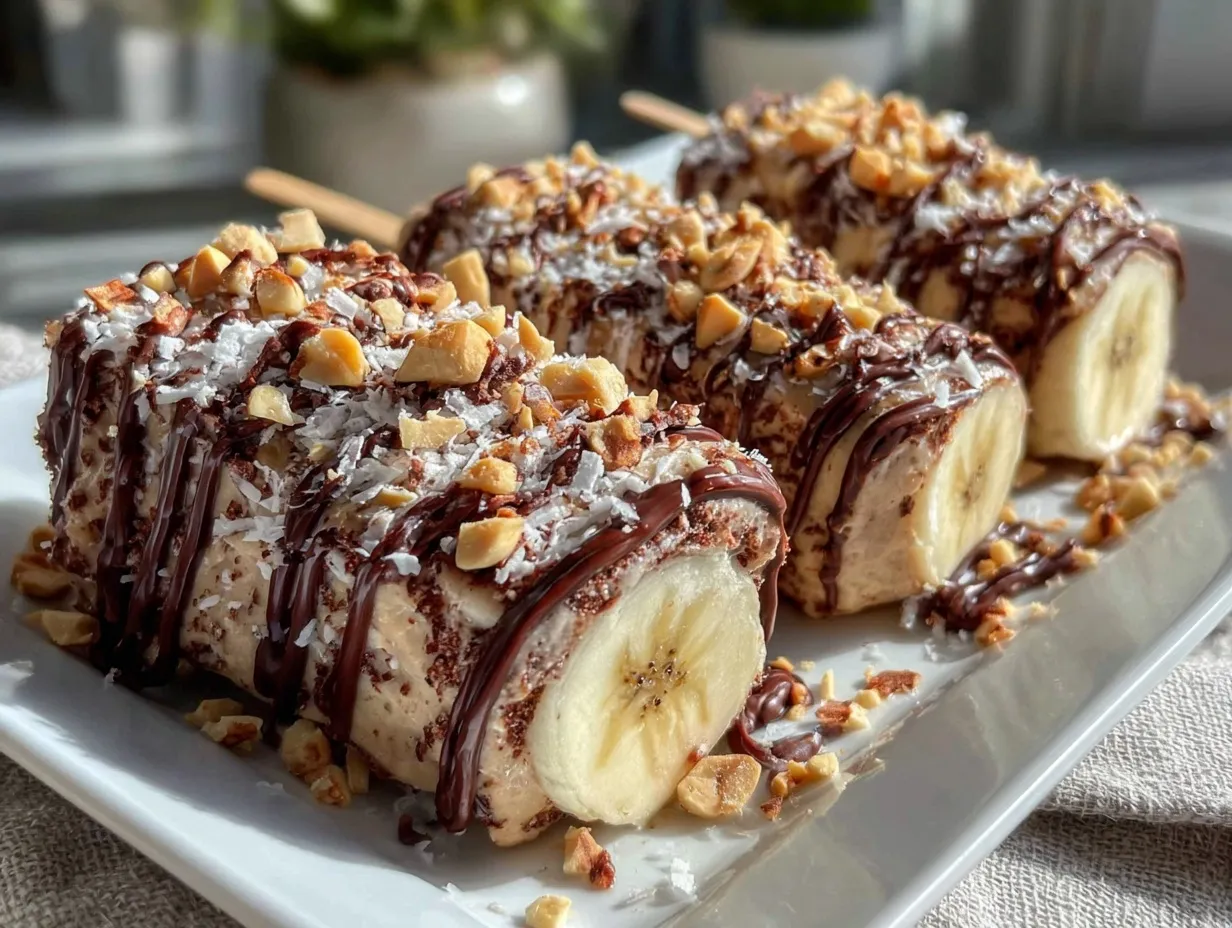
Creamy Frozen Chocolate Peanut Butter Banana Pops
A quick and easy 5-ingredient frozen treat combining ripe bananas, creamy peanut butter, and a rich dark chocolate coating for a creamy, indulgent snack.
- Prep Time: 10 minutes
- Cook Time: 0 minutes
- Total Time: 4 hours 10 minutes
- Yield: 6 pops 1x
- Category: Dessert
- Cuisine: American
Ingredients
- 3 medium ripe bananas, peeled, sliced, and frozen
- ½ cup creamy peanut butter (120 ml)
- 2 tablespoons honey (30 ml)
- 1 cup dark chocolate chips (170 g, 60-70% cocoa)
- 1 teaspoon coconut oil (5 ml)
Instructions
- Freeze the Bananas: Peel and slice 3 medium ripe bananas into ½ inch thick coins. Arrange on a parchment-lined tray and freeze until solid, about 2 hours or overnight.
- Blend the Base: Place frozen banana slices into a blender or food processor. Blend until smooth and creamy, scraping down sides as needed, about 2-3 minutes.
- Mix Peanut Butter and Honey: In a separate bowl, combine ½ cup creamy peanut butter with 2 tablespoons honey. Stir until smooth.
- Combine: Add peanut butter-honey mixture to the banana base. Blend briefly to combine evenly, about 30 seconds. Avoid over-blending.
- Fill the Molds: Spoon mixture into popsicle molds, leaving space at the top. Insert sticks and freeze for at least 4 hours or overnight.
- Prepare Chocolate Coating: Melt 1 cup dark chocolate chips with 1 teaspoon coconut oil in a microwave-safe bowl in 20-second intervals, stirring until smooth.
- Coat the Pops: Remove frozen pops from molds. Quickly dip each pop into melted chocolate, letting excess drip off. Place on parchment-lined tray and freeze 15-20 minutes to set.
- Serve or Store: Enjoy immediately or store frozen in an airtight container for up to 2 weeks.
Notes
Use ripe bananas with yellow skin and brown spots for best sweetness and creaminess. Avoid over-blending after adding peanut butter to maintain texture. Melt chocolate slowly in 20-second bursts to avoid graininess. If chocolate hardens too quickly while dipping, warm slightly again. Add a teaspoon of almond milk or water if banana mixture is too thick for blending. Run warm water over popsicle molds to loosen pops before removing.
Nutrition
- Serving Size: 1 pop
- Calories: 165
- Sugar: 12
- Sodium: 50
- Fat: 9
- Saturated Fat: 3
- Carbohydrates: 18
- Fiber: 3
- Protein: 5
Keywords: frozen banana pops, peanut butter popsicles, chocolate banana pops, easy frozen treats, healthy frozen dessert