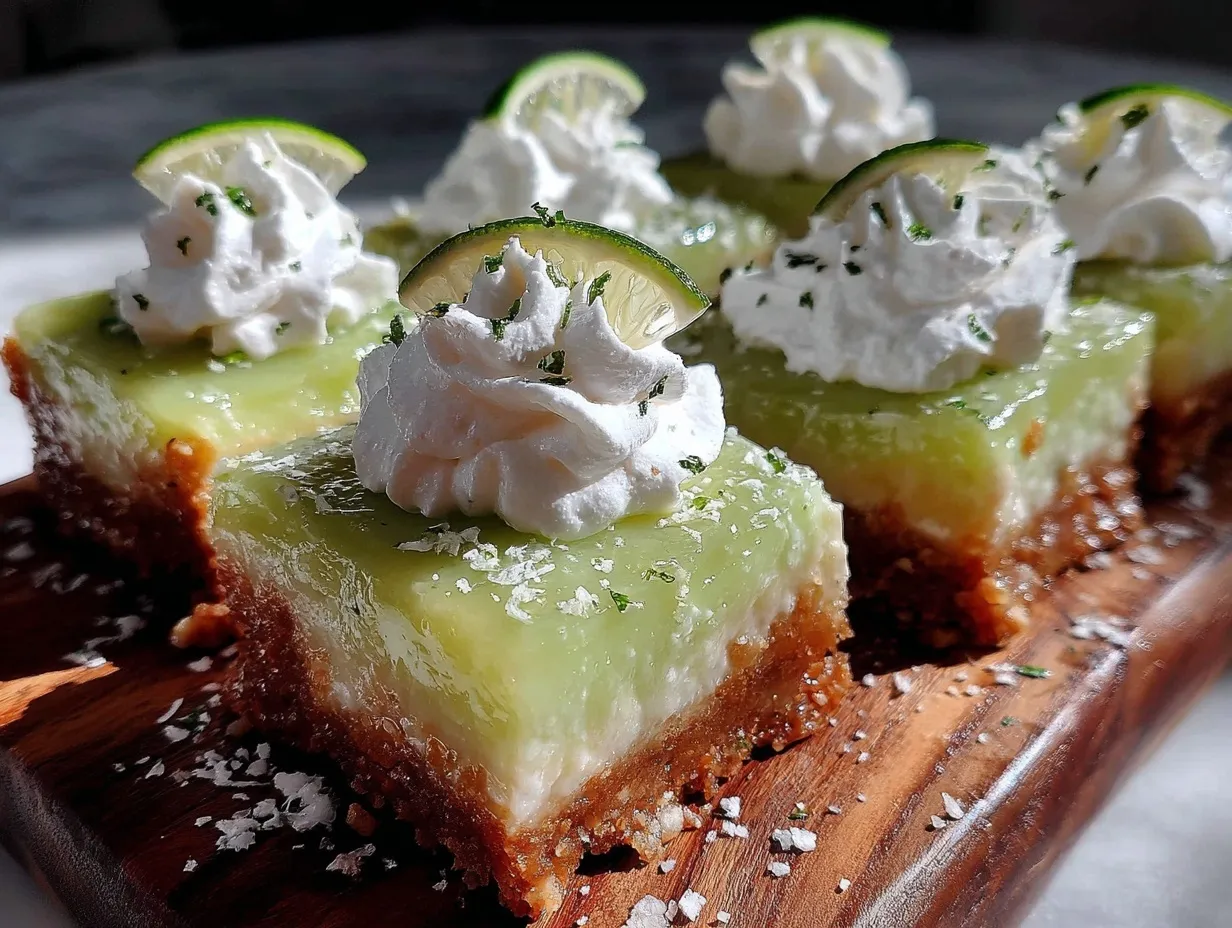
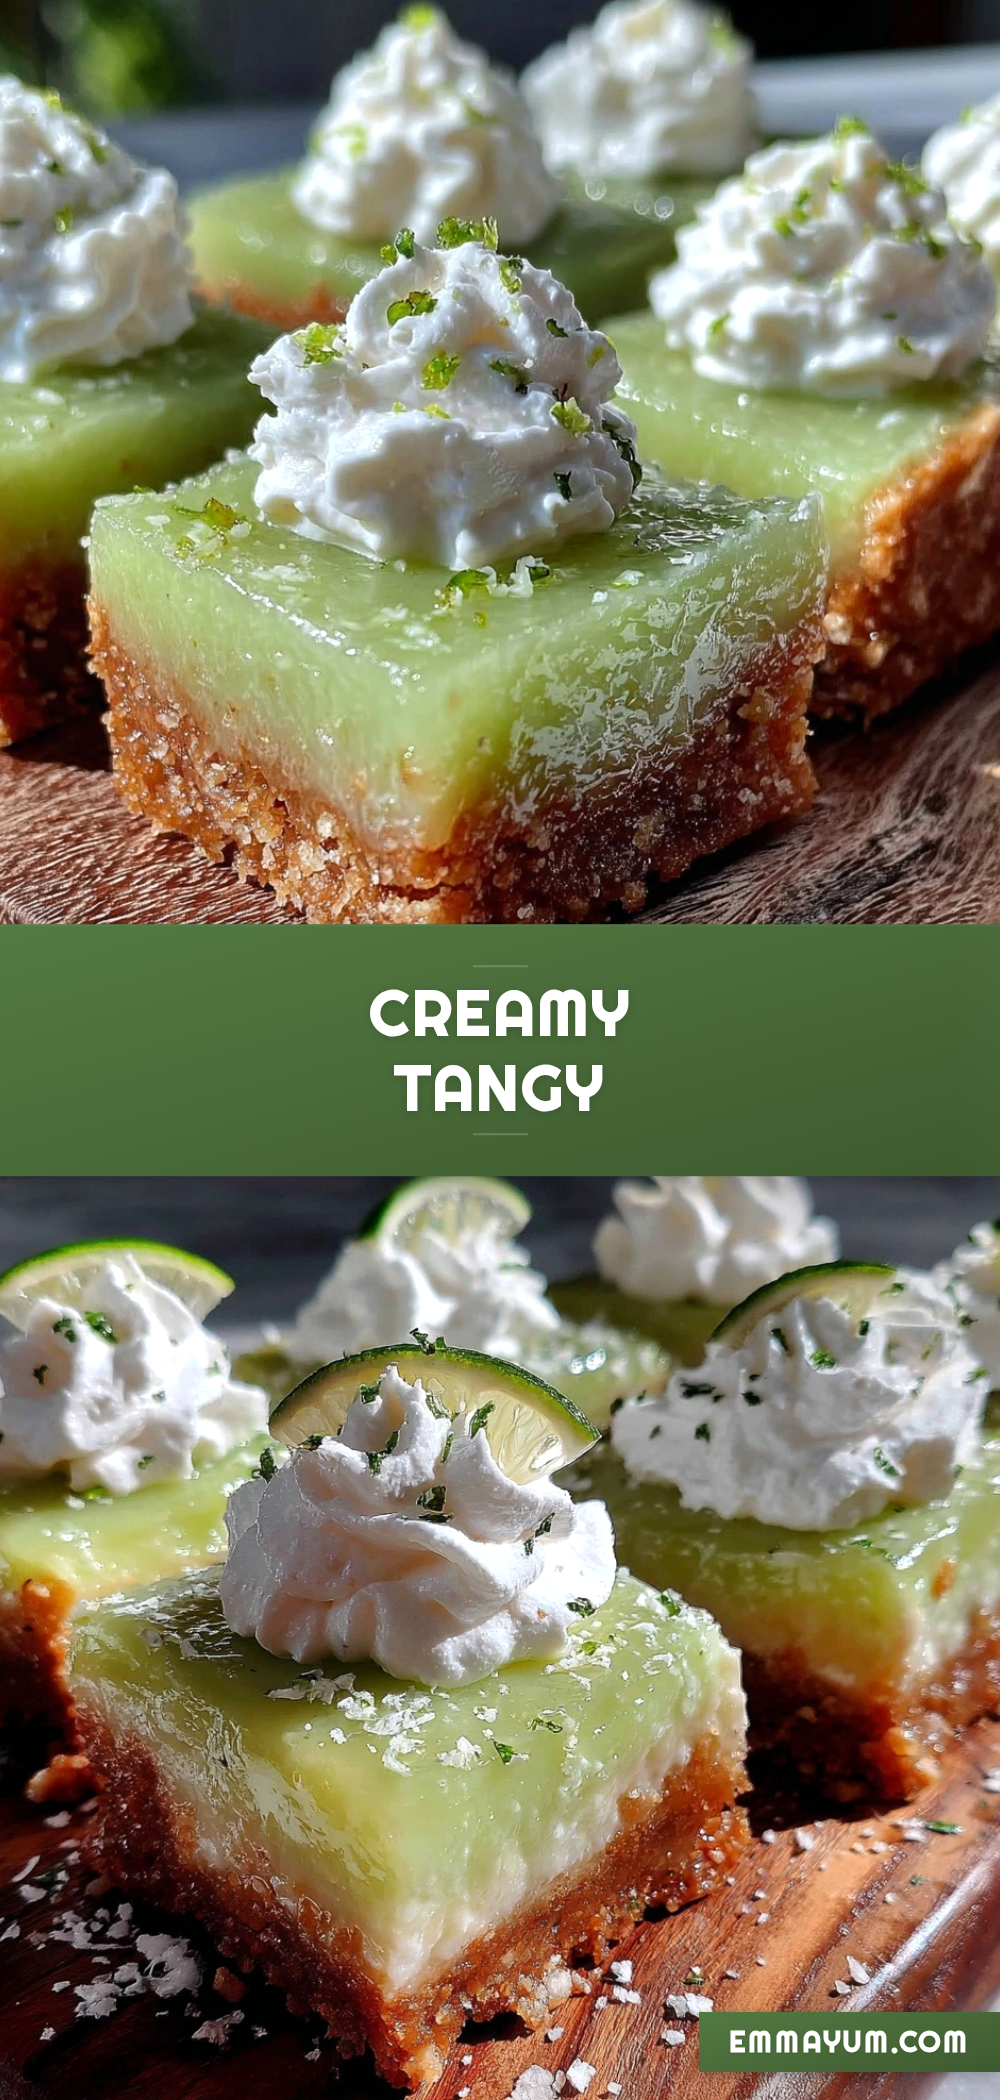
“You have to try this one,” my friend texted me late on a humid summer evening, alongside a photo of these bright, creamy bars topped with cloud-like whipped cream. Honestly, I was skeptical—key lime pie bars? With whipped cream? But the picture had this glow that made me pause my scroll. A few days later, I found myself in my kitchen, armed with limes and graham crackers, recreating that moment. What started as a curious experiment quickly turned into a small obsession. I couldn’t stop making these creamy key lime pie bars with whipped cream topping, especially because they somehow struck the perfect balance between tangy brightness and smooth richness.
The zingy aroma of lime zest mixing with the buttery crust filled the kitchen, and every bite felt like a mini-vacation to a sunny beach—just what I needed to shake off a hectic week. There’s something quietly satisfying about the way the silky filling melts against the crumbly base, all crowned with a fluffy dollop of whipped cream that’s just sweet enough. It’s not flashy or complicated, and that’s exactly why it stuck with me. These bars became my go-to for when I wanted a dessert that felt special but didn’t come with a laundry list of ingredients or a long bake time. It’s a little slice of sunshine you can grab anytime.
What I love most is how the recipe feels approachable—no fancy gadgets, no weird ingredients—just familiar flavors, done right. If you’ve ever hesitated to make a key lime dessert at home, this recipe might just change your mind. It’s creamy, refreshing, and honestly, a bit addictive. And once you try it, you’ll understand why it’s become a quiet favorite around here.
Why You’ll Love This Recipe
After testing multiple versions in my kitchen, I can say this creamy key lime pie bars recipe is one of the easiest and most reliable ways to get that perfect balance of tart and sweet. Here’s why it’s a keeper:
- Quick & Easy: Ready in under 40 minutes—not including chilling time—making it perfect for last-minute dessert needs or casual get-togethers.
- Simple Ingredients: Uses pantry staples and fresh limes; no complicated or obscure items needed.
- Perfect for Summer Gatherings: Light and refreshing, these bars are a hit at barbecues, potlucks, or even a casual weeknight treat.
- Crowd-Pleaser: The creamy texture and bright flavor consistently get compliments from kids and adults alike.
- Unbelievably Delicious: The graham cracker crust adds a buttery crunch that complements the silky, tangy filling flawlessly.
This recipe stands out because of the whipped cream topping that’s whipped just right to add a light sweetness without overpowering the lime’s zing. I’ve tried versions where the cream was too dense or sweet, but this one hits the mark every time. Plus, the filling is made with real lime juice and zest, giving it that authentic punch you won’t get from artificial flavorings.
For me, it’s a recipe that brings back memories of summer evenings, but also one that feels fresh enough to make year-round. Whether you’re serving it after dinner, bringing it to a friend’s house, or just sneaking a bar when no one’s looking, it’s the kind of treat that makes you close your eyes and savor every bite.
What Ingredients You Will Need
This recipe relies on straightforward, wholesome ingredients to deliver that dreamy creamy texture and bright lime flavor without any fuss. Most of these you probably already have in your kitchen.
- For the crust:
- 1 ½ cups graham cracker crumbs (about 10 full crackers, finely crushed)
- ⅓ cup unsalted butter, melted (I like using Land O Lakes for that rich flavor)
- ¼ cup granulated sugar
- For the key lime filling:
- 4 large eggs, room temperature (helps the filling set nicely)
- 1 can (14 oz / 396 g) sweetened condensed milk
- ½ cup fresh key lime juice (about 8-10 key limes; you can substitute with regular limes if needed)
- 1 tablespoon key lime zest (use a microplane to get just the green part)
- For the whipped cream topping:
- 1 cup heavy whipping cream, chilled (I recommend Organic Valley for the best whipping consistency)
- 2 tablespoons powdered sugar
- ½ teaspoon pure vanilla extract
Tip: If key limes aren’t in season, regular Persian limes work well and offer a similar tartness. For a dairy-free twist, swap the butter in the crust with coconut oil, and use coconut whipped cream or a plant-based alternative for the topping. I’ve also found that using freshly grated zest rather than store-bought dried zest makes a world of difference in freshness and aroma.
Equipment Needed
- 9×9-inch (23×23 cm) baking pan – a square glass or metal pan works great
- Mixing bowls – one large for crust, one medium for filling
- Electric mixer or stand mixer – helpful for whipping the cream to the right texture
- Microplane or fine grater – for zesting limes
- Citrus juicer or reamer – to get fresh lime juice easily (a handheld reamer works fine and is budget-friendly)
- Rubber spatula – for scraping and folding ingredients gently
- Measuring cups and spoons – for precise measurements
If you don’t have an electric mixer, whipping cream by hand is possible but expect a bit of an arm workout. I’ve done it on busy nights when the mixer was occupied making easy no-churn cookies and cream ice cream, and it still worked out, just slower. For zesting, a standard box grater’s fine, but a microplane will give you those fine, fragrant shreds that blend beautifully into the filling.
Preparation Method
- Preheat your oven to 350°F (175°C). Line your 9×9-inch baking pan with parchment paper, leaving an overhang on two sides for easy removal later.
- Prepare the crust: In a medium bowl, combine 1 ½ cups graham cracker crumbs, ⅓ cup melted unsalted butter, and ¼ cup granulated sugar. Mix until the crumbs are evenly coated and resemble wet sand. Press this firmly and evenly into the bottom of the prepared pan using the back of a measuring cup or your fingers. Bake for 10 minutes until golden and fragrant. Let it cool slightly while you prepare the filling.
- Make the key lime filling: In a large bowl, whisk together 4 large eggs until frothy (about 1 minute). Slowly add the 14 oz (396 g) sweetened condensed milk, mixing until smooth. Stir in ½ cup fresh key lime juice and 1 tablespoon lime zest until fully combined. The mixture should be smooth and creamy.
- Pour the filling over the warm crust carefully. Return the pan to the oven and bake for 15 minutes. The filling should be just set but still slightly jiggly in the center—like a good cheesecake. Don’t overbake or it will crack.
- Remove from oven and let cool to room temperature. Then refrigerate for at least 3 hours, preferably overnight, to allow the bars to fully set and develop flavor.
- Prepare the whipped cream topping: Using a chilled bowl and beaters, whip 1 cup heavy cream with 2 tablespoons powdered sugar and ½ teaspoon vanilla extract until soft peaks form. Be careful not to overwhip or it will become grainy.
- Spread or pipe the whipped cream over the chilled bars. For a decorative touch, I like using a star tip to pipe rosettes, but a simple spread is just as lovely.
- Cut into 16 squares using a sharp knife. Wipe the knife clean between cuts to keep edges neat. Serve chilled and enjoy the creamy, tangy, and airy combination.
Pro tip: If you notice your crust is too soft after baking, try pressing the crumbs a bit more firmly next time or bake a minute longer before adding the filling. Also, using room temperature eggs helps the filling blend better and prevents curdling.
Cooking Tips & Techniques
Getting this recipe just right is mostly about timing and texture balance. Here are a few tips I’ve picked up over multiple batches:
- Don’t skip chilling the bars: The refrigeration is crucial for the filling to firm up and for the flavors to meld. I’ve tried cutting too soon, and the bars just fall apart.
- Whip the cream last: To keep it fluffy and fresh, whip the cream right before serving or topping the bars.
- Use fresh key limes if possible: The fresh juice and zest add a brightness that bottled lime juice can’t match.
- Avoid overbaking: The filling should still jiggle slightly when you take it out; it will continue to set as it cools.
- Cleanup tip: Line the pan with parchment paper for easy removal and clean edges. I learned this the hard way when my first batch stuck and I had to wrestle the bars out.
- Mix gently: When folding in the lime juice, whisk just enough to combine. Overmixing can introduce bubbles that cause cracks during baking.
One mistake I made early on was using cold eggs straight from the fridge, which caused the filling to curdle a bit when mixed with the acid. Bringing eggs to room temperature smooths the process. Plus, using a fine microplane for zest makes a noticeable difference in flavor release, much better than a coarse grater.
Variations & Adaptations
This recipe is flexible and easy to tweak based on your preferences or what you have on hand. Here are some variations I’ve enjoyed:
- Gluten-Free Option: Swap the graham cracker crumbs for gluten-free graham crumbs or crushed gluten-free cookies. The texture is slightly different but still delicious.
- Low-Sugar Variation: Use a sugar substitute in the crust like erythritol and reduce powdered sugar in the whipped cream. The tartness of the lime keeps it balanced and fresh.
- Tropical Twist: Add a handful of finely chopped toasted coconut to the crust or sprinkle on top of the whipped cream for extra flavor and texture.
- Mini Pie Bars: Make these in a mini muffin tin for bite-sized treats perfect for parties or kids.
- Frozen Bars: Freeze the assembled bars and serve as a frozen treat on hot days. Just let them soften slightly before eating.
Personally, I once added a layer of fresh raspberries between the crust and filling for a pop of color and a sweet-tart surprise. It worked beautifully and paired nicely with the whipped cream’s smoothness. If you want to try a similar creamy citrus treat, you might enjoy my creamy lemon garlic butter chicken thighs for dinner beforehand—both recipes bring bright flavors to the table!
Serving & Storage Suggestions
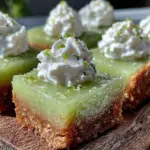
These creamy key lime pie bars are best served chilled, straight from the fridge. The cool temperature enhances the creamy texture and the refreshing lime zing. For presentation, add a small lime twist or zest sprinkle on top of the whipped cream for a pretty finishing touch.
They pair wonderfully with a light cup of iced tea or a sparkling water with lime slices. For a more indulgent combo, try serving alongside a scoop of cookies and cream ice cream—the creamy richness complements the tart bars perfectly.
Store leftover bars in an airtight container in the refrigerator for up to 4 days. The crust may soften slightly over time but the flavor deepens. If you want to keep them longer, wrap tightly and freeze for up to 1 month; thaw in the fridge before serving.
When reheating (if you prefer them slightly less cold), avoid the microwave as it can melt the whipped cream and affect texture. Instead, let them sit at room temperature for 10-15 minutes. The bars maintain their fresh, tangy flavor and the whipped cream topping stays light and fluffy.
Nutritional Information & Benefits
Each serving (based on 16 bars) contains approximately:
| Calories | 210 kcal |
|---|---|
| Fat | 12 g |
| Carbohydrates | 24 g |
| Protein | 3 g |
| Sugar | 18 g |
The key lime juice provides vitamin C and antioxidants, which support immunity and skin health. Using fresh lime zest adds natural flavor without added sugars or artificial ingredients. The recipe is naturally gluten-free if you use gluten-free crackers for the crust, and can be adapted for dairy-free diets with simple swaps.
From a wellness perspective, this dessert feels indulgent but is lighter than many pies or cakes, thanks to the bright citrus and airy whipped cream. It’s a satisfying treat that doesn’t leave you weighed down—a nice balance of creamy comfort and refreshing zest.
Conclusion
This creamy key lime pie bars with whipped cream topping recipe has quietly become my favorite way to end a summer meal or add a little sunshine to any day. It’s approachable, uses ingredients you likely have on hand, and rewards you with a tangy, creamy dessert that feels both special and simple.
Whether you stick to the classic version or experiment with some of the variations, this recipe invites you to make it your own. I love how it brings a little brightness to the table without fuss, and I hope it finds a cozy spot in your dessert rotation too.
Feel free to share how you customize it or what memories it sparks for you—I’m always curious what twists others come up with. Here’s to sweet, creamy bites that remind us good desserts don’t have to be complicated.
Frequently Asked Questions
Can I use bottled lime juice instead of fresh key limes?
Fresh key lime juice is best for flavor, but bottled lime juice works in a pinch. Just watch the quantity as bottled juice is often more concentrated or tart.
How long should I chill the bars before serving?
At least 3 hours in the refrigerator is ideal to let the filling set and flavors develop, but overnight chilling yields the best texture.
Can I make these bars ahead of time?
Absolutely! They keep well in the fridge for up to 4 days and can be frozen for longer storage. Just thaw before serving.
What’s the best way to cut the bars without them falling apart?
Use a sharp knife and wipe it clean between each cut. Chilling the bars well before slicing helps keep the edges neat.
Is there a vegan or dairy-free version of this recipe?
Yes—substitute vegan butter or coconut oil for the crust, use a dairy-free condensed milk alternative, and top with coconut whipped cream or another plant-based whipped topping.
Pin This Recipe!
Creamy Key Lime Pie Bars with Whipped Cream Topping
These creamy key lime pie bars feature a tangy, silky lime filling on a buttery graham cracker crust, topped with light whipped cream. Perfect for a quick, refreshing homemade dessert.
- Prep Time: 15 minutes
- Cook Time: 25 minutes
- Total Time: 3 hours 40 minutes
- Yield: 16 bars 1x
- Category: Dessert
- Cuisine: American
Ingredients
- 1 ½ cups graham cracker crumbs (about 10 full crackers, finely crushed)
- ⅓ cup unsalted butter, melted
- ¼ cup granulated sugar
- 4 large eggs, room temperature
- 1 can (14 oz / 396 g) sweetened condensed milk
- ½ cup fresh key lime juice (about 8–10 key limes)
- 1 tablespoon key lime zest
- 1 cup heavy whipping cream, chilled
- 2 tablespoons powdered sugar
- ½ teaspoon pure vanilla extract
Instructions
- Preheat your oven to 350°F (175°C). Line a 9×9-inch baking pan with parchment paper, leaving an overhang on two sides for easy removal.
- Prepare the crust: In a medium bowl, combine graham cracker crumbs, melted butter, and granulated sugar. Mix until crumbs are evenly coated and resemble wet sand. Press firmly and evenly into the bottom of the prepared pan. Bake for 10 minutes until golden and fragrant. Let cool slightly.
- Make the key lime filling: In a large bowl, whisk eggs until frothy (about 1 minute). Slowly add sweetened condensed milk, mixing until smooth. Stir in fresh key lime juice and lime zest until fully combined.
- Pour the filling over the warm crust carefully. Return the pan to the oven and bake for 15 minutes. The filling should be just set but still slightly jiggly in the center.
- Remove from oven and let cool to room temperature. Refrigerate for at least 3 hours or overnight to fully set.
- Prepare the whipped cream topping: Using a chilled bowl and beaters, whip heavy cream with powdered sugar and vanilla extract until soft peaks form.
- Spread or pipe the whipped cream over the chilled bars.
- Cut into 16 squares using a sharp knife, wiping the knife clean between cuts. Serve chilled.
Notes
Use room temperature eggs to prevent curdling. Chill bars for at least 3 hours or overnight for best texture. Press crust firmly and bake until golden to avoid a soft crust. Whip cream last to keep it fresh and fluffy. Fresh key limes and zest provide the best flavor. For dairy-free or gluten-free options, substitute ingredients as noted.
Nutrition
- Serving Size: 1 bar (1/16th of rec
- Calories: 210
- Sugar: 18
- Fat: 12
- Carbohydrates: 24
- Protein: 3
Keywords: key lime pie bars, creamy dessert, whipped cream topping, easy dessert, summer dessert, lime bars, homemade dessert