“I wasn’t expecting dessert wisdom from my plumber, but there I was, watching him fix my leaky faucet while he casually mentioned his grandmother’s secret to the best no-bake cheesecake. Honestly, it sounded too simple to be true, but curiosity got the better of me. That afternoon, I scribbled down the recipe on a crumpled receipt, and the rest is, well, delicious history.
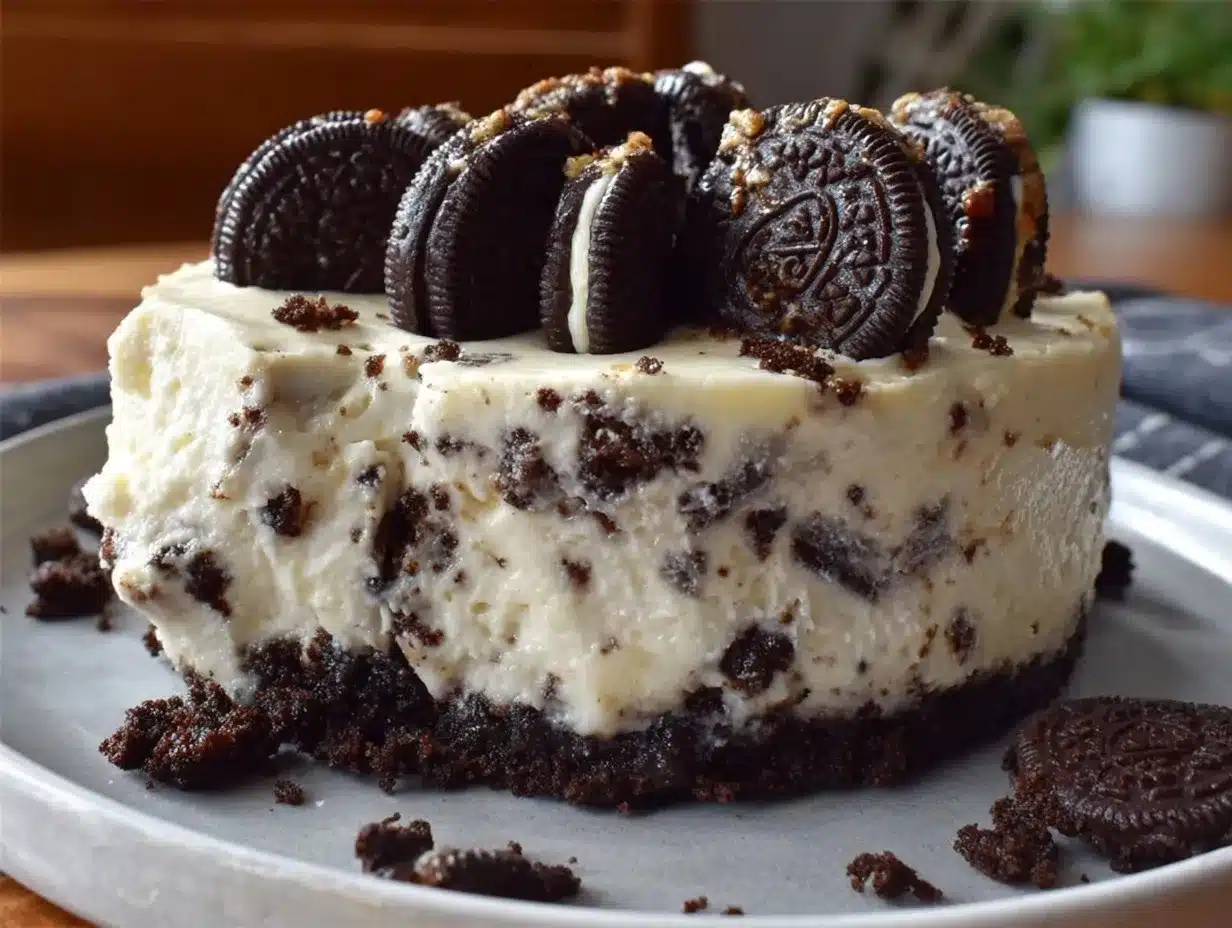
This Easy No-Bake Oreo Cheesecake with Creamy Cookie Crust has since become my go-to when I want a crowd-pleaser without the oven hassle. You know that feeling when you want a dessert that’s rich and indulgent but don’t want to spend hours baking or dealing with complicated steps? Yeah, this is it. I mean, let’s face it—sometimes life throws curveballs, and you need a quick, fuss-free treat that still feels special.
One Tuesday night, I almost forgot to bring dessert to a friend’s potluck. Panicking, I whipped this up with whatever I had on hand—Oreos and cream cheese—while my phone buzzed nonstop. The cheesecake set beautifully, and believe me, it vanished faster than I could say ‘who made this?’ That little cracked mixing bowl and flour dust on my counter are now part of the story behind this recipe’s charm.
Maybe you’ve been there too, craving something sweet but short on time or energy. This recipe isn’t just a dessert; it’s a trusty companion for those moments. And honestly? I keep making it because it never disappoints.
Why You’ll Love This Recipe
After countless trials and little tweaks in my kitchen, this Easy No-Bake Oreo Cheesecake with Creamy Cookie Crust stands out for so many reasons:
- Quick & Easy: Comes together in under 20 minutes, perfect for busy weeknights or surprise guests.
- Simple Ingredients: No fancy grocery trips needed; odds are, you already have Oreos and cream cheese sitting in your pantry.
- Perfect for Any Occasion: Whether it’s a casual family dessert or a potluck centerpiece, it fits right in.
- Crowd-Pleaser: Kids, adults, picky eaters—everyone asks for seconds.
- Unbelievably Delicious: The creamy cookie crust adds texture and flavor depth that’s just next-level indulgence.
What makes this recipe different? It’s the magic of blending a smooth, velvety cream cheese filling with crushed Oreos both in the crust and folded throughout the cheesecake. That creamy cookie crust isn’t just a base—it’s a flavor bomb that gives every bite a satisfying crunch and sweetness that’s perfectly balanced. Plus, it’s no-bake, so no worries about cracked tops or dry edges.
This cheesecake captures that comfort-food feeling but with minimal effort—and trust me, it’s the kind of dessert that makes you close your eyes and savor every bite. Whether you want to impress without stress or just treat yourself on a random Tuesday, this recipe hits all the right notes.
What Ingredients You Will Need
This recipe uses simple, wholesome ingredients to deliver bold flavor and satisfying texture without the fuss. Most are pantry staples, with easy swaps if needed.
- For the Creamy Cookie Crust:
- 24 Oreo cookies, finely crushed (about 2 cups) – I prefer Nabisco for that perfect balance of crunch and sweetness
- 6 tablespoons unsalted butter, melted (adds richness and helps bind the crust)
- 1 tablespoon granulated sugar (optional, depends on your Oreo sweetness preference)
- For the Cheesecake Filling:
- 16 ounces (450g) cream cheese, softened (room temperature to avoid lumps)
- 1 cup (240 ml) heavy whipping cream, chilled (for that fluffy, creamy texture)
- 3/4 cup (90g) powdered sugar, sifted (for smooth sweetness)
- 1 teaspoon vanilla extract (real vanilla if possible for the best flavor)
- 12 Oreo cookies, roughly chopped (to fold into the filling)
Substitution tips: If you need a dairy-free option, swap cream cheese for a plant-based cream cheese and use coconut cream instead of heavy cream. For a gluten-free crust, use gluten-free sandwich cookies instead of Oreos.
Ingredient notes: Look for firm cream cheese without additives for the creamiest results. I always chill my heavy cream beforehand—it whips up faster and holds better. Also, crushing Oreos by hand with a rolling pin gives a nicer texture than processed crumbs sometimes, but both work.
Equipment Needed
- 9-inch (23 cm) springform pan (ideal for easy removal of the cheesecake)
- Mixing bowls (medium and large)
- Electric hand mixer or stand mixer (for whipping cream and smoothing cream cheese)
- Spatula (preferably silicone for scraping bowls clean)
- Food processor or plastic bag and rolling pin (to crush Oreos)
- Measuring cups and spoons
If you don’t have a springform pan, a regular cake pan lined with parchment paper works too, though removing the cheesecake will be a bit trickier. I once tried making this in a glass pie dish—turned out fine, but the edges weren’t as neat.
For an electric mixer, a stand mixer makes things hands-free and faster, but a handheld mixer gets the job done just fine (I’ve used both depending on the day!). Keep your mixing equipment clean and chill your bowl for whipping cream to get fluffier results.
Preparation Method
- Prepare the crust: Combine the finely crushed Oreo cookies (about 2 cups) with melted butter and granulated sugar in a medium bowl. Mix until all crumbs are evenly coated and hold together when pressed.
- Press the crust: Transfer the mixture into the bottom of the 9-inch springform pan. Use the back of a spoon or a flat-bottomed glass to press the crust firmly and evenly. Chill in the fridge for 15 minutes to set while you prepare the filling.
- Make the cheesecake filling: In a large bowl, beat the softened cream cheese with an electric mixer on medium speed until smooth and creamy—about 2 to 3 minutes. Scrape down the sides as needed to avoid lumps.
- Add powdered sugar and vanilla: Gradually add sifted powdered sugar and vanilla extract to the cream cheese. Continue mixing until fully incorporated and silky smooth.
- Whip the heavy cream: In a separate chilled bowl, whip the cold heavy cream on high speed until stiff peaks form. This usually takes about 3 to 5 minutes. Be careful not to overwhip or it will turn grainy.
- Fold whipped cream into cream cheese mixture: Gently fold the whipped cream into the cream cheese mixture using a spatula. Do this carefully to keep the filling light and airy.
- Add chopped Oreos: Fold the roughly chopped Oreo pieces into the filling, distributing them evenly but without overmixing.
- Assemble the cheesecake: Spoon the filling over the chilled cookie crust in the springform pan. Spread evenly with a spatula, smoothing the top.
- Chill to set: Cover the cheesecake loosely with plastic wrap and refrigerate for at least 4 hours, preferably overnight. This resting time lets the flavors meld and the texture firm up.
- Serve: Before serving, run a knife along the edges of the pan to loosen the cheesecake, then release the springform side. Slice with a clean, sharp knife wiped between cuts for neat slices.
Tip: If you notice any cracks or unevenness on top, don’t worry—this cheesecake’s charm is in its creamy texture, not a perfect finish. Also, if the crust feels loose, chilling longer helps it set up better.
Cooking Tips & Techniques
Here are some tips I learned the hard way, so you won’t have to:
- Softening cream cheese: Take it out of the fridge at least 30 minutes before starting. If you’re short on time, microwave in 10-second bursts. Lumps in cream cheese are the biggest cheesecake bummer.
- Whipping cream: Chill your mixing bowl and beaters for a colder whip. This helps the cream reach stiff peaks faster and hold its shape better.
- Folding technique: Use a gentle folding motion rather than stirring to keep the filling fluffy. Overmixing deflates the air, making the cheesecake dense.
- Crust texture: Don’t pulverize Oreos into powder. You want some fine crumbs mixed with slightly larger bits for that satisfying crunch.
- Setting time: Resist the urge to slice too soon. The cheesecake needs time to firm up in the fridge, or it will be too soft and won’t hold shape.
- Multitasking: While the crust chills, prep your filling. Saves time and keeps the process smooth.
Once, I skipped chilling the crust and the filling didn’t set properly. Lesson learned: patience pays off here. Also, I like to use a serrated knife warmed under hot water to slice—makes cutting through the creamy crust less of a struggle.
Variations & Adaptations
If you want to switch things up or cater to specific needs, here are some ideas:
- Chocolate lovers’ twist: Add 1/4 cup (25g) unsweetened cocoa powder to the cream cheese for a chocolate-flavored filling. You can also drizzle melted chocolate on top before chilling.
- Fruit topping: Fresh berries or sliced strawberries on top add a refreshing contrast. A quick berry compote stirred with a little sugar works beautifully too.
- Nutty upgrade: Mix chopped toasted pecans or almonds into the crust for extra crunch and flavor depth.
- Dairy-free version: Use dairy-free cream cheese and coconut cream. The texture changes slightly but still creamy and delicious.
- Mini cheesecakes: Make this recipe in muffin tins with cupcake liners for individual servings—perfect for parties.
Personally, I once swapped Oreo cookies for chocolate chip cookies in the crust and filling—an unplanned experiment that my family surprisingly loved! It’s fun to try what you have on hand.
Serving & Storage Suggestions
This cheesecake is best served chilled but not straight from the fridge. Let it sit at room temperature for 10 to 15 minutes to soften slightly and bring out the creamy flavors.
For presentation, garnish with extra crushed Oreos or a dollop of whipped cream. Pair with a cup of coffee or a cold glass of milk for a classic combo.
Storage: Keep it covered in the refrigerator for up to 4 days. Make sure to wrap tightly with plastic wrap or store in an airtight container to prevent drying out.
You can freeze leftover slices wrapped in foil and placed in a freezer bag for up to 2 months. Thaw in the fridge overnight before serving.
Flavors tend to deepen after a day, so if you can wait, it’s even better the next day. The crust stays delightfully crunchy, and the filling becomes silkier with time.
Nutritional Information & Benefits
Estimated per serving (based on 12 servings):
| Calories | 320 kcal |
|---|---|
| Fat | 22g |
| Carbohydrates | 28g |
| Protein | 4g |
| Sugar | 21g |
This cheesecake packs indulgence but includes some nutritional value from the dairy. Cream cheese provides calcium and protein, while Oreos add a bit of fun crunch (and sugar). For those watching carbs or dairy, substitutions like almond flour crust or dairy-free cream cheese can help tailor the dessert.
Personally, I view this as a treat worth savoring mindfully—it’s not everyday food but perfect for celebrations or when you need a sweet pick-me-up without complicated steps or ingredients.
Conclusion
Easy No-Bake Oreo Cheesecake with Creamy Cookie Crust is a recipe I keep coming back to because it’s simple, satisfying, and downright delicious. Whether you’re a cheesecake pro or a total beginner, this one’s approachable and forgiving.
Feel free to make it your own—add berries, nuts, or even a swirl of caramel if you like. I love how flexible it is, letting you impress without the stress and still enjoy that homemade touch. Honestly, it’s a recipe that turns unexpected moments into memorable ones.
If you give this recipe a try, I’d love to hear how you personalized it or any tips you discovered. Don’t hesitate to share, comment, or ask questions—it’s always a joy to swap stories about good food. Here’s to many creamy, cookie-packed slices ahead!
FAQs
Can I use a different cookie instead of Oreos for the crust?
Absolutely! Chocolate chip cookies, graham crackers, or any sturdy cookie you like can work. Just crush them finely and mix with melted butter as usual.
Do I need to bake this cheesecake at all?
Nope! This is a no-bake recipe, which means all the magic happens in the fridge as the filling sets and the crust firms up.
How long should I chill the cheesecake before serving?
At least 4 hours, but overnight chilling is best for firm texture and flavor melding.
Can I make this cheesecake ahead of time for a party?
Yes, it’s perfect for making a day or two ahead. Just keep it covered in the fridge until ready to serve.
What’s the best way to slice no-bake cheesecake cleanly?
Use a sharp knife dipped in hot water and wiped dry before slicing. This helps cut through the creamy layers smoothly without sticking.
Pin This Recipe!
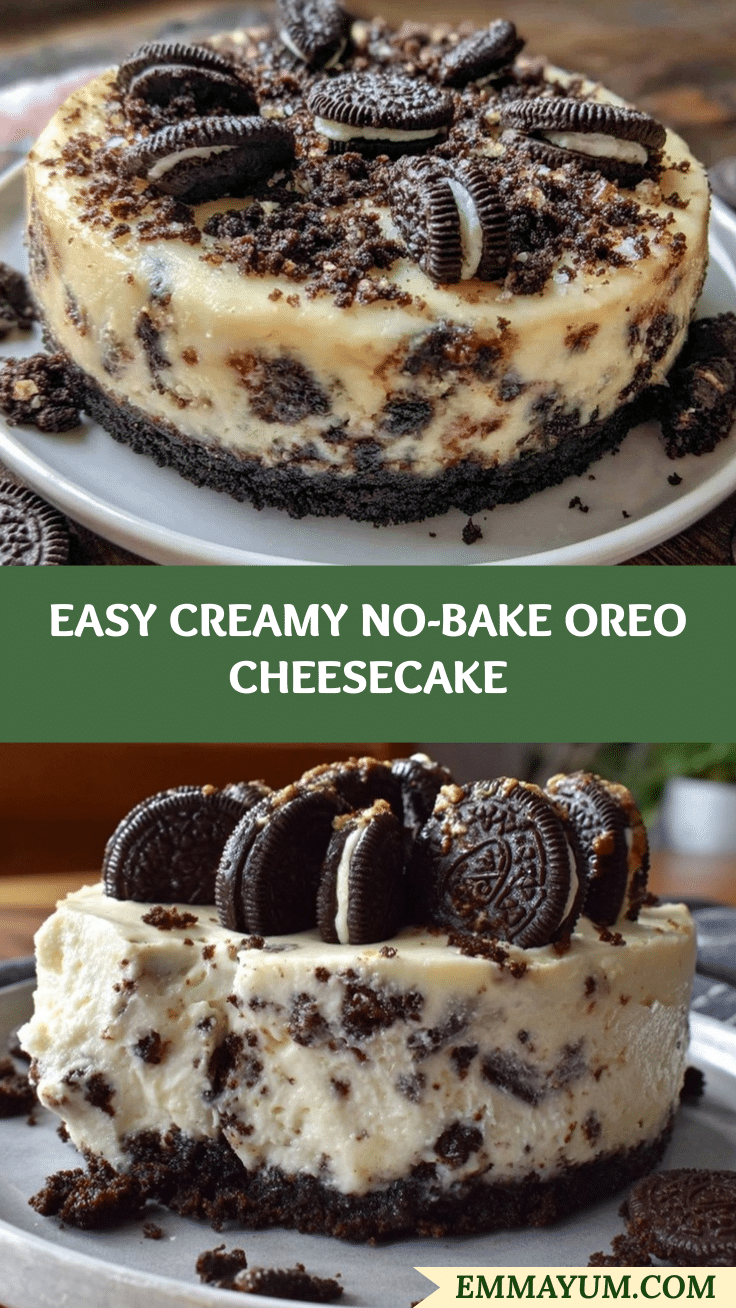
Easy No-Bake Oreo Cheesecake Recipe Perfect for Creamy Cookie Crust Lovers

A quick and easy no-bake Oreo cheesecake with a creamy cookie crust that is rich, indulgent, and perfect for any occasion. This recipe requires no oven and comes together in under 20 minutes.
- Prep Time: 15 minutes
- Cook Time: 0 minutes
- Total Time: 4 hours 15 minutes
- Yield: 12 servings 1x
- Category: Dessert
- Cuisine: American
Ingredients
- 24 Oreo cookies, finely crushed (about 2 cups)
- 6 tablespoons unsalted butter, melted
- 1 tablespoon granulated sugar (optional)
- 16 ounces (450g) cream cheese, softened
- 1 cup (240 ml) heavy whipping cream, chilled
- 3/4 cup (90g) powdered sugar, sifted
- 1 teaspoon vanilla extract
- 12 Oreo cookies, roughly chopped
Instructions
- Combine the finely crushed Oreo cookies with melted butter and granulated sugar in a medium bowl. Mix until all crumbs are evenly coated and hold together when pressed.
- Transfer the mixture into the bottom of the 9-inch springform pan. Press the crust firmly and evenly using the back of a spoon or flat-bottomed glass. Chill in the fridge for 15 minutes to set.
- In a large bowl, beat the softened cream cheese with an electric mixer on medium speed until smooth and creamy, about 2 to 3 minutes. Scrape down the sides as needed.
- Gradually add sifted powdered sugar and vanilla extract to the cream cheese. Continue mixing until fully incorporated and silky smooth.
- In a separate chilled bowl, whip the cold heavy cream on high speed until stiff peaks form, about 3 to 5 minutes. Be careful not to overwhip.
- Gently fold the whipped cream into the cream cheese mixture using a spatula to keep the filling light and airy.
- Fold the roughly chopped Oreo pieces into the filling, distributing evenly without overmixing.
- Spoon the filling over the chilled cookie crust in the springform pan. Spread evenly and smooth the top.
- Cover loosely with plastic wrap and refrigerate for at least 4 hours, preferably overnight, to let the cheesecake set.
- Before serving, run a knife along the edges of the pan to loosen the cheesecake, then release the springform side. Slice with a clean, sharp knife wiped between cuts.
Notes
Soften cream cheese at room temperature or microwave in short bursts to avoid lumps. Chill mixing bowl and beaters for whipping cream to achieve stiff peaks faster. Use gentle folding to keep filling airy. Do not pulverize Oreos into powder; keep some texture for crunch. Chill cheesecake at least 4 hours or overnight for best results. Use a serrated knife warmed under hot water for clean slicing.
Nutrition
- Serving Size: 1 slice (1/12th of c
- Calories: 320
- Sugar: 21
- Fat: 22
- Carbohydrates: 28
- Protein: 4
Keywords: no-bake cheesecake, Oreo cheesecake, easy dessert, creamy cookie crust, no oven dessert, quick cheesecake, crowd-pleaser dessert