Let me tell you, the scent of crushed Oreo cookies mingling with velvety cream is enough to make anyone’s mouth water before they even take a bite. The first time I made these Creamy Oreo Dirt Cups, I was instantly hooked—honestly, it was the kind of moment where you pause, take a deep breath, and just smile because you know you’re onto something truly special. Years ago, when I was knee-high to a grasshopper, my grandma used to whip up the simplest but most decadent treats, and this recipe feels like pure, nostalgic comfort wrapped in a modern, no-bake twist.
You know what’s funny? My family couldn’t stop sneaking these dirt cups off the cooling rack (and I can’t really blame them). It’s dangerously easy to keep popping spoons in for “just one more bite.” Perfect for summer afternoons when you want a sweet treat without firing up the oven, these cups have become a staple for family gatherings and last-minute potlucks. Honestly, if you’re looking to brighten up your Pinterest cookie board or surprise the kids with something fun and creamy, this recipe is a keeper. I tested it multiple times in the name of research, of course, and it never disappoints.
Why You’ll Love This Recipe
This Creamy Oreo Dirt Cups recipe isn’t just any no-bake dessert—it’s a crowd-pleaser that hits all the right notes with minimal effort. Here’s why it’s so special:
- Quick & Easy: Comes together in under 15 minutes, perfect for busy summer days or last-minute dessert emergencies.
- Simple Ingredients: No fancy grocery trips needed; you likely have everything in your pantry or fridge already.
- Perfect for Summer Gatherings: Whether it’s a picnic, potluck, or backyard BBQ, these cups impress without the stress.
- Crowd-Pleaser: Always gets rave reviews from kids and adults alike—there’s just something magical about creamy layers and Oreo crunch.
- Unbelievably Delicious: The combo of silky cream, sweet pudding, and cookie crumbles creates a texture that’s next-level indulgent.
What sets this recipe apart? It’s all about the smooth, creamy pudding mixed with softened cream cheese, which gives it that luscious, rich texture. Plus, the Oreo crumbs aren’t just for show—they add a satisfying crunch that keeps you coming back for more. This recipe isn’t just good; it’s the kind that makes you close your eyes after the first bite and smile. It’s comfort food reimagined—no oven, no fuss, just sweet, creamy happiness served in a cup.
What Ingredients You Will Need
This recipe uses simple, wholesome ingredients to deliver bold flavor and satisfying texture without the fuss. Most are pantry staples, and you can easily swap a few if needed.
- Oreo Cookies (about 20-24 cookies, finely crushed) – For that classic dirt effect and crunch. I prefer using the original Oreo brand for the perfect balance of chocolate and cream.
- Instant Chocolate Pudding Mix (1 package, 3.9 oz / 110 g) – Adds rich, chocolatey flavor and creaminess.
- Milk (2 cups / 480 ml) – Whole milk is best for a richer taste, but 2% works fine too.
- Cream Cheese (8 oz / 225 g, softened) – Gives the pudding a silky, tangy depth.
- Whipped Topping (1 cup / 240 ml, thawed) – Use store-bought or homemade for that light, fluffy texture.
- Sugar (1/4 cup / 50 g) – Just enough to sweeten the cream cheese mixture.
- Vanilla Extract (1 tsp / 5 ml) – For a hint of warmth and complexity.
Optional: For a fun twist, toss in some gummy worms on top for that classic dirt cup look. Also, if you need a dairy-free version, swap cream cheese for a plant-based alternative and use coconut milk for pudding.
Equipment Needed
- Mixing Bowls – At least two: one for crushing Oreos, another for the pudding mixture.
- Electric Mixer – Handheld or stand mixer to whip cream cheese and sugar smoothly.
- Measuring Cups and Spoons – Precision matters for pudding consistency.
- Spatula – For folding whipped topping gently.
- Serving Cups or Small Mason Jars – Clear cups work great to show off layers.
- Food Processor or Plastic Bag and Rolling Pin – To crush Oreos finely; a plastic bag and rolling pin work just fine if you don’t have a processor.
If you’re on a budget, no worries—just use what you have. A regular whisk can substitute an electric mixer if you don’t mind a bit of arm work.
Preparation Method
- Crush the Oreos: Place the Oreo cookies in a food processor and pulse until fine crumbs form (about 1 minute). If you don’t have a processor, put the cookies in a sealed plastic bag and crush with a rolling pin until you get an even crumb texture. Set aside about one cup of crumbs for topping. (Time: 5 minutes)
- Make the pudding: In a medium bowl, whisk together the instant chocolate pudding mix and milk until thickened, about 2 minutes. Set aside to chill slightly. (Time: 5 minutes)
- Prepare the cream cheese mixture: In a large mixing bowl, beat the softened cream cheese, sugar, and vanilla extract using an electric mixer until smooth and creamy, about 3 minutes. (Tip: Make sure cream cheese is fully softened to avoid lumps.)
- Combine whipped topping: Gently fold the whipped topping into the cream cheese mixture until well blended but still light and fluffy. Be careful not to overmix or you’ll lose that airy texture. (Time: 2 minutes)
- Mix pudding and cream cheese layers: Carefully fold the prepared pudding into the cream cheese and whipped topping mixture until combined, keeping it light and creamy. (Time: 2 minutes)
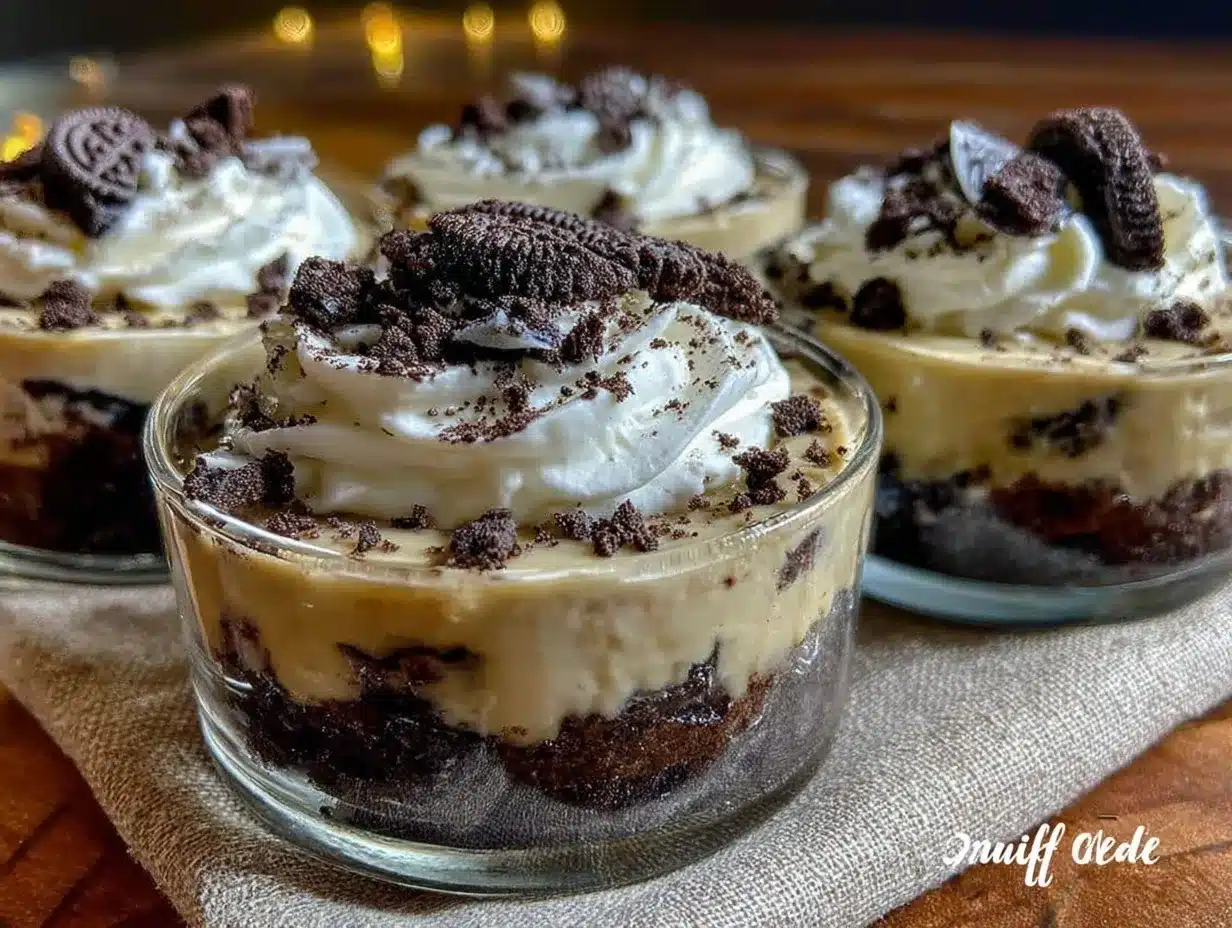
- Assemble the dirt cups: In your serving cups, start with a layer of crushed Oreos (about 2 tablespoons), spoon a generous layer of the creamy pudding mixture on top (about 1/4 cup), then repeat layers until cups are full, finishing with a sprinkle of the reserved Oreo crumbs. (Time: 5 minutes)
- Chill: Refrigerate the assembled dirt cups for at least 2 hours to let the flavors meld and the dessert set up nicely. (Overnight is even better!)
- Serve: Just before serving, garnish with gummy worms or extra cookie crumbs if desired. Enjoy chilled for maximum creaminess.
Pro tip: If your pudding mixture feels too thick, stir in a tablespoon of milk to loosen it before layering. And if Oreos seem too chunky, pulse a few more seconds in the processor to prevent a rough texture.
Cooking Tips & Techniques
Honestly, no-bake desserts like these Oreo Dirt Cups are all about balance and gentle handling. Here are some tips I’ve picked up over the years:
- Softened cream cheese is key. If it’s too cold, you’ll end up with lumps that are just frustrating. Let it sit out for at least 30 minutes before mixing.
- Don’t overmix the whipped topping. Fold it in gently to keep that fluffy texture. Overmixing will deflate it and make the dessert dense.
- Crush the Oreos finely. If your crumbs are too chunky, it can throw off the texture, making it less smooth and creamy.
- Layer evenly for the best presentation. Clear cups show off the beautiful layers and make the dessert look irresistible.
- Chilling time matters. The pudding mixture firms up and flavors meld after a couple of hours in the fridge — don’t skip this step!
I’ve learned the hard way that rushing the chilling step results in a runny mess, so plan ahead. Also, multitask by crushing Oreos while pudding sets—that way, you save time and stay organized.
Variations & Adaptations
This recipe is wonderfully adaptable to fit your taste and dietary needs. Here are some ideas I’ve tried and loved:
- Peanut Butter Twist: Swap half the cream cheese with creamy peanut butter for a rich, nutty flavor. Top with chopped peanuts for crunch.
- Mint Oreo Cups: Use mint-flavored Oreos and add a few drops of peppermint extract to the cream cheese mixture for a refreshing change.
- Gluten-Free Version: Use gluten-free chocolate sandwich cookies instead of Oreos. Make sure your pudding mix is gluten-free too.
- Fruit Add-In: Toss in fresh raspberries or sliced strawberries between layers for a pop of color and tang.
- Dairy-Free: Substitute cream cheese with a vegan alternative and use coconut milk for pudding. The texture changes slightly but still delicious!
One personal favorite I stumbled upon was adding a swirl of caramel sauce between layers—dangerously good and perfect for caramel lovers.
Serving & Storage Suggestions
Serve these Creamy Oreo Dirt Cups chilled for the best experience. They’re perfect as individual dessert cups for parties or as a sweet treat after a casual dinner. Presentation-wise, I like clear glass jars or short tumblers so those gorgeous layers shine through.
Pair them with a cold glass of milk, iced coffee, or even a scoop of vanilla ice cream for an extra indulgent combo. They’re also a hit at summer BBQs where you want a no-fuss, crowd-pleasing dessert.
To store, cover the cups tightly with plastic wrap or lids and refrigerate for up to 3 days. If you want to prepare ahead for a party, assemble them a day early—the flavors meld beautifully overnight. Avoid freezing, as the texture suffers when thawed.
For reheating (if you dare!), just let them sit at room temperature for 15 minutes. But honestly, these are best enjoyed cold and creamy—the texture is part of their charm.
Nutritional Information & Benefits
Each serving of these dirt cups contains approximately 300-350 calories, with a good balance of fat and protein from the cream cheese and whipped topping. While they are a treat, the recipe uses real dairy and no artificial flavors, which I appreciate.
The Oreo cookies add sugar and carbs, so moderation is key if you’re watching intake. For a lighter version, consider using sugar-free pudding mix and reduced-fat cream cheese.
From a wellness perspective, this dessert hits the sweet spot for summer fun without complicated ingredients or preservatives. Plus, sharing it with family and friends brings joy that’s just as important as nutrition!
Conclusion
These Creamy Oreo Dirt Cups are truly worth trying if you want a no-bake dessert that’s easy, delicious, and guaranteed to impress. They’re fuss-free but feel special—perfect for customizing to your taste and occasion. Honestly, I keep this recipe in my back pocket for any time I need a quick, crowd-pleasing treat that feels like a warm hug in a cup.
Give it a whirl, tweak it your way, and don’t forget to share how yours turn out—I’d love to hear your twists and tips! You’re going to want to bookmark this one for all those summer get-togethers and beyond.
FAQs About Creamy Oreo Dirt Cups
Can I make these dirt cups ahead of time?
Absolutely! They’re even better if chilled overnight. Just cover and refrigerate until ready to serve.
What can I use instead of Oreo cookies?
Any chocolate sandwich cookie works, or try graham crackers for a different flavor and texture.
Is it okay to use homemade whipped cream instead of store-bought topping?
Yes! Whip heavy cream with a little sugar and vanilla until soft peaks form for a fresh, fluffy topping.
How do I keep the layers from mixing together?
Be gentle when layering and use a spoon or piping bag for neat layers. Chilling between layers helps too.
Can kids help make this dessert?
Definitely! Crushing Oreos and layering cups are fun tasks for little hands, making it a great family activity.
Pin This Recipe!
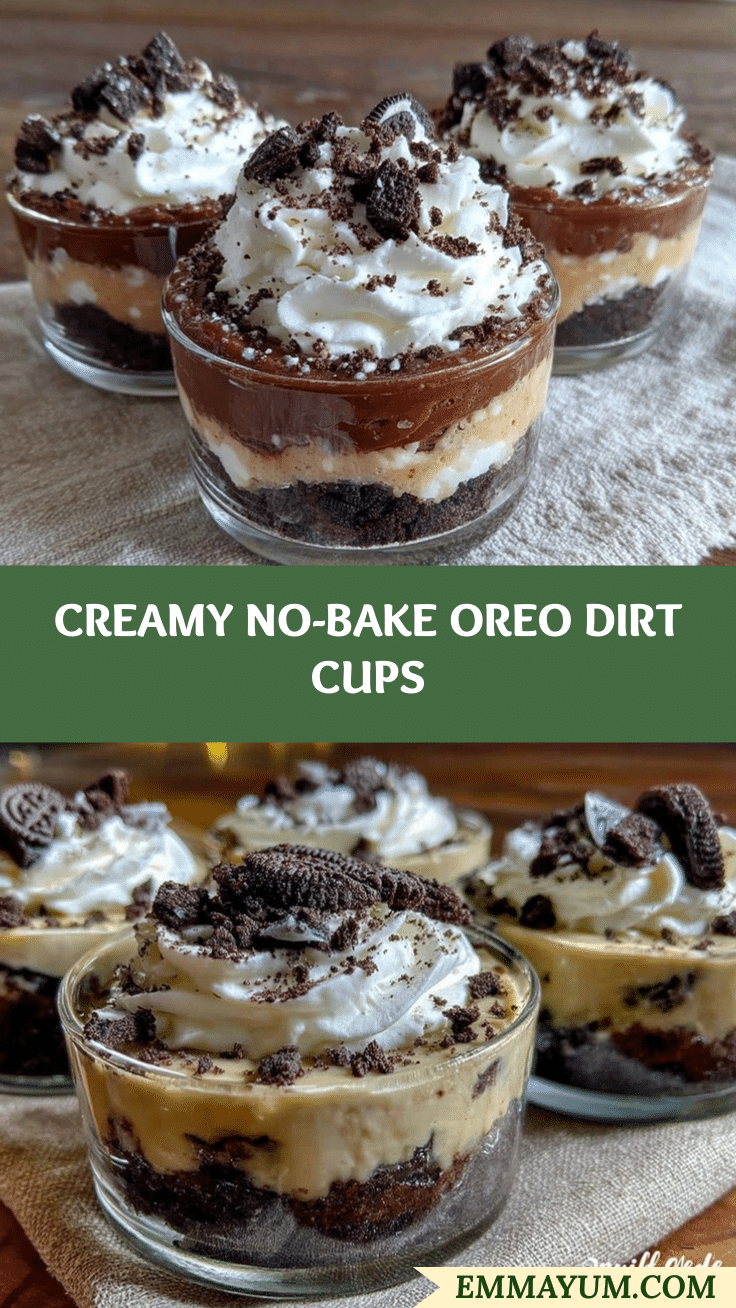
Creamy Oreo Dirt Cups

A quick and easy no-bake dessert featuring layers of creamy chocolate pudding, whipped cream cheese mixture, and crushed Oreo cookies. Perfect for summer gatherings and family treats.
- Prep Time: 15 minutes
- Cook Time: 0 minutes
- Total Time: 2 hours 15 minutes
- Yield: 6 servings 1x
- Category: Dessert
- Cuisine: American
Ingredients
- 20–24 Oreo Cookies, finely crushed
- 1 package (3.9 oz / 110 g) Instant Chocolate Pudding Mix
- 2 cups (480 ml) Milk (whole or 2%)
- 8 oz (225 g) Cream Cheese, softened
- 1 cup (240 ml) Whipped Topping, thawed
- 1/4 cup (50 g) Sugar
- 1 tsp (5 ml) Vanilla Extract
- Optional: Gummy worms for garnish
Instructions
- Crush the Oreos using a food processor or place in a sealed plastic bag and crush with a rolling pin until fine crumbs form. Set aside about one cup of crumbs for topping.
- In a medium bowl, whisk together the instant chocolate pudding mix and milk until thickened, about 2 minutes. Set aside to chill slightly.
- In a large mixing bowl, beat the softened cream cheese, sugar, and vanilla extract using an electric mixer until smooth and creamy, about 3 minutes.
- Gently fold the whipped topping into the cream cheese mixture until well blended but still light and fluffy.
- Carefully fold the prepared pudding into the cream cheese and whipped topping mixture until combined, keeping it light and creamy.
- In serving cups, layer crushed Oreos (about 2 tablespoons), then spoon a generous layer of the creamy pudding mixture (about 1/4 cup). Repeat layers until cups are full, finishing with a sprinkle of reserved Oreo crumbs.
- Refrigerate the assembled dirt cups for at least 2 hours to let flavors meld and dessert set up nicely (overnight is better).
- Just before serving, garnish with gummy worms or extra cookie crumbs if desired. Serve chilled.
Notes
Make sure cream cheese is fully softened to avoid lumps. Fold whipped topping gently to keep it fluffy. Chill for at least 2 hours or overnight for best texture. If pudding mixture is too thick, stir in a tablespoon of milk to loosen. Crush Oreos finely for best texture. Optional gummy worms add a fun touch.
Nutrition
- Serving Size: 1 cup
- Calories: 325
- Sugar: 28
- Sodium: 210
- Fat: 18
- Saturated Fat: 9
- Carbohydrates: 38
- Fiber: 1
- Protein: 5
Keywords: Oreo, dirt cups, no-bake dessert, chocolate pudding, creamy dessert, summer dessert, easy dessert, family treat