Let me tell you, the scent of sweet cherries mingling with warm butter from the oven is enough to make anyone’s mouth water. The first time I baked these easy chewy cherry pie bars with buttery shortbread crust, I was instantly hooked—the kind of moment where you pause, take a deep breath, and just smile because you know you’re onto something truly special. It took me back to summers when I was knee-high to a grasshopper, watching my grandma pull her famous cherry pie from the oven, the flaky crust crackling gently as it cooled. Years ago, I stumbled on the idea of turning that classic pie into bars during a rainy weekend baking session, hoping to recreate that nostalgic comfort in a quicker, less fussy form.
Honestly, my family couldn’t stop sneaking them off the cooling rack (and I can’t really blame them). You know what makes these cherry pie bars dangerously easy? The buttery shortbread crust that’s crisp but tender, paired with a chewy cherry filling that’s bursting with just the right balance of sweet and tart. Let’s face it, these bars are perfect for potlucks, a sweet treat for your kids’ lunchboxes, or brightening up your Pinterest cookie board with something that looks as good as it tastes. The best part? I’ve tested this recipe more times than I can count (in the name of research, of course), and it’s become a staple for family gatherings and gifting alike. If you’re after a dessert that feels like a warm hug, you’re going to want to bookmark this one.
Why You’ll Love This Recipe
Having whipped up these cherry pie bars countless times, I can say with confidence they’re a winner for so many reasons. Here’s why you’re going to adore this easy chewy cherry pie bars recipe with buttery shortbread crust:
- Quick & Easy: Comes together in under 45 minutes, perfect for squeezing into a busy day or last-minute dessert needs.
- Simple Ingredients: No fancy grocery runs needed—you probably already have everything in your pantry and fridge.
- Perfect for Any Occasion: Whether it’s brunch, potlucks, or cozy family dinners, these bars fit right in and steal the show.
- Crowd-Pleaser: Kids and adults alike rave about the chewy texture and buttery crust combo.
- Unbelievably Delicious: The texture and flavor are next-level comfort food, with that buttery shortbread crunch contrasting the juicy cherry filling.
What makes this recipe stand out? It’s the perfectly balanced shortbread crust that’s not too crumbly and not too dense—thanks to a touch of cornstarch and just the right amount of butter. Plus, the cherry filling isn’t overly sweet; it’s got that fresh-picked cherry brightness with a chewy consistency that’s totally addictive. This isn’t just another cherry bar recipe; it’s my best version perfected through trial, error, and plenty of taste tests. Honestly, the first bite will have you closing your eyes and savoring the moment. It’s comfort food reimagined—simple, fast, but still packed with soul-soothing satisfaction. Whether you’re impressing guests without stress or just treating yourself, these bars have got you covered.
What Ingredients You Will Need
This recipe uses simple, wholesome ingredients to deliver bold flavor and satisfying texture without the fuss. Most of these are pantry staples, with a few fresh additions to keep things lively.
- For the Buttery Shortbread Crust:
- 1 cup (227g) unsalted butter, softened (I recommend Kerrygold for best richness)
- 2/3 cup (135g) granulated sugar
- 2 cups (250g) all-purpose flour
- 1 tbsp cornstarch (adds tenderness and less crumbly texture)
- 1/4 tsp salt
- For the Cherry Pie Filling:
- 3 cups (450g) pitted fresh or frozen tart cherries (if frozen, thaw and drain excess liquid)
- 3/4 cup (150g) granulated sugar
- 2 tbsp cornstarch (helps thicken the filling)
- 1 tbsp lemon juice (brightens flavor)
- 1 tsp vanilla extract
- 1/4 tsp almond extract (optional, but adds a lovely depth)
- For the Topping:
- 1/2 cup (65g) all-purpose flour
- 1/3 cup (67g) packed light brown sugar
- 1/4 cup (57g) unsalted butter, melted
If you want to switch things up, you can use almond flour instead of all-purpose for a gluten-free option, but the texture will be a bit different (a little denser). For dairy-free baking, swap butter with coconut oil or a vegan butter substitute. In summer, fresh cherries are unbeatable, but frozen works great year-round. I always pick cherries that are firm and bright for that perfect balance of tartness and sweetness.
Equipment Needed
- 9×13-inch (23×33 cm) baking pan – a standard size that works perfectly for these bars
- Mixing bowls – one large for the crust and topping, one medium for the filling
- Electric mixer or sturdy wooden spoon – for creaming butter and sugar
- Measuring cups and spoons – for precise ingredient amounts
- Spatula – helpful for spreading the crust and filling evenly
- Cooling rack – to cool the bars completely before slicing
If you don’t have a 9×13 pan, a slightly smaller 8×8 or 9×9 pan can work, but the bars will be thicker and bake a bit longer. I’ve tried silicone baking pans too, and they release the bars nicely but watch the baking time since heat distribution differs. For budget-friendly options, a metal baking pan from any major brand will do the trick and last forever with good care. Just make sure to grease or line the pan well to avoid sticking.
Preparation Method
- Preheat your oven to 350°F (175°C). Lightly grease your 9×13-inch baking pan or line it with parchment paper, leaving an overhang for easy bar removal.
- Make the shortbread crust: In a large bowl, cream 1 cup softened unsalted butter and 2/3 cup granulated sugar using an electric mixer on medium speed until pale and fluffy, about 2-3 minutes. Don’t rush this step—proper creaming gives the crust that tender crumb.
- Mix dry ingredients: In a separate bowl, whisk together 2 cups all-purpose flour, 1 tablespoon cornstarch, and 1/4 teaspoon salt. Gradually add the flour mixture to the butter mixture, mixing on low speed until just combined. The dough should feel soft but not sticky.
- Press the crust: Transfer the dough to your prepared baking pan. Use your fingers or the bottom of a glass to evenly press the dough into the pan, forming a smooth, even layer. Aim for about 1/4 to 1/3 inch thickness. The crust will bake partially before the filling goes on.
- Bake the crust: Bake in the preheated oven for 15 minutes, or until the edges start to turn golden. This pre-baking step prevents soggy bars later on. Remove from oven and set aside while you prepare the filling.
- Prepare the cherry filling: In a medium bowl, toss 3 cups pitted cherries with 3/4 cup granulated sugar, 2 tablespoons cornstarch, 1 tablespoon lemon juice, 1 teaspoon vanilla extract, and 1/4 teaspoon almond extract if using. Make sure cherries are evenly coated; the cornstarch will thicken the juices during baking.
- Spread the filling: Pour the cherry mixture evenly over the warm crust, spreading gently with a spatula.
- Make the topping: In a small bowl, stir together 1/2 cup all-purpose flour and 1/3 cup packed light brown sugar. Pour in 1/4 cup melted butter and mix until crumbly but moist.
- Sprinkle the topping: Distribute the crumbly topping evenly over the cherry filling. Don’t press down—let those crumbs stay nice and loose for that classic shortbread crumble texture.
- Bake again: Return the pan to the oven and bake for 30-35 minutes, or until the topping is golden brown and cherries are bubbly. Keep an eye during the last 10 minutes to avoid over-browning.
- Cool completely: Remove from oven and transfer to a cooling rack. Let the bars cool fully (at least 2 hours) to allow the filling to set properly before slicing. This patience makes slicing cleaner and the bars chewier.
- Slice and serve: Use a sharp knife to cut into generous squares or rectangles. Serve as is, or with a scoop of vanilla ice cream for an extra treat.
If your crust edges bake too quickly, tent the pan with foil halfway through baking to prevent burning. Also, if you notice the cherry filling is too runny before baking, add a little more cornstarch next time—cherry ripeness varies and affects liquid amount.
Cooking Tips & Techniques
Here’s some hard-earned wisdom from my many attempts at perfecting these cherry pie bars. First, creaming the butter and sugar well is key to that tender, buttery shortbread crust. Don’t skimp on this step—take your time until the mixture is light and fluffy. Also, pressing the crust evenly into the pan helps the bars bake uniformly without any thin spots that burn.
For the cherry filling, I learned that using a mix of lemon juice and cornstarch really brings out the fruit’s brightness and keeps the filling from getting too watery. When mixing the filling, toss the cherries gently so you don’t mash them but make sure every cherry is well coated.
Timing is crucial. Prebaking the crust prevents a soggy bottom, while baking the assembled bars until bubbly ensures the filling is cooked through. Keep an eye on the topping during the last few minutes—once it’s golden and crisp, you’re good to go.
One common mistake is slicing the bars too soon. Trust me, waiting for them to cool completely makes slicing easier and keeps the bars from falling apart. If you’re in a rush, pop the bars in the fridge for 30 minutes to help firm up the filling.
Lastly, multitasking helps—prepare the filling while the crust bakes, then the topping during the filling spread. Saves time and keeps your kitchen flow smooth. These tips will get you consistent, crowd-pleasing cherry pie bars every time.
Variations & Adaptations
Want to mix things up? Here are some tasty twists you can try with this easy chewy cherry pie bars recipe:
- Seasonal Fruit Swap: Use fresh blueberries, raspberries, or blackberries instead of cherries for a berry burst. Adjust sugar slightly depending on fruit sweetness.
- Gluten-Free Version: Substitute the all-purpose flour in the crust and topping with a 1:1 gluten-free baking flour blend. Expect a slightly different texture but still delicious.
- Vegan Adaptation: Replace butter with vegan butter or coconut oil, and swap sugar for organic cane sugar to ensure no bone char processing. Use a flax “egg” or skip eggs entirely as this recipe doesn’t call for eggs.
- Crunchy Nut Topping: Add 1/2 cup chopped toasted pecans or almonds to the crumb topping for extra texture and a nutty flavor bonus.
- Spiced Cherry Bars: Stir in 1/2 tsp ground cinnamon and a pinch of nutmeg into the cherry filling for cozy warmth, especially nice in cooler months.
Personally, I love adding a handful of chopped pecans to the topping for that satisfying crunch contrast. It’s a small change but makes a big impact on texture and flavor!
Serving & Storage Suggestions
These cherry pie bars are best served at room temperature or slightly chilled. If you want to treat yourself, add a scoop of vanilla bean ice cream or a dollop of whipped cream—pure bliss! They also pair beautifully with a cup of strong coffee or a light herbal tea.
To store, cover the bars tightly with plastic wrap or place in an airtight container. They keep well at room temperature for up to two days, but honestly, they rarely last that long. For longer storage, refrigerate for up to a week; the cherry flavor intensifies as they chill. You can even freeze the bars in a single layer on a baking sheet, then transfer to a freezer-safe container for up to 3 months. Thaw overnight in the fridge and warm slightly before serving.
Reheating in a low oven (300°F/150°C) for 10 minutes refreshes the buttery crust and softens the filling nicely without making the bars soggy. Just avoid microwaving straight from frozen—the crust can get rubbery.
Nutritional Information & Benefits
One cherry pie bar (about 2×2 inches) contains roughly 220 calories, with 12 grams of fat, 28 grams of carbohydrates, and 2 grams of protein. The cherries provide antioxidants and vitamins C and A, while the butter offers a source of healthy fats. This dessert isn’t low-calorie, but it’s a satisfying treat made with real ingredients you can feel good about on occasion.
If you’re mindful of gluten or dairy, the recipe adapts well as mentioned earlier. Cherries are also naturally gluten-free and packed with anti-inflammatory compounds. From a wellness perspective, I appreciate that this recipe balances indulgence with wholesome fruit and simple ingredients—no weird additives or preservatives.
Conclusion
In short, these easy chewy cherry pie bars with buttery shortbread crust are a must-try if you want a homemade dessert that’s both nostalgic and fuss-free. You can customize them to suit your dietary needs or personal preferences, making them a versatile addition to your baking repertoire. I love this recipe because it brings back memories of simpler times while still feeling fresh and approachable. Plus, the family-approved taste is a huge win.
Give this recipe a go, and don’t be shy about sharing your variations or questions in the comments. I’d love to hear how you make these cherry pie bars your own. Happy baking—you’re about to make some seriously happy taste buds!
FAQs
Can I use canned cherries instead of fresh or frozen?
You can, but canned cherries tend to be softer and more liquidy, which can make the filling runnier. If you use canned, drain them well and reduce added sugar since canned cherries are often sweetened.
How do I prevent the crust from getting soggy?
Pre-baking the crust for 15 minutes before adding the filling helps a lot. Also, letting the bars cool completely before slicing allows the filling to set properly, preventing sogginess.
Can I make these bars ahead of time?
Absolutely! They store well in an airtight container for up to a week in the fridge and freeze beautifully for up to 3 months. Just thaw and warm slightly before serving.
What if I don’t have cornstarch?
You can substitute with arrowroot powder or tapioca starch in equal amounts. They’ll thicken the filling similarly.
How do I get a chewier texture in the cherry filling?
Make sure to use enough cornstarch and avoid over-mixing the filling. Also, letting the bars cool completely helps the filling firm up for that chewy, luscious bite.
Pin This Recipe!
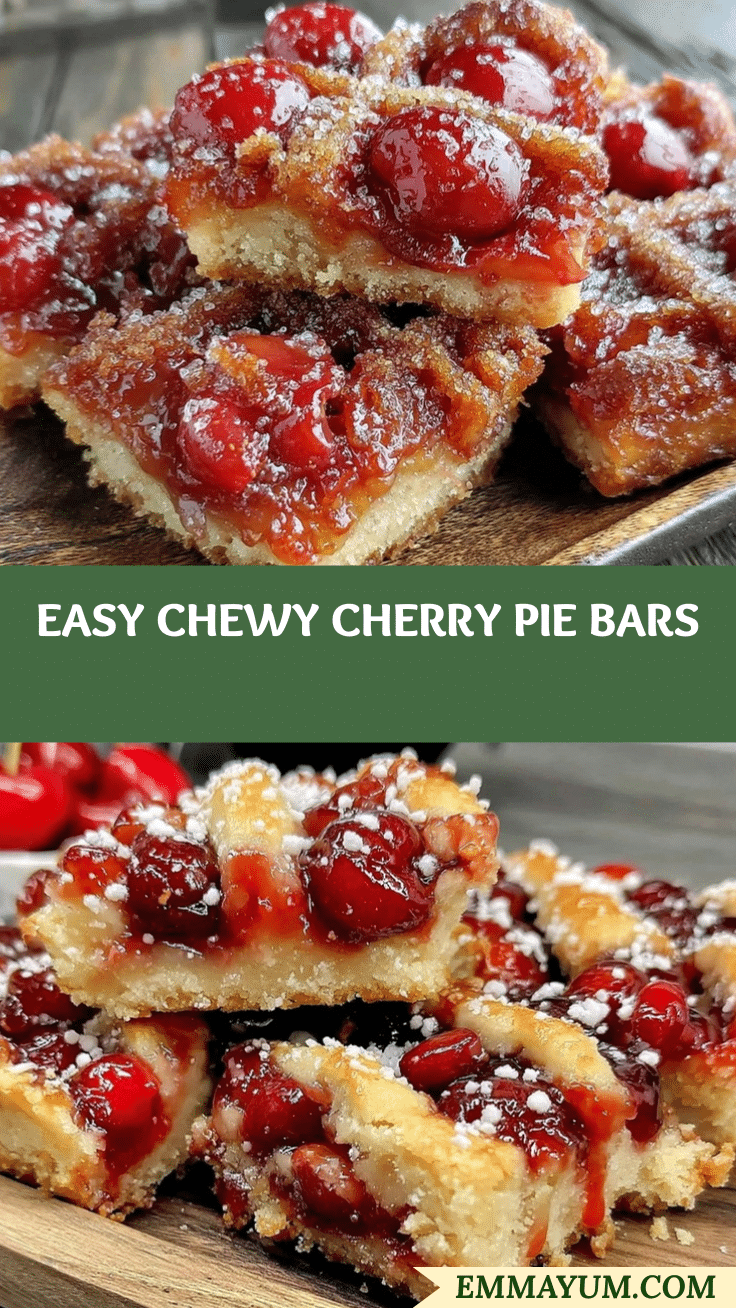
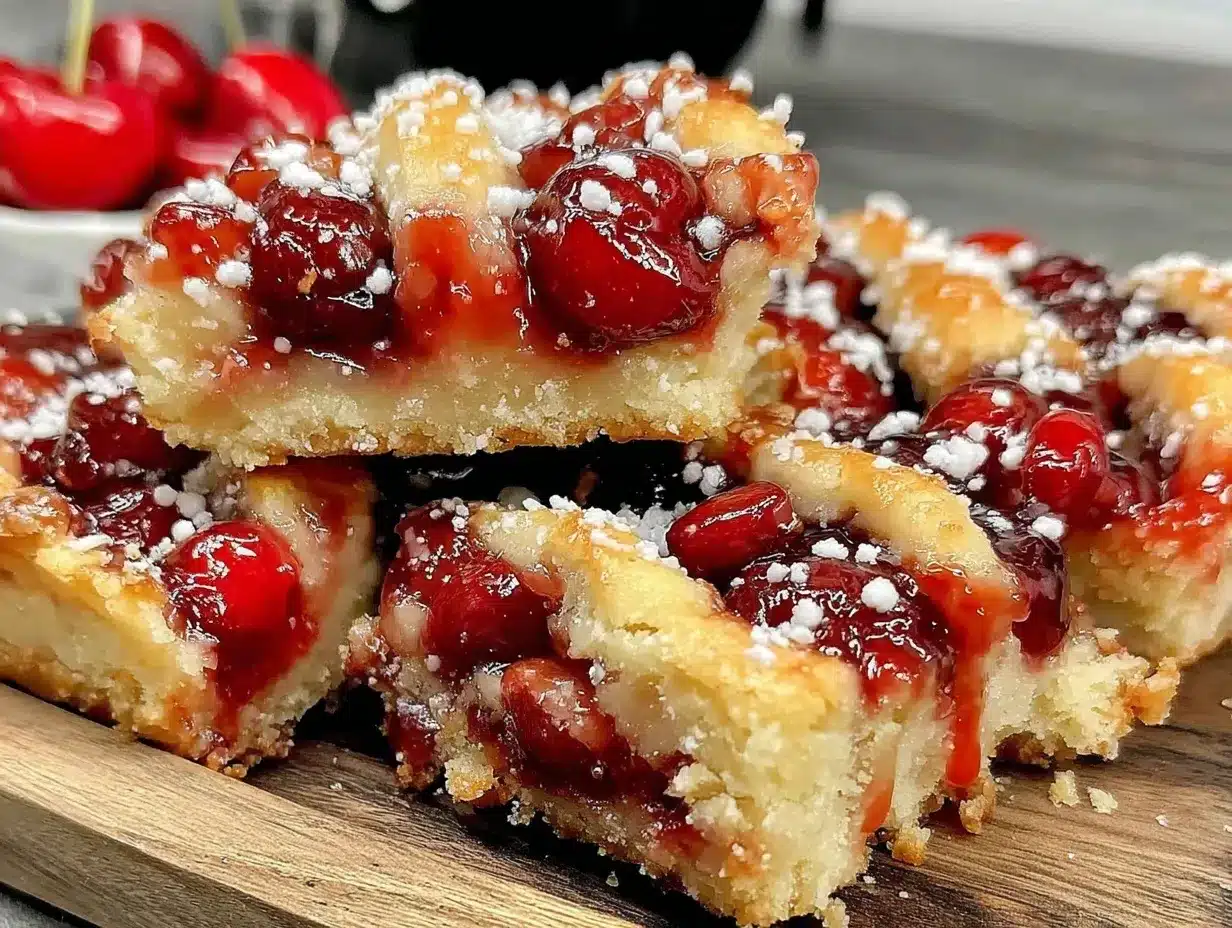
Easy Chewy Cherry Pie Bars Recipe with Buttery Shortbread Crust
These cherry pie bars feature a buttery shortbread crust paired with a chewy cherry filling, perfect for a quick and nostalgic dessert that pleases both kids and adults.
- Prep Time: 15 minutes
- Cook Time: 45 minutes
- Total Time: 1 hour
- Yield: 12 servings 1x
- Category: Dessert
- Cuisine: American
Ingredients
- 1 cup (227g) unsalted butter, softened
- 2/3 cup (135g) granulated sugar
- 2 cups (250g) all-purpose flour
- 1 tbsp cornstarch
- 1/4 tsp salt
- 3 cups (450g) pitted fresh or frozen tart cherries
- 3/4 cup (150g) granulated sugar
- 2 tbsp cornstarch
- 1 tbsp lemon juice
- 1 tsp vanilla extract
- 1/4 tsp almond extract (optional)
- 1/2 cup (65g) all-purpose flour
- 1/3 cup (67g) packed light brown sugar
- 1/4 cup (57g) unsalted butter, melted
Instructions
- Preheat oven to 350°F (175°C). Lightly grease a 9×13-inch baking pan or line with parchment paper with an overhang.
- In a large bowl, cream 1 cup softened unsalted butter and 2/3 cup granulated sugar with an electric mixer on medium speed until pale and fluffy, about 2-3 minutes.
- In a separate bowl, whisk together 2 cups all-purpose flour, 1 tablespoon cornstarch, and 1/4 teaspoon salt. Gradually add to butter mixture and mix on low speed until just combined.
- Press dough evenly into the prepared pan to about 1/4 to 1/3 inch thickness.
- Bake crust for 15 minutes or until edges start to turn golden. Remove and set aside.
- In a medium bowl, toss 3 cups pitted cherries with 3/4 cup granulated sugar, 2 tablespoons cornstarch, 1 tablespoon lemon juice, 1 teaspoon vanilla extract, and 1/4 teaspoon almond extract if using.
- Spread cherry filling evenly over the warm crust.
- In a small bowl, stir together 1/2 cup all-purpose flour and 1/3 cup packed light brown sugar. Pour in 1/4 cup melted butter and mix until crumbly but moist.
- Sprinkle the crumbly topping evenly over the cherry filling without pressing down.
- Bake for 30-35 minutes until topping is golden brown and cherries are bubbly. Watch closely in the last 10 minutes to avoid over-browning.
- Remove from oven and cool completely on a cooling rack for at least 2 hours to allow filling to set.
- Slice into squares or rectangles and serve as is or with vanilla ice cream.
Notes
Pre-baking the crust prevents sogginess. Let bars cool completely before slicing for cleaner cuts and chewier texture. Tent with foil if crust edges brown too quickly. Use arrowroot or tapioca starch if cornstarch is unavailable. For gluten-free, substitute all-purpose flour with gluten-free baking flour blend. For dairy-free, replace butter with coconut oil or vegan butter.
Nutrition
- Serving Size: 1 bar (approx. 2x2 i
- Calories: 220
- Fat: 12
- Carbohydrates: 28
- Protein: 2
Keywords: cherry pie bars, cherry dessert, shortbread crust, chewy cherry bars, easy cherry bars, homemade dessert, potluck dessert